
Table of Contents
Google Cloud Platform provides a cloud computing services that run the Spring Boot application in the cloud environment. In this chapter, we are going to see how to deploy the Spring Boot application in GCP app engine platform.
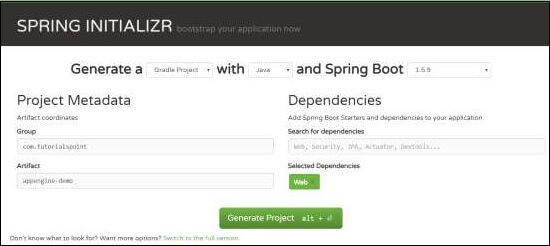
First, download the Gradle build Spring Boot application from Spring Initializer page www.start.spring.io. Observe the following screenshot.
Now, in build.gradle file, add the Google Cloud appengine plugin and appengine classpath dependency.
The code for build.gradle file is given below −
buildscript {
   ext {
      springBootVersion = '1.5.9.RELEASE'
   }
   repositories {
      mavenCentral()
   }
   dependencies {
      classpath("org.springframework.boot:spring-boot-gradle-plugin:${springBootVersion}")
      classpath 'com.google.cloud.tools:appengine-gradle-plugin:1.3.3'
   }
}

apply plugin: 'java'
apply plugin: 'eclipse'
apply plugin: 'org.springframework.boot'
apply plugin: 'com.google.cloud.tools.appengine'

group = 'com.maixuanviet'
version = '0.0.1-SNAPSHOT'
sourceCompatibility = 1.8

repositories {
   mavenCentral()
}
dependencies {
   compile('org.springframework.boot:spring-boot-starter-web')
   testCompile('org.springframework.boot:spring-boot-starter-test')
}
Now, write a simple HTTP Endpoint and it returns the String success as shown −
package com.maixuanviet.appenginedemo;

import org.springframework.boot.SpringApplication;
import org.springframework.boot.autoconfigure.SpringBootApplication;
import org.springframework.web.bind.annotation.RequestMapping;
import org.springframework.web.bind.annotation.RestController;

@SpringBootApplication
@RestController
public class AppengineDemoApplication {
   public static void main(String[] args) {
      SpringApplication.run(AppengineDemoApplication.class, args);
   }
   @RequestMapping(value = "/")
   public String success() {
      return "APP Engine deployment success";
   }
}
Next, add the app.yml file under src/main/appengine directory as shown −
runtime: java
env: flex

handlers:
- url: /.*
   script: this field is required, but ignored
Now, go to the Google Cloud console and click the Activate Google cloud shell at the top of the page.

Now, move your source files and Gradle file into home directory of your google cloud machine by using google cloud shell.

Now, execute the command gradle appengineDeploy and it will deploy your application into the Google Cloud appengine.
Note − GCP should be billing enabled and before deploying your application into appengine, you should create appengine platform in GCP.
It will take few minutes to deploy your application into GCP appengine platform.
After build successful you can see the Service URL in console window.
Now, hit the service URL and see the output.

Google Cloud SQL
To connect the Google Cloud SQL into your Spring Boot application, you should add the following properties into your application.properties file.
JDBC URL Format
jdbc:mysql://google/<DATABASE-NAME>?cloudSqlInstance = <GOOGLE_CLOUD_SQL_INSTANCE_NAME> &socketFactory = com.google.cloud.sql.mysql.SocketFactory&user = <USERNAME>&password = <PASSWORD>
Note − The Spring Boot application and Google Cloud SQL should be in same GCP project.
The application.properties file is given below.
spring.dbProductService.driverClassName = com.mysql.jdbc.Driver
spring.dbProductService.url = jdbc:mysql://google/PRODUCTSERVICE?cloudSqlInstance = springboot-gcp-cloudsql:asia-northeast1:springboot-gcp-cloudsql-instance&socketFactory = com.google.cloud.sql.mysql.SocketFactory&user = root&password = rootspring.dbProductService.username = root

spring.dbProductService.password = root
spring.dbProductService.testOnBorrow = true
spring.dbProductService.testWhileIdle = true
spring.dbProductService.timeBetweenEvictionRunsMillis = 60000
spring.dbProductService.minEvictableIdleTimeMillis = 30000
spring.dbProductService.validationQuery = SELECT 1
spring.dbProductService.max-active = 15
spring.dbProductService.max-idle = 10
spring.dbProductService.max-wait = 8000
YAML file users can add the below properties to your application.yml file.
spring:
   datasource:
      driverClassName: com.mysql.jdbc.Driver
      url: "jdbc:mysql://google/PRODUCTSERVICE?cloudSqlInstance=springboot-gcp-cloudsql:asia-northeast1:springboot-gcp-cloudsql-instance&socketFactory=com.google.cloud.sql.mysql.SocketFactory&user=root&password=root"
      password: "root"
      username: "root"
      testOnBorrow: true
      testWhileIdle: true
      validationQuery: SELECT 1

      max-active: 15
      max-idle: 10
      max-wait: 8000