By using Spring Boot RESTful web service, you can send an email with Gmail Transport Layer Security. In this chapter, let us understand in detail how to use this feature.
First, we need to add the Spring Boot Starter Mail dependency in your build configuration file.
Maven users can add the following dependency into the pom.xml file.
<dependency>
   <groupId>org.springframework.boot</groupId>
   <artifactId>spring-boot-starter-mail</artifactId>
</dependency>
Gradle users can add the following dependency in your build.gradle file.
compile('org.springframework.boot:spring-boot-starter-mail')
The code of main Spring Boot application class file is given below −
package com.maixuanviet.emailapp;

import org.springframework.boot.SpringApplication;
import org.springframework.boot.autoconfigure.SpringBootApplication;

@SpringBootApplication
public class EmailappApplication {
   public static void main(String[] args) {
      SpringApplication.run(EmailappApplication.class, args);
   }
}
You can write a simple Rest API to send to email in Rest Controller class file as shown.
package com.maixuanviet.emailapp;
import org.springframework.web.bind.annotation.RequestMapping;
import org.springframework.web.bind.annotation.RestController;
@RestController
public class EmailController {
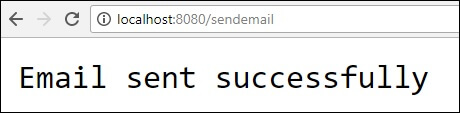
@RequestMapping(value = "/sendemail")
public String sendEmail() {
return "Email sent successfully";
}
}
You can write a method to send the email with Attachment. Define the mail.smtp properties and used PasswordAuthentication.
private void sendmail() throws AddressException, MessagingException, IOException {
Properties props = new Properties();
props.put("mail.smtp.auth", "true");
props.put("mail.smtp.starttls.enable", "true");
props.put("mail.smtp.host", "smtp.gmail.com");
props.put("mail.smtp.port", "587");
Session session = Session.getInstance(props, new javax.mail.Authenticator() {
protected PasswordAuthentication getPasswordAuthentication() {
return new PasswordAuthentication("maixuanviet@gmail.com", "<your password>");
}
});
Message msg = new MimeMessage(session);
msg.setFrom(new InternetAddress("maixuanviet@gmail.com", false));
msg.setRecipients(Message.RecipientType.TO, InternetAddress.parse("maixuanviet@gmail.com"));
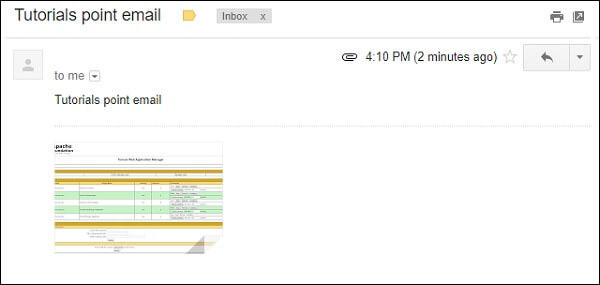
msg.setSubject("Tutorials point email");
msg.setContent("Tutorials point email", "text/html");
msg.setSentDate(new Date());
MimeBodyPart messageBodyPart = new MimeBodyPart();
messageBodyPart.setContent("Tutorials point email", "text/html");
Multipart multipart = new MimeMultipart();
multipart.addBodyPart(messageBodyPart);
MimeBodyPart attachPart = new MimeBodyPart();
attachPart.attachFile("/var/tmp/image19.png");
multipart.addBodyPart(attachPart);
msg.setContent(multipart);
Transport.send(msg);
}
Now, call the above sendmail() method from the Rest API as shown −
@RequestMapping(value = "/sendemail")
public String sendEmail() throws AddressException, MessagingException, IOException {
   sendmail();
   return "Email sent successfully";
}
Note − Please switch ON allow less secure apps in your Gmail account settings before sending an email.
The complete build configuration file is given below.
Maven – pom.xml
<?xml version = "1.0" encoding = "UTF-8"?>
<project xmlns = "http://maven.apache.org/POM/4.0.0"
   xmlns:xsi = "http://www.w3.org/2001/XMLSchema-instance"
   xsi:schemaLocation = "http://maven.apache.org/POM/4.0.0
   http://maven.apache.org/xsd/maven-4.0.0.xsd">

   <modelVersion>4.0.0</modelVersion>
   <groupId>com.maixuanviet</groupId>
   <artifactId>emailapp</artifactId>
   <version>0.0.1-SNAPSHOT</version>
   <packaging>jar</packaging>
   <name>emailapp</name>
   <description>Demo project for Spring Boot</description>

   <parent>
      <groupId>org.springframework.boot</groupId>
      <artifactId>spring-boot-starter-parent</artifactId>
      <version>1.5.9.RELEASE</version>
      <relativePath/> <!-- lookup parent from repository -->
   </parent>

   <properties>
      <project.build.sourceEncoding>UTF-8</project.build.sourceEncoding>
      <project.reporting.outputEncoding>UTF-8</project.reporting.outputEncoding>
   <java.version>1.8</java.version>
   </properties>

   <dependencies>
      <dependency>
         <groupId>org.springframework.boot</groupId>
         <artifactId>spring-boot-starter-web</artifactId>
      </dependency>

      <dependency>
         <groupId>org.springframework.boot</groupId>
         <artifactId>spring-boot-starter-mail</artifactId>
      </dependency>

      <dependency>
         <groupId>org.springframework.boot</groupId>
         <artifactId>spring-boot-starter</artifactId>
      </dependency>

      <dependency>
         <groupId>org.springframework.boot</groupId>
         <artifactId>spring-boot-starter-test</artifactId>
         <scope>test</scope>
      </dependency>
   </dependencies>

   <build>
      <plugins>
         <plugin>
            <groupId>org.springframework.boot</groupId>
            <artifactId>spring-boot-maven-plugin</artifactId>
         </plugin>
      </plugins>
   </build>

</project>
Gradle – build.gradle
buildscript {
   ext {
      springBootVersion = '1.5.9.RELEASE'
   }
   repositories {
      mavenCentral()
   }
   dependencies {
      classpath("org.springframework.boot:spring-boot-gradle-plugin:${springBootVersion}")
   }
}

apply plugin: 'java'
apply plugin: 'eclipse'
apply plugin: 'org.springframework.boot'

group = 'com.maixuanviet'
version = '0.0.1-SNAPSHOT'
sourceCompatibility = 1.8

repositories {
   mavenCentral()
}
dependencies {
   compile('org.springframework.boot:spring-boot-starter-web')
   compile('org.springframework.boot:spring-boot-starter-mail')
   testCompile('org.springframework.boot:spring-boot-starter-test')
}
Now, you can create an executable JAR file, and run the Spring Boot application by using the Maven or Gradle commands shown below −
For Maven, you can use the command as shown −
mvn clean install
After “BUILD SUCCESS”, you can find the JAR file under the target directory.
For Gradle, you can use the command as shown −
gradle clean build
After “BUILD SUCCESSFUL”, you can find the JAR file under the build/libs directory.
Now, run the JAR file by using the command given below −
java –jar <JARFILE>
You can see that the application has started on the Tomcat port 8080.

Now hit the following URL from your web browser and you will receive an email.