
Table of Contents
1. Overview
In this tutorial, we’ll cover the basics of setting up a Keycloak server, connecting a Spring Boot application to it, and using it with Spring Security.
2. What Is Keycloak?
Keycloak is an open source Identity and Access Management solution targeted towards modern applications and services.
Keycloak offers features such as Single-Sign-On (SSO), Identity Brokering and Social Login, User Federation, Client Adapters, an Admin Console, and an Account Management Console. To learn more about Keycloak, please visit the official page.
In our tutorial, we’ll use the Admin Console of Keycloak for setting up and connecting to Spring Boot using the Keycloak Client Adapter.
3. Setting Up a Keycloak Server
There are several distributions to choose from; however, in this tutorial, we’ll be using the standalone version.
Let’s download the Keycloak-13.0.1 Standalone server distribution from the official source.
Once we’ve downloaded the Standalone server distribution, we can unzip and start Keycloak from the terminal:
unzip keycloak-13.0.1.zip
cd keycloak-13.0.1/bin
./standalone.sh -Djboss.socket.binding.port-offset=100
After running ./standalone.sh, Keycloak will be starting its services. Once we see a line containing Keycloak 13.0.1 (WildFly Core 15.0.1.Final) started, we’ll know its start-up is complete.
Now let’s open a browser and visit http://localhost:8180. We’ll be redirected to http://localhost:8180/auth to create an administrative login:
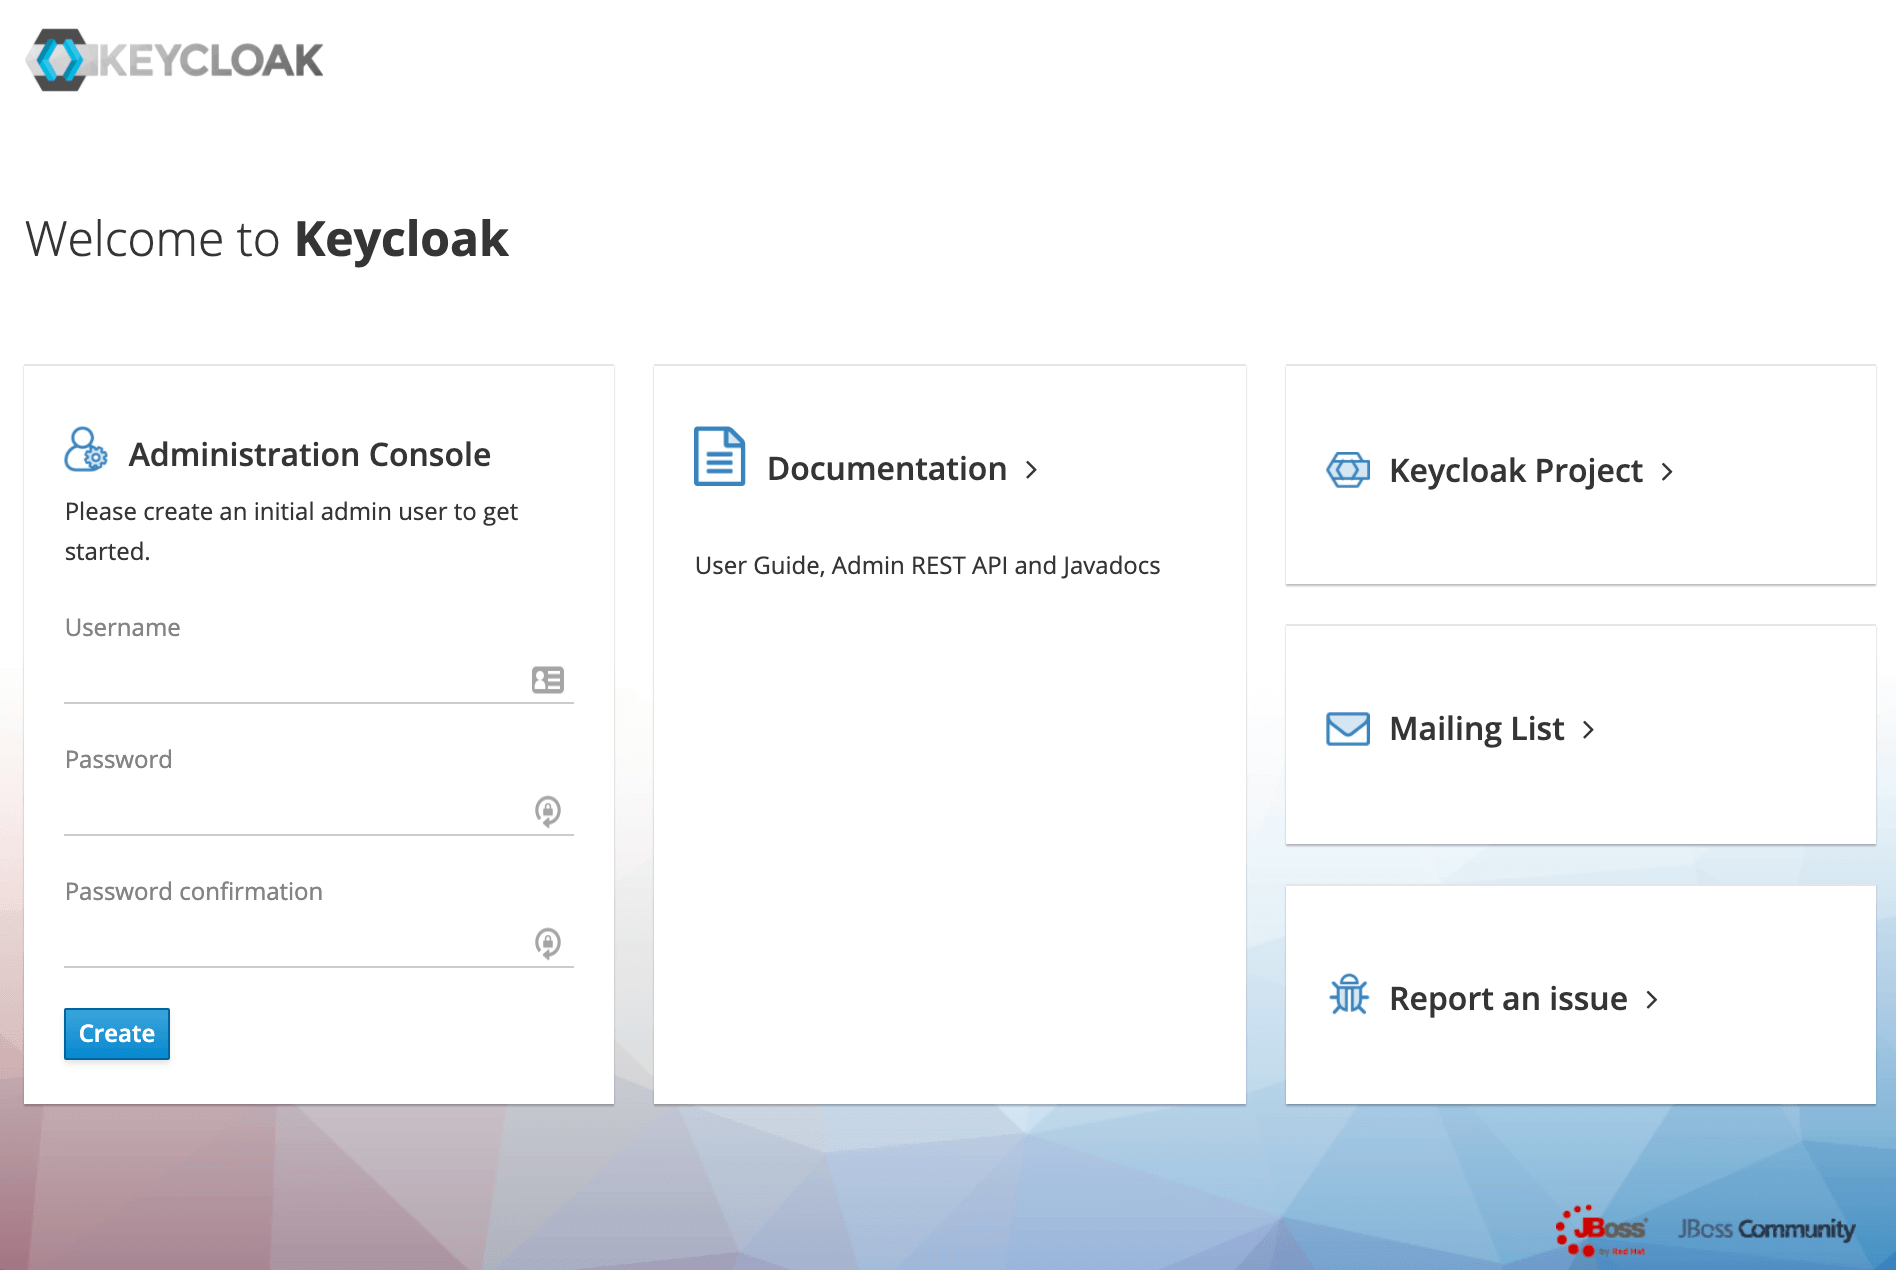
Let’s create an initial admin user named initial1 with the password zaq1!QAZ. Upon clicking Create, we’ll see the message User Created.
We can now proceed to the Administrative Console. On the login page, we’ll enter the initial admin user credentials:

3.2. Creating a Realm
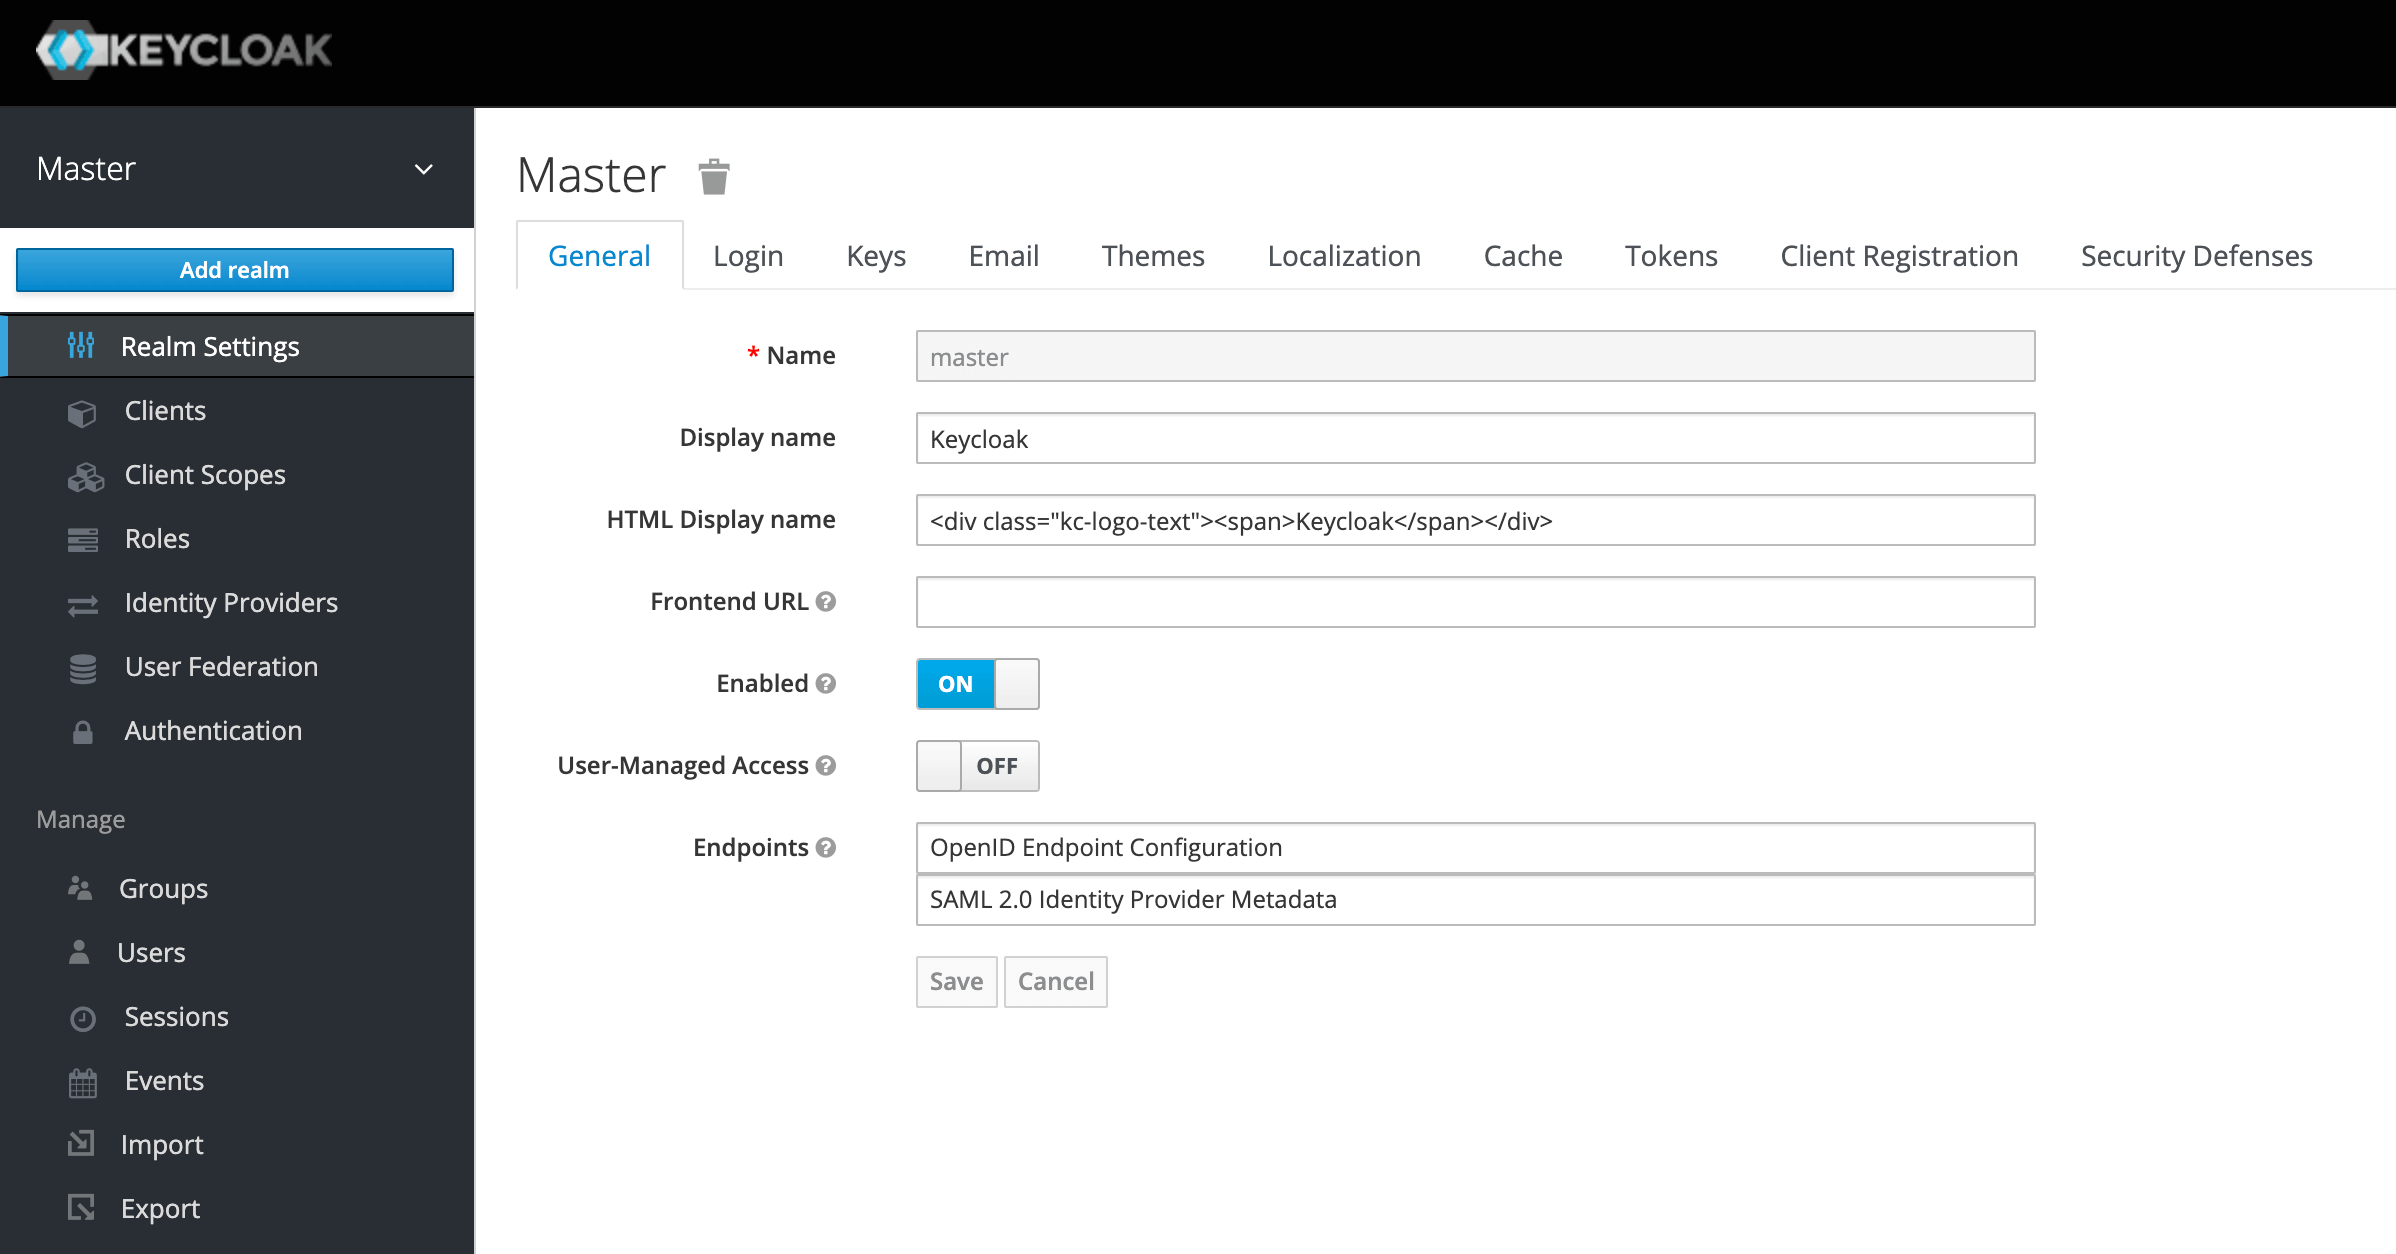
A successful login will take us to the console and open up the default Master realm for us.
Here we’ll focus on creating a custom realm.
Let’s navigate to the upper left corner to discover the Add realm button:
On the next screen, let’s add a new realm called SpringBootKeycloak:
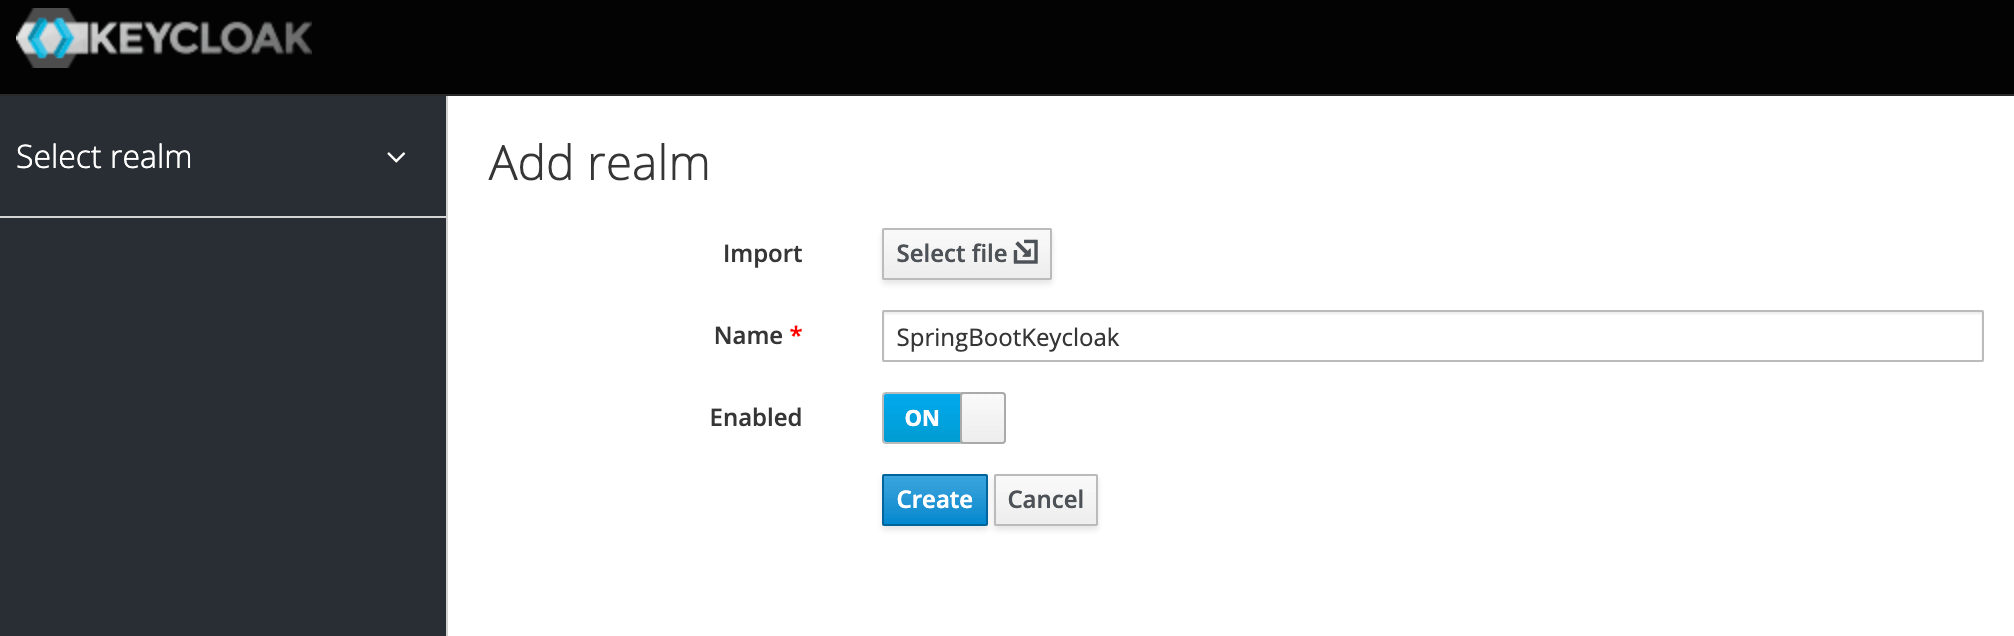
After clicking the Create button, a new realm will be created and we’ll be redirected to it. All the operations in the next sections will be performed in this new SpringBootKeycloak realm.
3.3. Creating a Client
Now we’ll navigate to the Clients page. As we can see in the image below, Keycloak comes with Clients that are already built-in:
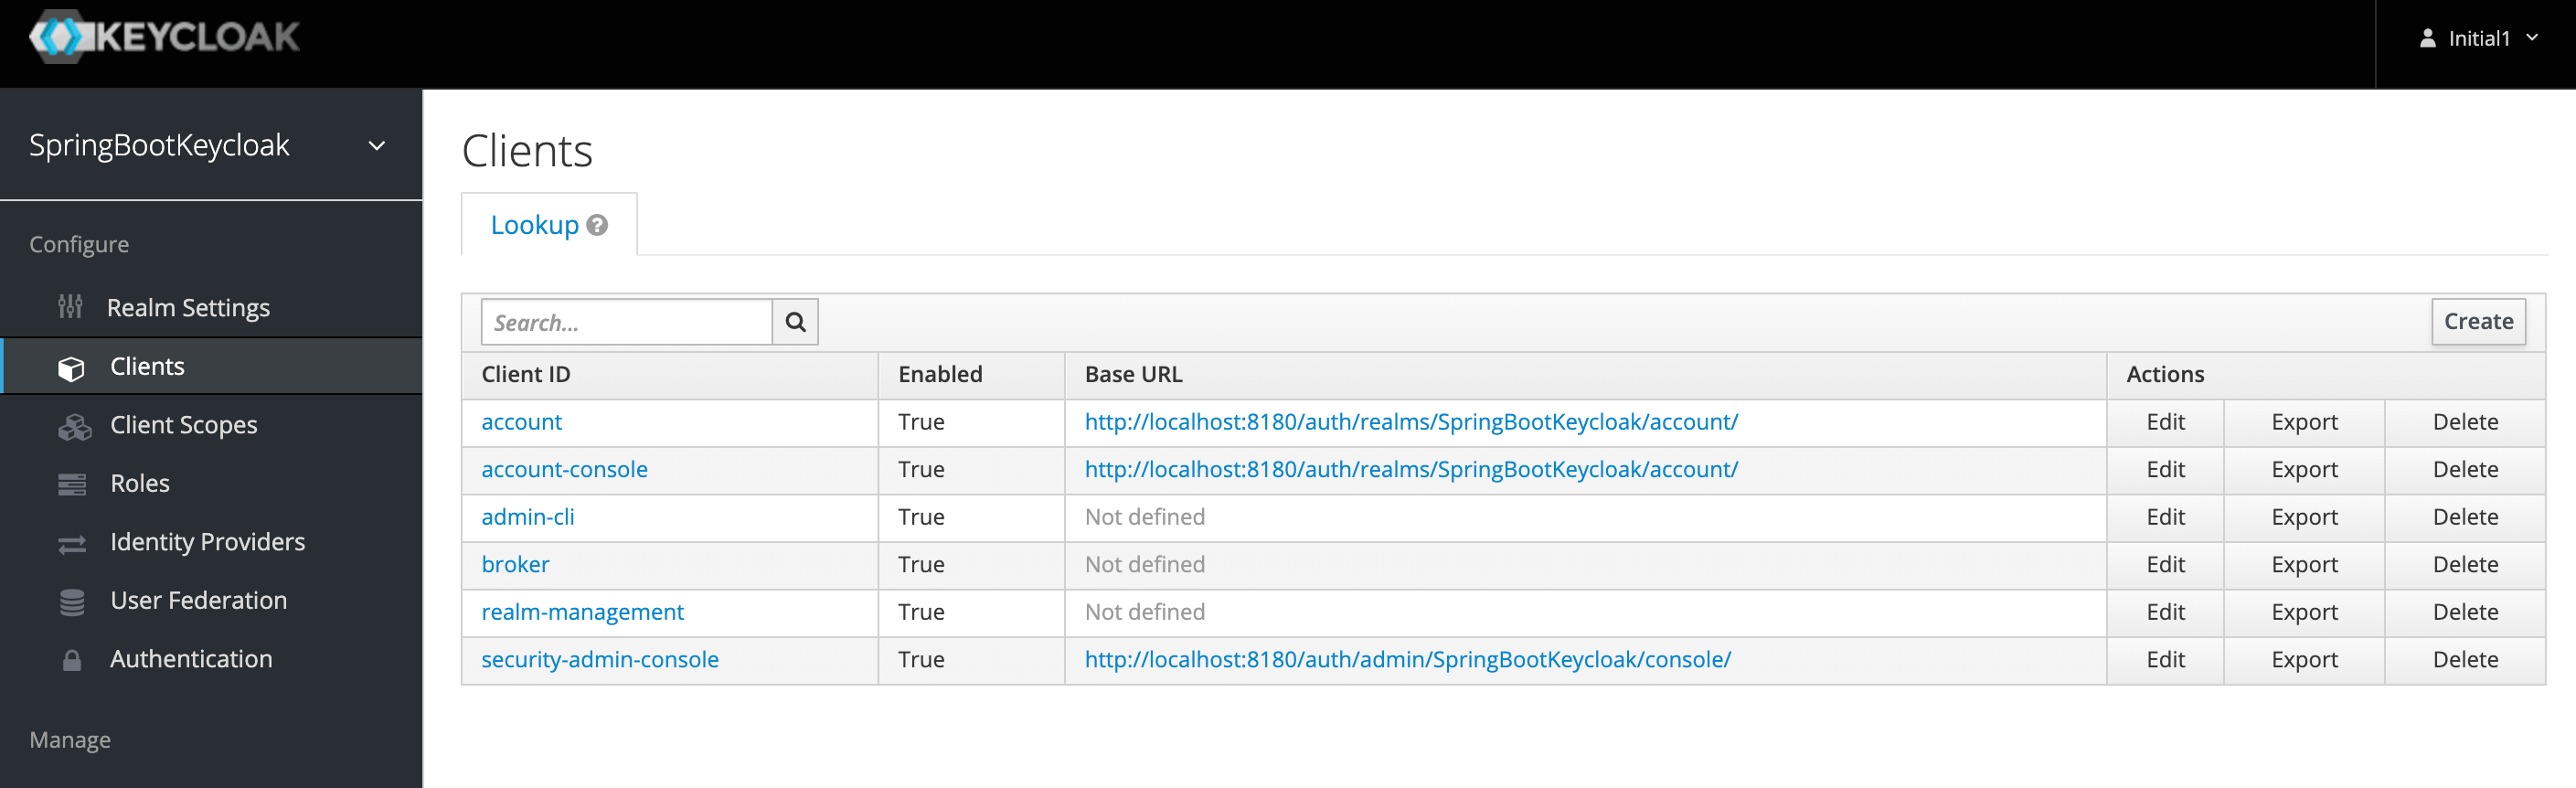
We still need to add a new client to our application, so we’ll click Create. We’ll call the new Client login-app:
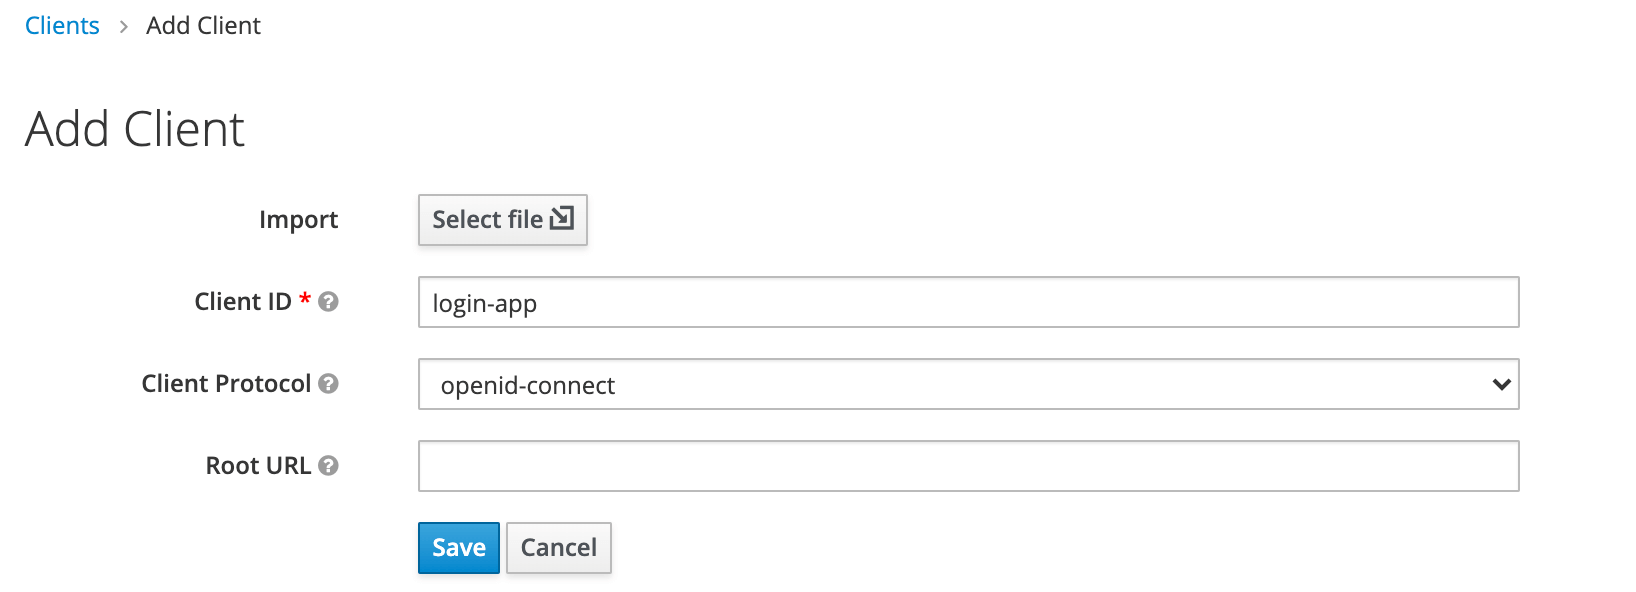
In the next screen, for the purpose of this tutorial, we’ll leave all the defaults except the Valid Redirect URIs field. This field should contain the application URL(s) that will use this client for authentication:
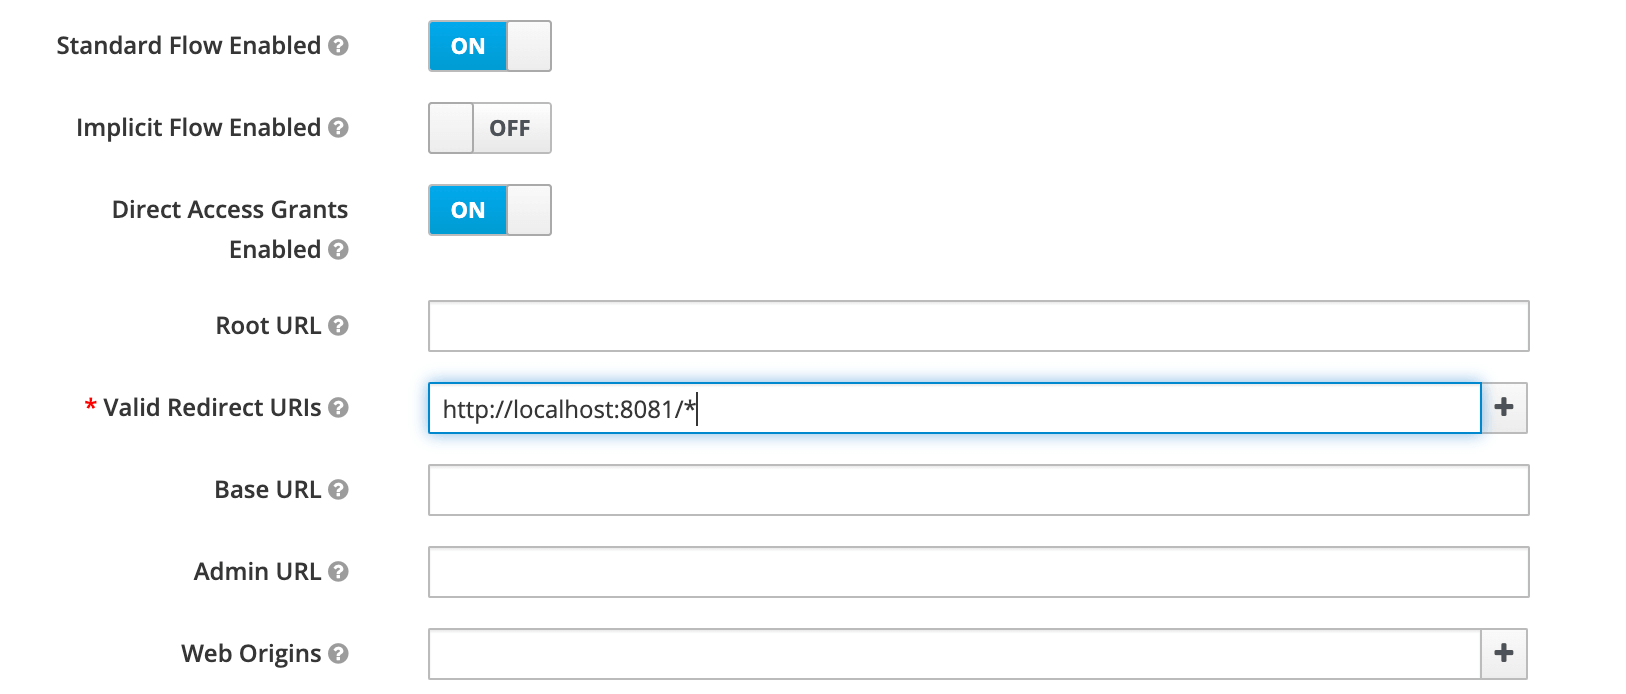
Later on, we’ll be creating a Spring Boot Application running at the port 8081 that’ll use this client. Hence we’ve used a redirect URL of http://localhost:8081/* above.
3.4. Creating a Role and a User
Keycloak uses Role-Based Access; therefore, each user must have a role.
To do that, we need to navigate to the Roles page:
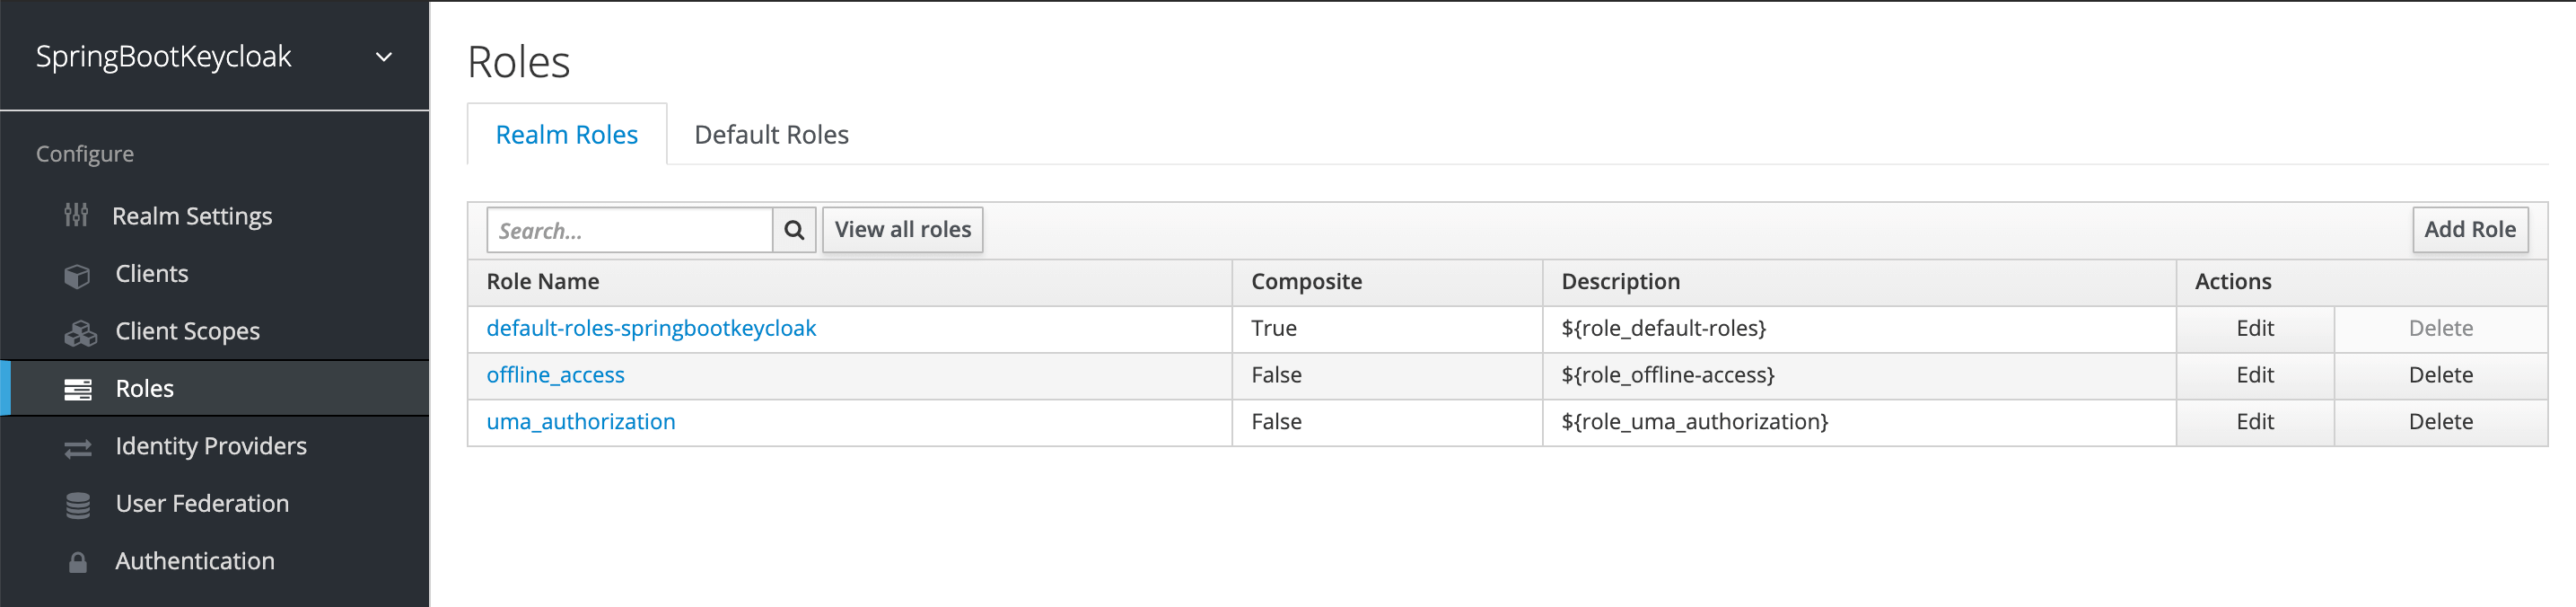
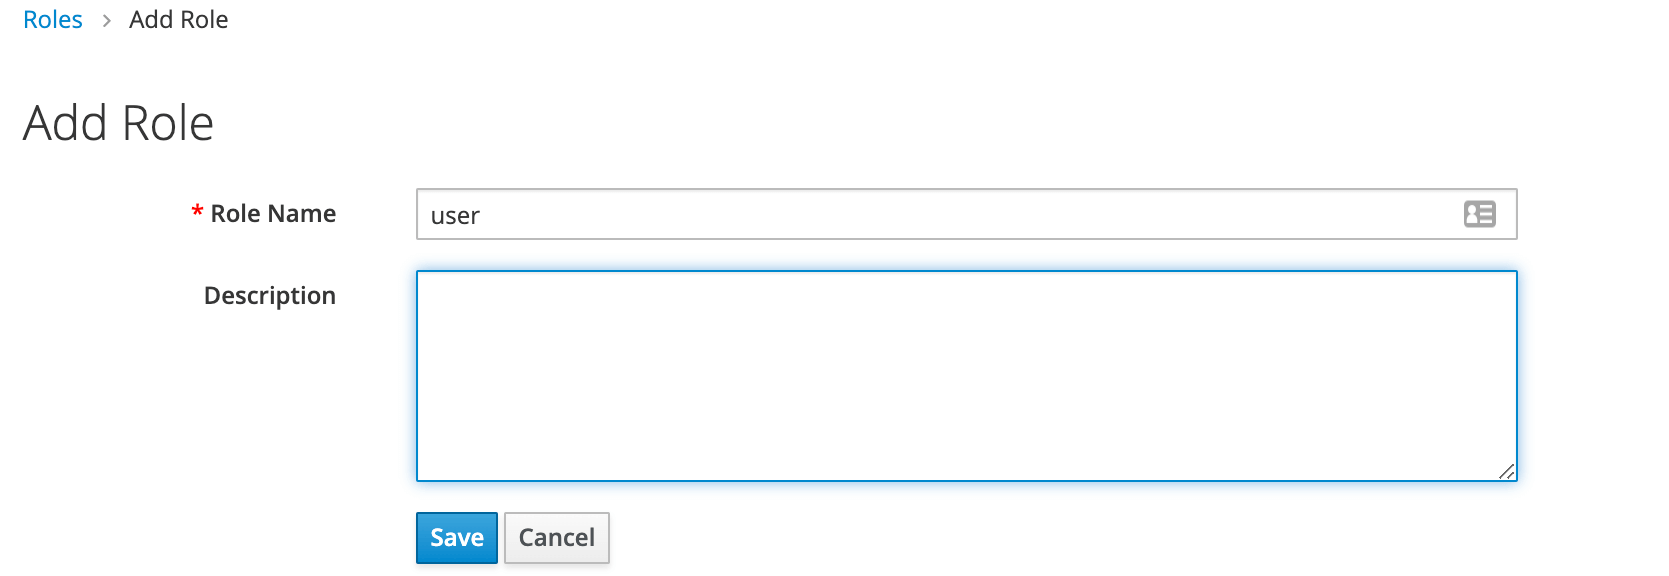
Then we’ll add the user role:
Now we have a role that can be assigned to users, but as there are no users yet, let’s go the Users page and add one:
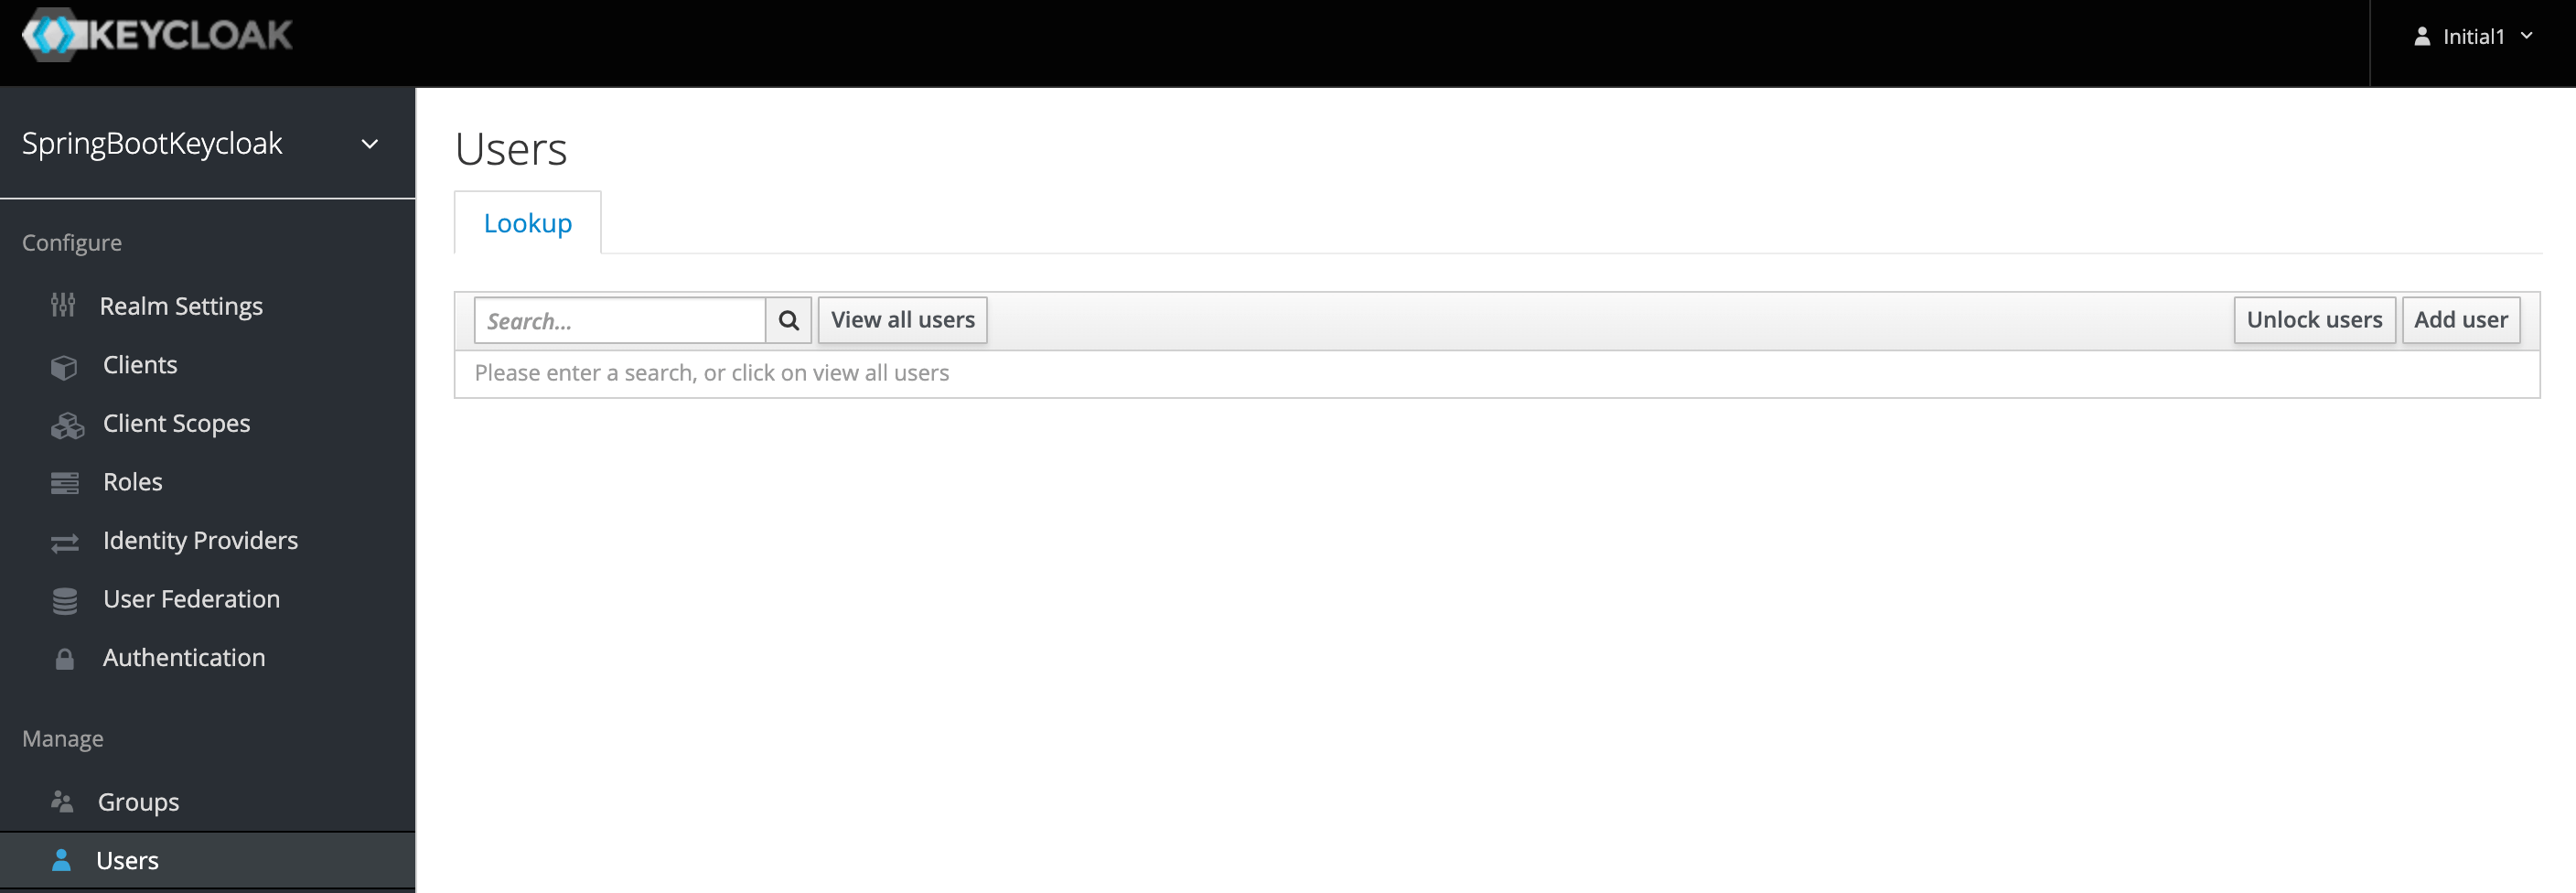
We’ll add a user named user1:
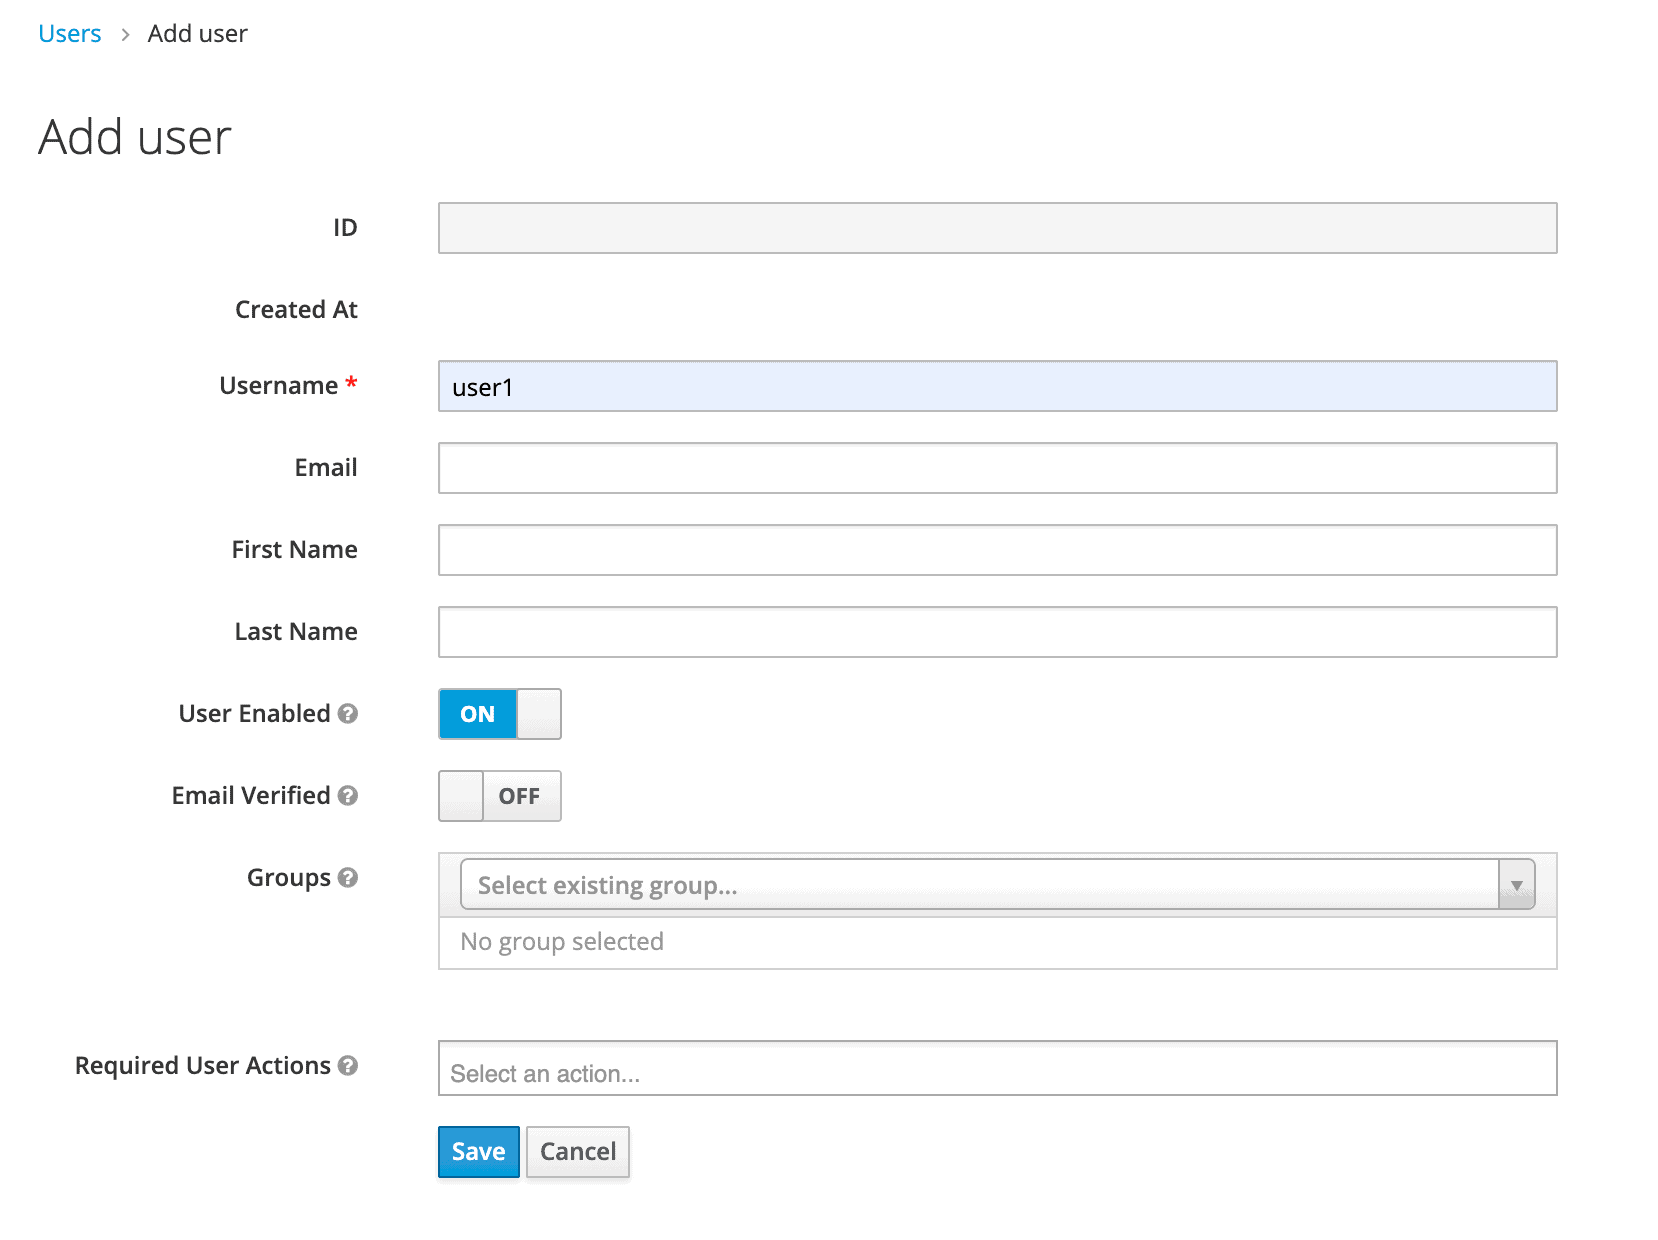
Once the user is created, a page with its details will be displayed:
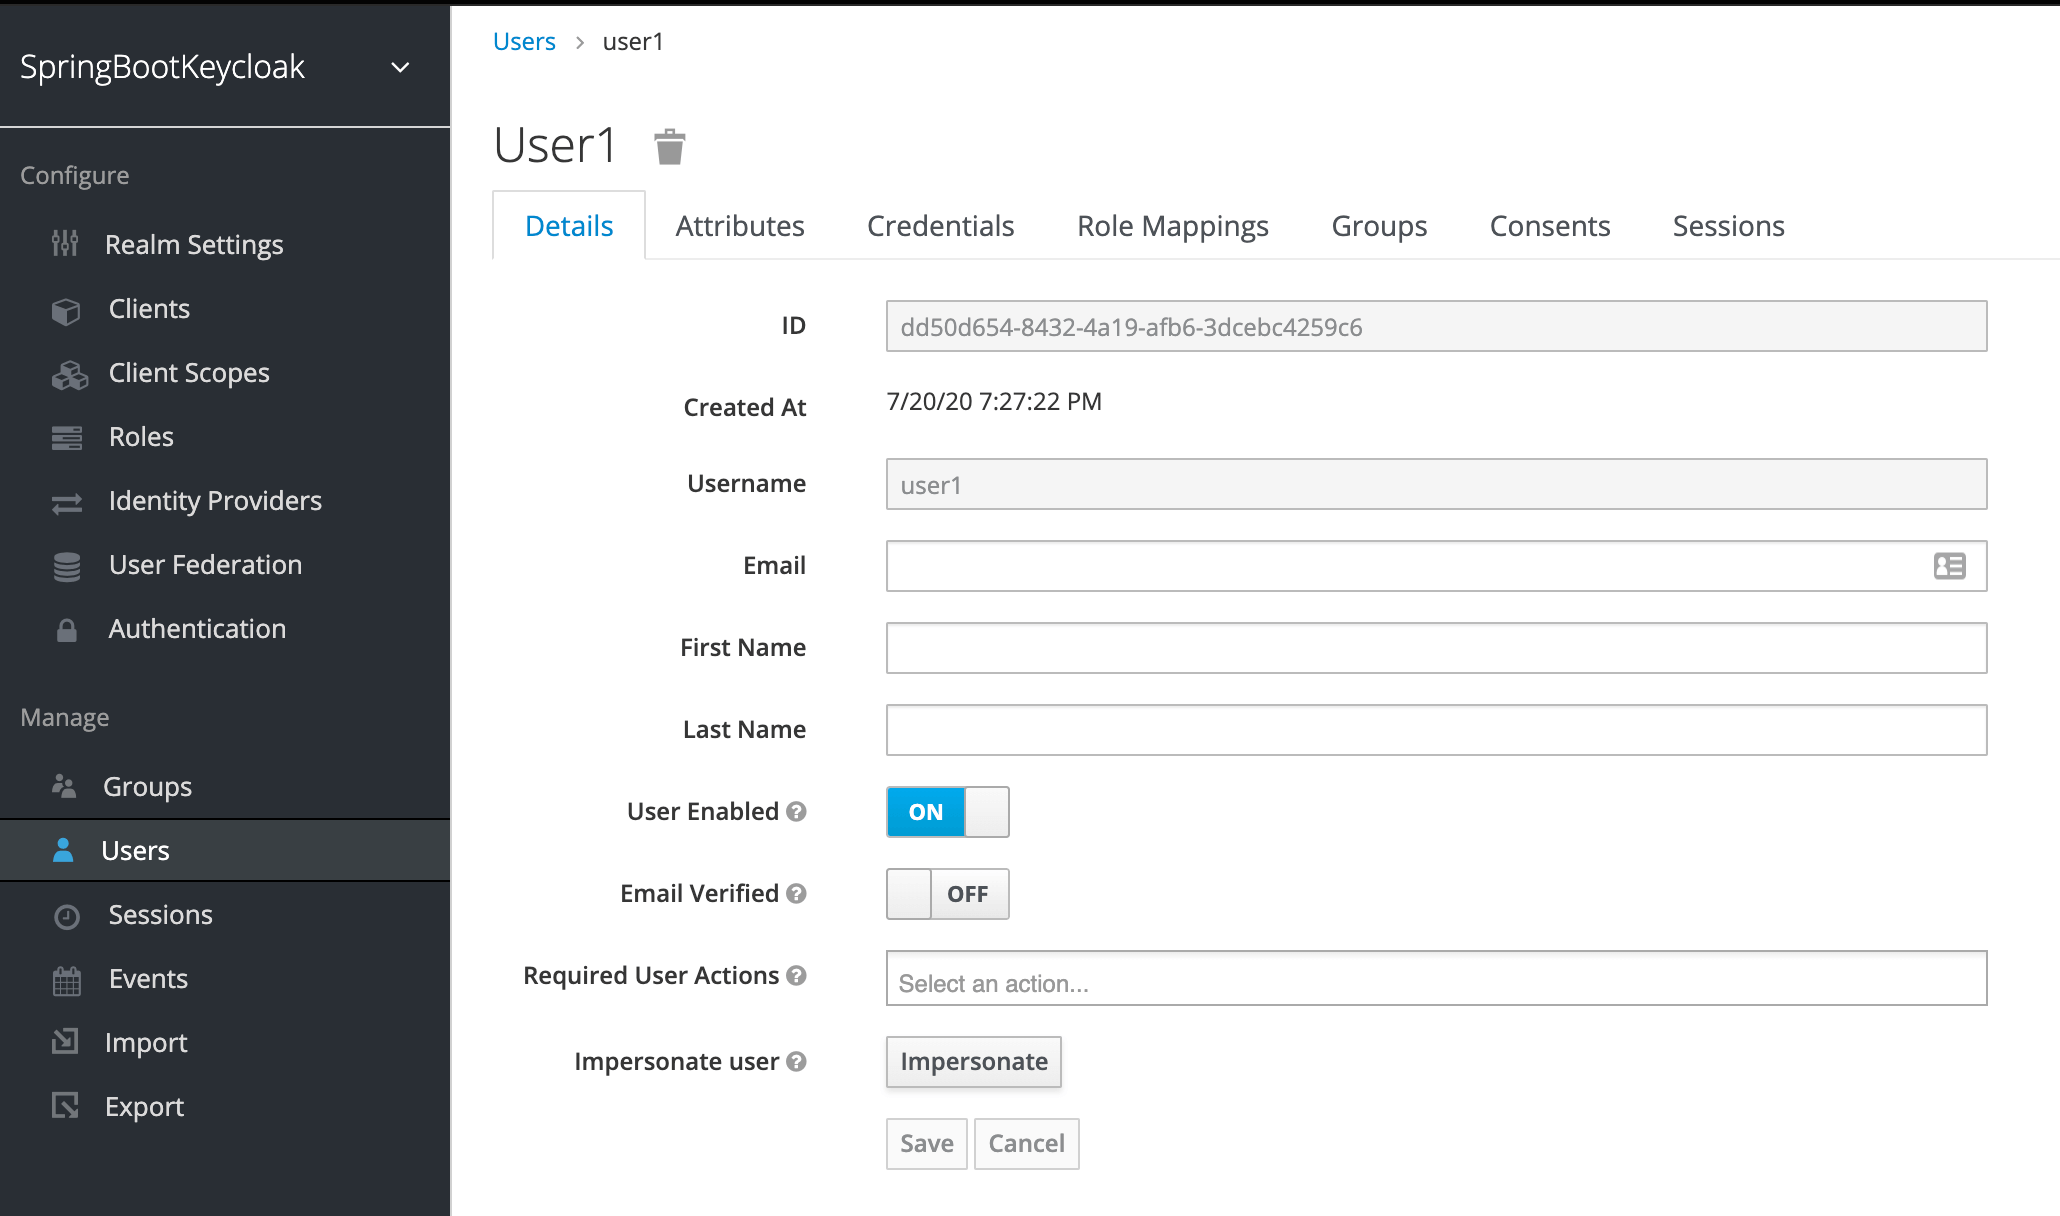
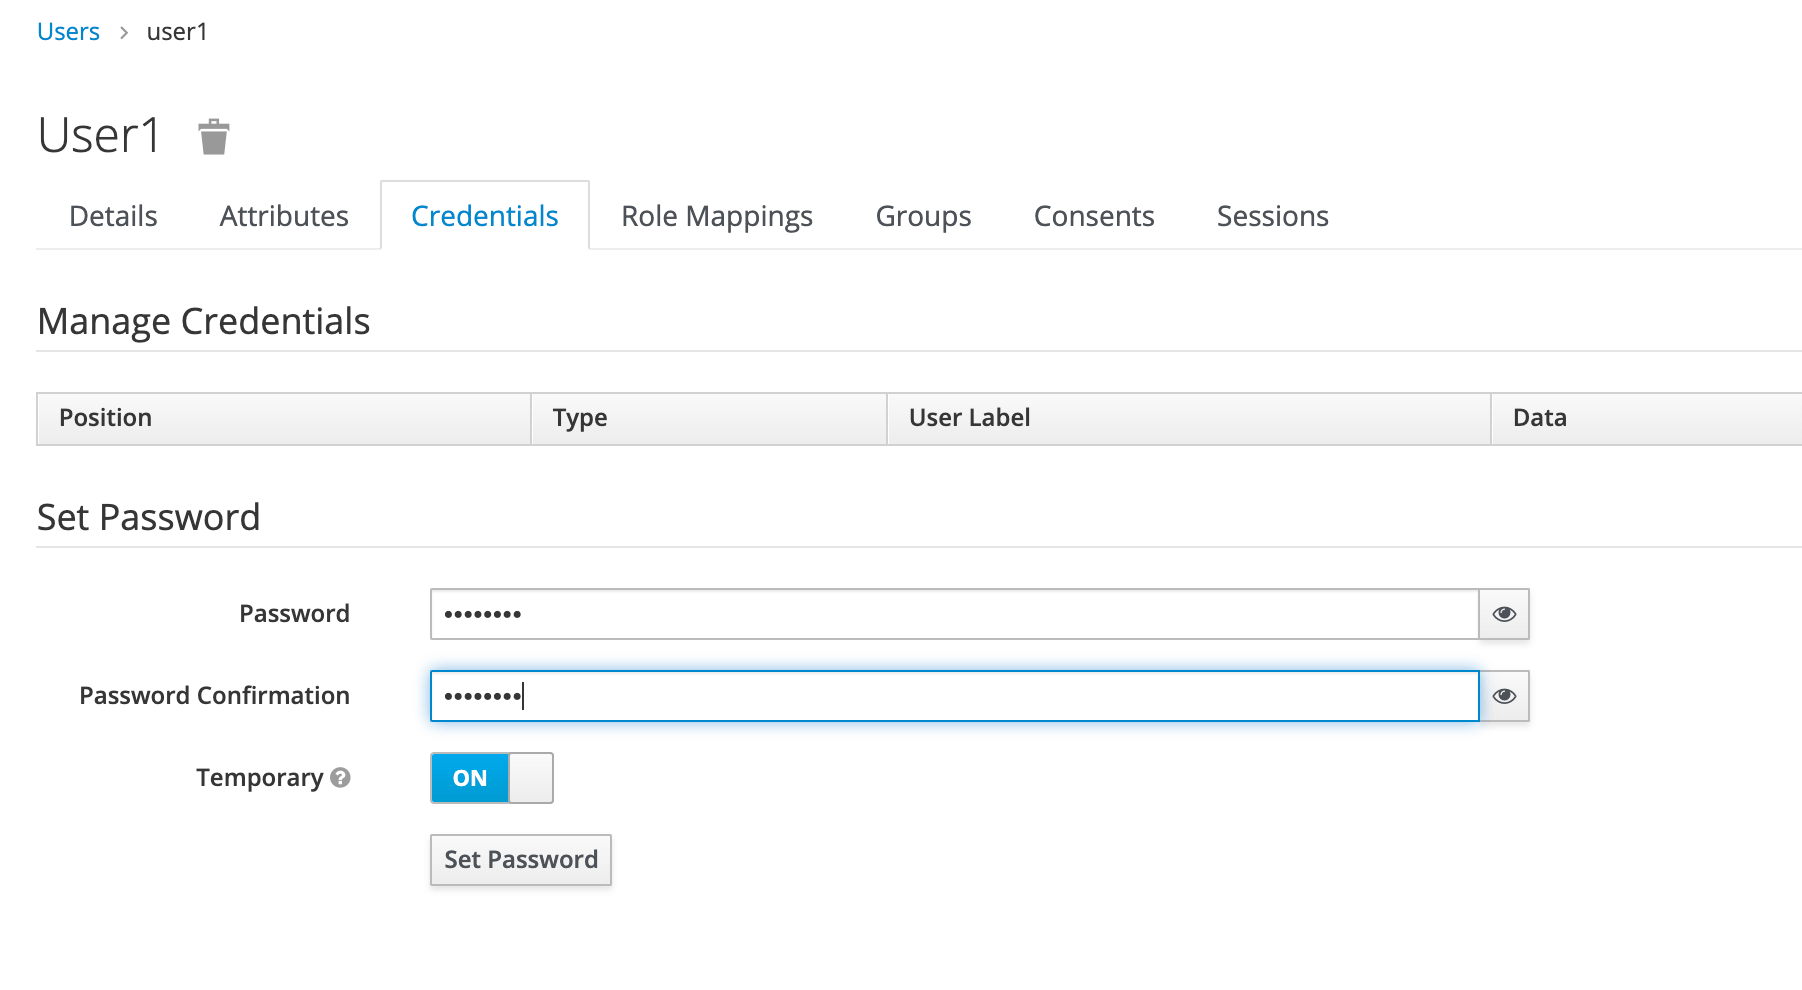
We can now go to the Credentials tab. We’ll be setting the initial password to xsw2@WSX:
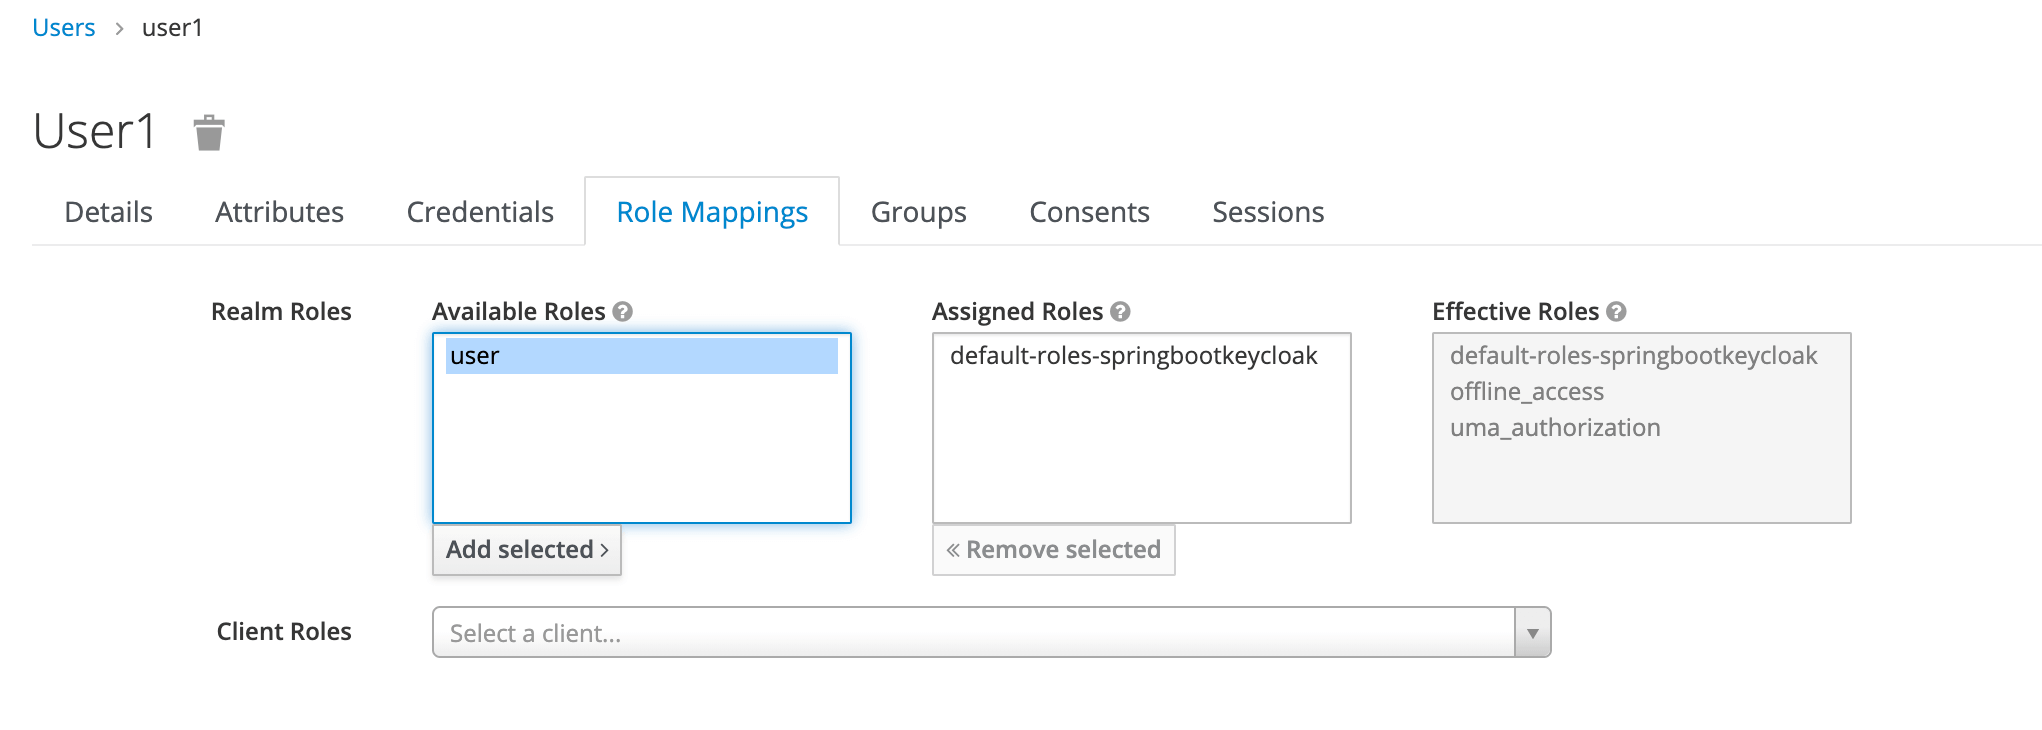
Finally, we’ll navigate to the Role Mappings tab. We’ll be assigning the user role to our user1:
4. Generating Access Tokens With Keycloak’s API
Keycloak provides a REST API for generating and refreshing access tokens. We can easily use this API to create our own login page.
First, we need to acquire an access token from Keycloak by sending a POST request to this URL:
http://localhost:8180/auth/realms/SpringBootKeycloak/protocol/openid-connect/token
The request should have this body in a x-www-form-urlencoded format:
client_id:<your_client_id>
username:<your_username>
password:<your_password>
grant_type:password
In response, we’ll get an access_token and a refresh_token.
The access token should be used in every request to a Keycloak-protected resource by simply placing it in the Authorization header:
headers: {
    'Authorization': 'Bearer' + access_token
}
Once the access token has expired, we can refresh it by sending a POST request to the same URL as above, but containing the refresh token instead of username and password:
{
    'client_id': 'your_client_id',
    'refresh_token': refresh_token_from_previous_request,
    'grant_type': 'refresh_token'
}
Keycloak will respond to this with a new access_token and refresh_token.
5. Creating a Spring Boot Application
5.1. Dependencies
The latest Spring Boot Keycloak Starter dependencies can be found on Maven Central.
The Keycloak Spring Boot adapter capitalizes on Spring Boot’s auto-configuration, so all we need to do is add the Keycloak Spring Boot starter to our project.
Within the dependencies XML element, we need the following to run Keycloak with Spring Boot:
<dependency>
    <groupId>org.keycloak</groupId>
    <artifactId>keycloak-spring-boot-starter</artifactId>
</dependency>
After the dependencies XML element, we need to specify dependencyManagement for Keycloak:
<dependencyManagement>
    <dependencies>
        <dependency>
            <groupId>org.keycloak.bom</groupId>
            <artifactId>keycloak-adapter-bom</artifactId>
            <version>13.0.1</version>
            <type>pom</type>
            <scope>import</scope>
        </dependency>
    </dependencies>
</dependencyManagement>
The following embedded containers are supported now and don’t require any extra dependencies if using Spring Boot Keycloak Starter:
- Tomcat
- Undertow
- Jetty
5.2. Thymeleaf Web Pages
We’re using Thymeleaf for our web pages.
We’ve got three pages:
- external.html – an externally facing web page for the public
- customers.html – an internally facing page that will have its access restricted to only authenticated users with the role user.
- layout.html – a simple layout, consisting of two fragments, that is used for both the externally facing page and the internally facing page
The code for the Thymeleaf templates is available on Github.
5.3. Controller
The web controller maps the internal and external URLs to the appropriate Thymeleaf templates:
@GetMapping(path = "/")
public String index() {
    return "external";
}

@GetMapping(path = "/customers")
public String customers(Principal principal, Model model) {
    addCustomers();
    model.addAttribute("customers", customerDAO.findAll());
    model.addAttribute("username", principal.getName());
    return "customers";
}
For the path /customers, we’re retrieving all customers from a repository and adding the result as an attribute to the Model. Later on, we iterate through the results in Thymeleaf.
To be able to display a username, we’re injecting the Principal as well.
Note that we’re using customer here just as raw data to display, and nothing more.
5.4. Keycloak Configuration
Here’s the basic, mandatory configuration:
keycloak.auth-server-url=http://localhost:8180/auth
keycloak.realm=SpringBootKeycloak
keycloak.resource=login-app
keycloak.public-client=true
As we recall, we started Keycloak on port 8180, hence the path specified in keycloak.auth-server-url. We enter the realm name we created in the Keycloak admin console.
The value we specify in keycloak.resource matches the client we named in the admin console.
Here are the security constraints we’ll be using:
keycloak.security-constraints[0].authRoles[0]=user
keycloak.security-constraints[0].securityCollections[0].patterns[0]=/customers/*
These constraints ensure that every request to /customers/* will only be authorized if the one requesting it is an authenticated user with the role user.
Additionally, we can define keycloak.principal-attribute as preferred_username so as to populate our controller’s Principal with a proper user:
keycloak.principal-attribute=preferred_username
5.5. Demonstration
Now we’re ready to test our application. To run a Spring Boot application, we can start it easily through an IDE, like Spring Tool Suite (STS), or run this command in the terminal:
mvn clean spring-boot:run
On visiting http://localhost:8081 we see:
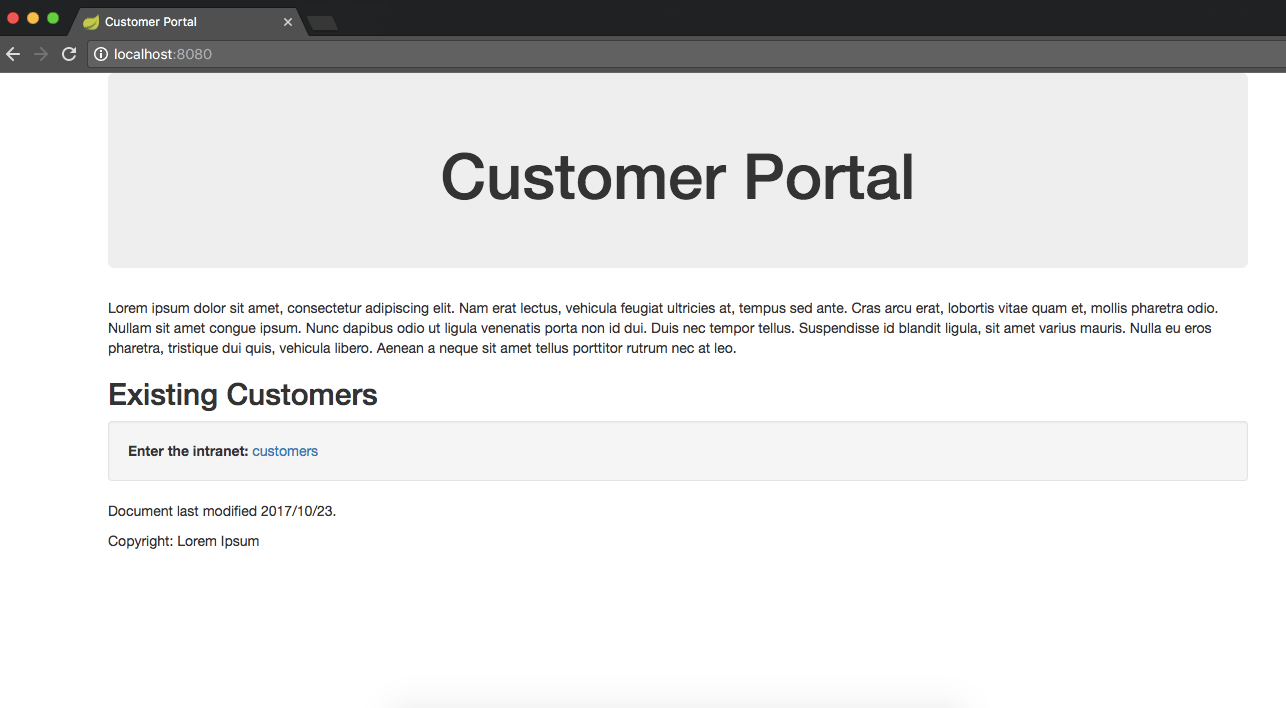
Now we click customers to enter the intranet, which is the location of sensitive information.
Note that we’ve been redirected to authenticate through Keycloak to see if we’re authorized to view this content:
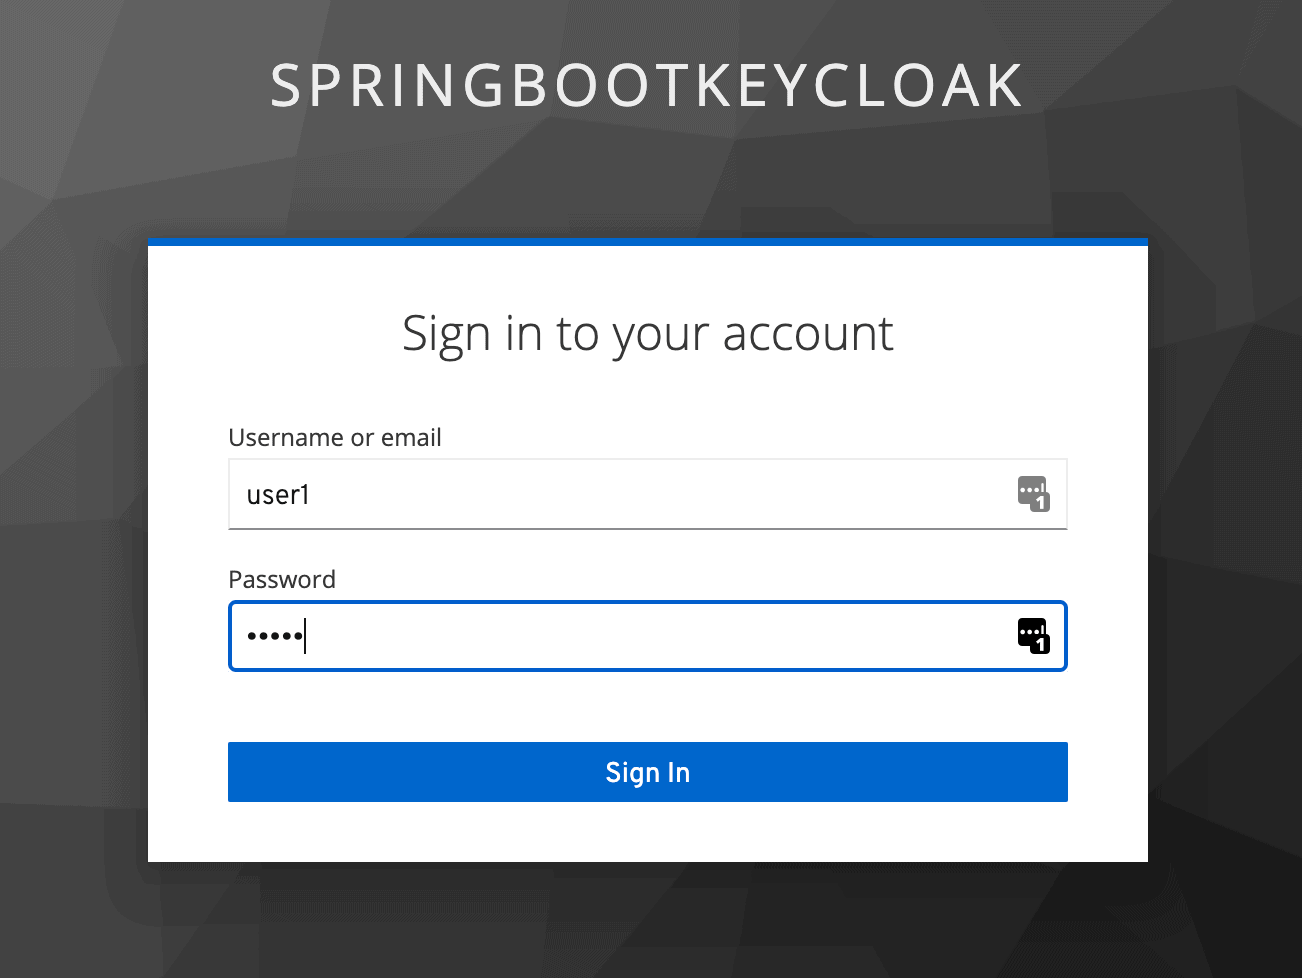
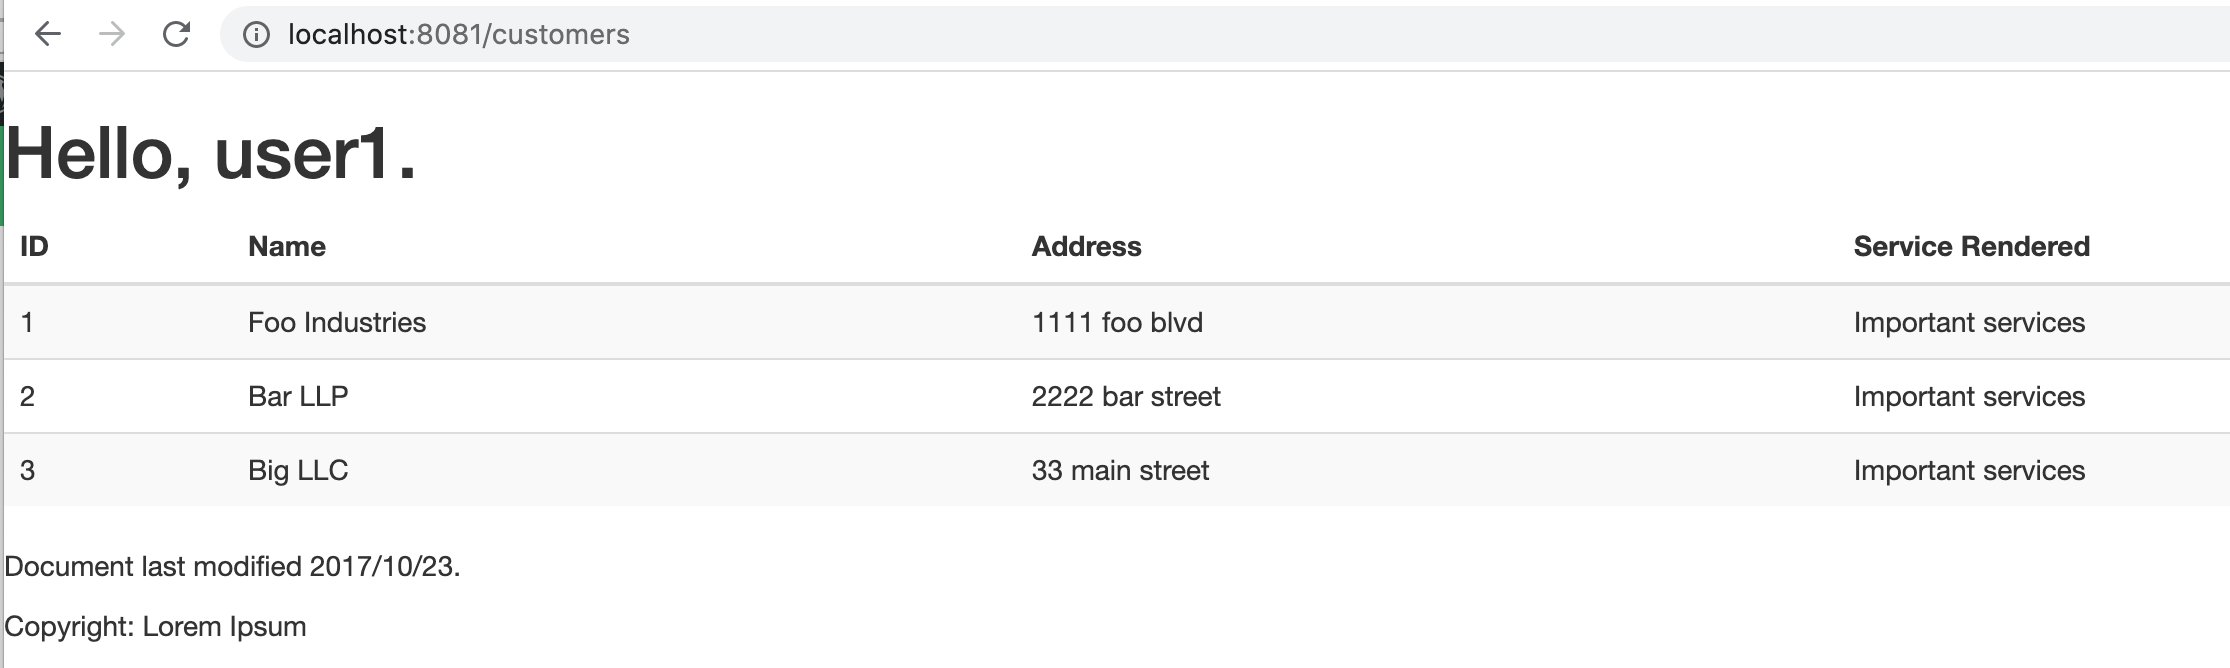
Once we log in as user1, Keycloak will verify our authorization that we have the user role, and we’ll be redirected to the restricted customers page:
Now we’ve finished the set up of connecting Spring Boot with Keycloak and demonstrating how it works.
As we can see, Spring Boot seamlessly handled the entire process of calling the Keycloak Authorization Server. We did not have to call the Keycloak API to generate the Access Token ourselves, or even send the Authorization header explicitly in our request for protected resources.
Next we’ll be reviewing how to use Spring Security in conjunction with our existing application.
6. Spring Security
There is a Keycloak Spring Security Adapter, and it’s already included in our Spring Boot Keycloak Starter dependency. We’ll now see how to integrate Spring Security with Keycloak.
6.1. Dependency
To use Spring Security with Spring Boot, we must add this dependency:
<dependency>
    <groupId>org.springframework.boot</groupId>
    <artifactId>spring-boot-starter-security</artifactId>
    <version>2.4.3</version>
</dependency>
The latest Spring Boot Starter Security release can be found on Maven Central.
6.2. Configuration Class
Keycloak provides a KeycloakWebSecurityConfigurerAdapter as a convenient base class for creating a WebSecurityConfigurer instance.
This is helpful because any application secured by Spring Security requires a configuration class that extends WebSecurityConfigurerAdapter:
@Configuration
@EnableWebSecurity
@ComponentScan(basePackageClasses = KeycloakSecurityComponents.class)
class SecurityConfig extends KeycloakWebSecurityConfigurerAdapter {

    @Autowired
    public void configureGlobal(
      AuthenticationManagerBuilder auth) throws Exception {

        KeycloakAuthenticationProvider keycloakAuthenticationProvider
          = keycloakAuthenticationProvider();
        keycloakAuthenticationProvider.setGrantedAuthoritiesMapper(
          new SimpleAuthorityMapper());
        auth.authenticationProvider(keycloakAuthenticationProvider);
    }

    @Bean
    public KeycloakSpringBootConfigResolver KeycloakConfigResolver() {
        return new KeycloakSpringBootConfigResolver();
    }

    @Bean
    @Override
    protected SessionAuthenticationStrategy sessionAuthenticationStrategy() {
        return new RegisterSessionAuthenticationStrategy(
          new SessionRegistryImpl());
    }

    @Override
    protected void configure(HttpSecurity http) throws Exception {
        super.configure(http);
        http.authorizeRequests()
          .antMatchers("/customers*")
          .hasRole("user")
          .anyRequest()
          .permitAll();
    }
}
In the code above, the method configureGlobal() tasks the SimpleAuthorityMapper to make sure roles are not prefixed with ROLE_.
Another method, keycloakConfigResolver defines that we want to use the Spring Boot properties file support instead of the default keycloak.json.
Since we set up the security constraints with Spring Security, we can remove or comment these security constraints we placed earlier in the properties file:
#keycloak.security-constraints[0].authRoles[0]=user
#keycloak.security-constraints[0].securityCollections[0].patterns[0]=/customers/*
Now, after we authenticate, we’ll be able to access the internal customers page, the same as we saw before.
7. Conclusion
In this article, we configured a Keycloak server and used it with a Spring Boot Application.
We also learned how to set up Spring Security and use it in conjunction with Keycloak. A working version of the code shown in this article is available over on Github.