
Accessing systems remotely from your home computer is crucial for software developers and system administrators. Users might need to configure, install, and run applications on servers and computers that might not be physically accessible to them. Nowadays, cloud computing is one of the most popular platforms for hosting and running applications over the internet.
In the cloud ecosystem, users create virtual computers called virtual machines that run in data centers somewhere in the world. Users require access to these virtual machines so that they can host their code, transfer files, manage, and run applications.
SSH is one such tool that allows users to securely connect to and control remote computers from the comfort of their homes. In this article, we are going to explore the basics of SSH and build an application in Node.js to connect to a virtual machine and monitor system health.
1. What is SSH?
SSH stands for Secure Shell (also called Secure Socket Shell) and is a protocol that allows users to access a remote system or a virtual machine using the command line or the terminal. SSH establishes a shell session with the remote host, and the user will be able to manage the remote host by executing commands on their local computer via a terminal or command-line interface.
In other words, users can “log in” to a virtual machine and manipulate it based on their requirements. SSH is a very powerful tool for IT professionals and system administrators who deal with configuring and managing servers on a daily basis. Without SSH, users would have to physically go to remote data centers and connect to the computers, which is not feasible or efficient.
SSH is based on the client-server model, where a client is an application on the local system, and the server is the host you wish to connect to. The client application takes the remote host information, such as username, password, etc., as input and establishes an encrypted SSH session with the remote host.
In the server, a daemon process constantly listens to a port for any incoming SSH requests and checks to see if the credentials sent by the client are correct. If not, the request is rejected, and an SSH connection is not established.
1.1. Using SSH
Most UNIX based operating systems such as Ubuntu, MAC OS, etc. come with an SSH client pre-installed. To establish a connection, open the terminal and execute the following command:
ssh <username>@<hostname or host ip>
The username field specifies the user id of the machine you are connecting to. The hostname is the name of the remote system and can be found by typing hostname in the terminal. Users can also specify the host IP instead of the hostname. for example:
ssh adith@219.123.101.201
This establishes a connection with the host whose IP is: 219.123.101.201 and the user is adith.
1.2. SSH in Node.js
We are going to build an application that connects to a virtual machine and extracts information on the filesystem health of the VM. The application monitors the disk utilization in the VM and flags the partitions that have a disk utilization greater than 90%. This is useful for system administrators as it tells which partitions need to be monitored and increased in size before an actual failure of the system occurring due to low space.
Node.js has an array of libraries for establishing an SSH connection. In this article, we are going to use simple-ssh. Simple-ssh is a robust and easy to use library that allows us to connect to a VM and execute Linux commands using Node.js.
To install and setup Node.js, follow this tutorial
Install the simple-ssh library by running the following command:
npm install simple-ssh
Install the node-csv-parse library(to parse the output of the df -h command) by running the following command:
npm install node-csv-parse
Code
// required to take input from user
const readline = require("readline");
const rl = readline.createInterface({
    input: process.stdin,
    output: process.stdout
});

const SSH = require('simple-ssh');

// parser to parse the data(separated by tabs and spaces)
const parser = require('node-csv-parse');
The readline library allows users to provide input using the command line. We are going to take the VM host details such as hostname, username, and password as input from the user. This is required to establish a secure connection with the remote host.
// function to get input from user
function getInput() {

	rl.question("What is the host? ", function(host) {
	    rl.question("What is the user? ", function(user) {
	    	rl.question("What is the password? ", function(password) {

	    		ssh(host, user ,password);
	   		rl.close();

	    	});
	    });
	});
}
The getInput() function takes input from the user. The hostname, username, and password of the VM are stored in the host, user, and password variables and are passed to the ssh() function as parameters.
// function to ssh into a remote host.
function ssh(host, user ,password){

	console.log('inside the system')
	var ssh_options = new SSH({
	    host: host,
	    user: user,
	    pass: password
	});
	// execute the df -h command to find out disk utilization
	ssh.exec('df -h', {
	    out: function(stdout) {
	        parse(stdout);
	    }
	}).start();
}
The ssh() function takes the hostname, username, and password as the input and establishes an SSH connection with the VM using simple-ssh. The exec() function executes a Linux command on the remote host. In this case, we execute the df -h command that shows us the amount of disk space that is free on the host.
Once we get the output of the df -h command in the stdout variable, we pass it to the parse() function that parses the output and displays it in a presentable format.
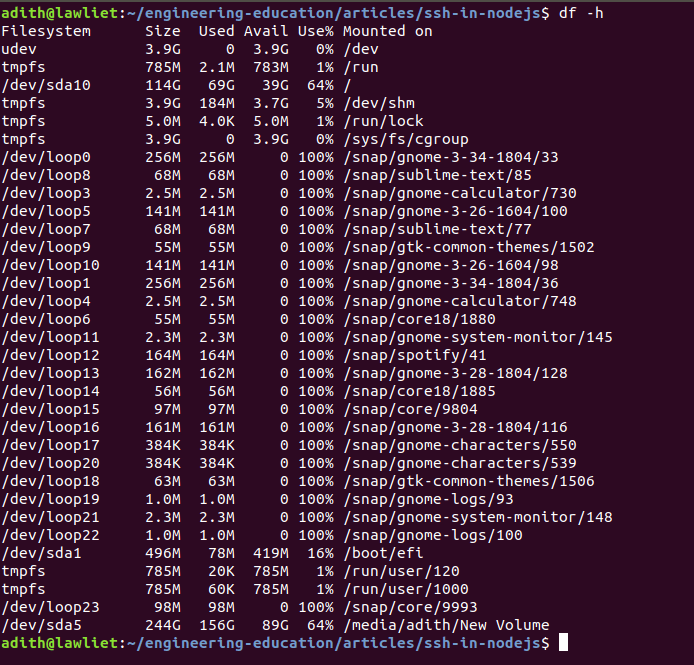
The output of the df command is hard to read and understand. Therefore, we need to parse it and extract the relevant data.
// Threshold value to see if disk utilization is below or above the desired limit.
const threshold = 90;
// function to parse the raw data from the df -h command.
function parse(data){

	// the parser function takes the data that needs to be parsed as the input and returns the parsed data as the output.
	// the delimiter specifies how the data is separated into columns. For example, if there is a '-' separating the columns in the
	// data, then the delimiter would be '-'. In this case, there is a space(' ') separating the columns. Hence, the delimiter is ' '
	// The trim value specifies whether the extra spaces in the data needs to be removed or not.
	var parsed = parser(data, {
		delimiter: ' ',
		trim: true
	}).asRows();

	var finalData = [];

	// go through every row in the data and add another column for threshold.
	// Also, check to see if CPU utilization percentage has exceeded threshold or not.
	for(var i = 0; i < parsed.length; i++){
		// Split the data based on space so that we get the individual columns.
		var temp = parsed[i][0].split(' ');

		// remove all the empty spaces in the array
		temp = temp.filter(function(str) {
			// This line removes all the empty spaces in the array
    			return /\S/.test(str);
		});

		// If this is the first record, then it is the column header. Therefore, for the column header, we need to add another column
		// called Threshold exceeded? which tells us whether the limit has exceeded or not.
		if(i == 0){
			temp.pop();
			temp.push('Threshold exceeded?');
		}
		// If this is not the first row, then we can check to see if it has exceeded the threshold or not.
		else{
			if(parseInt(temp[4]) >= threshold){
				temp.push('YES');
			}
			else{
				temp.push('NO');
			}
		}
		finalData.push(temp);
	}

	// Print the final data as a neat table on the terminal
	console.table(finalData);
}
In the parse() function, we go through every row in the data and see if the CPU utilization percentage has exceeded the threshold or not. For this, we add another column to the data called Threshold exceeded?. This column has two values, “yes” or “no” and tells the user whether the threshold was exceeded or not.
function main(){
	getInput();
}

main();
2. Conclusion and Further reading
To recap, SSH is a protocol that allows users to access a remote system, and is a very useful tool for developers and system administrators. We explored how SSH works and how to use SSH in your local system using the terminal. We understood how we can leverage the power of Node.js to write an application that uses simple-ssh (A library that allows users to use SSH in Node.js) to SSH into a virtual machine, monitor the system disk usage, and display it to the user in a presentable format. Now that you know how SSH works and how to use it in Node.js, you can write your own application to do much more.