
Table of Contents
What are telegram bots? Bots are third-party application accounts that run inside the Telegram application. Users can interact with bots by sending them messages, commands, and inline requests. You control your bots using HTTPS requests from the Telegram Bot API.
Telegram bots have made it easy to automate tasks in telegram channels and groups. You can even build your own telegram bot to curate news or monitor cryptocurrencies trend for you.
In this tutorial, you will learn how to build telegram bots using Node.js runtime environment and Telegraf library from scratch.
This will act as an introduction to the Telegram bot environment that will enable you to build weather bot, vendor bots, e-commerce bot, or even dictionary bot. This tutorial will be as beginner-friendly as possible.
1. Prerequisite
Before you begin this guide you’ll need the following:
- Node.js installed.
- npm installed.
- Visual Studio Code installed.
- Basic knowledge of using the CLI.
- A Telegram account .
2. Setting up your bot
First, go to the telegram search bar and search @botfather (this is a special telegram bot that controls all others). We are going to use this to get a token for our new bot.
There are several commands associated with @botfather, we are going to start with /newbot then provide the desired name for the bot. The name must always end with ‘bot’. Now that we have the token we can write the code.
3. The coding
Let’s first create a folder for our new project, i.e: myfirstbot. Open the command line and navigate to the folder. Initialize the project by running the following commands to install telegraf:
npm init

# install the telegraf library

npm install telegraf
Create a javascript file, app.js
const Telegraf = require('telegraf');

const bot = new Telegraf('insert_bot_token_here');
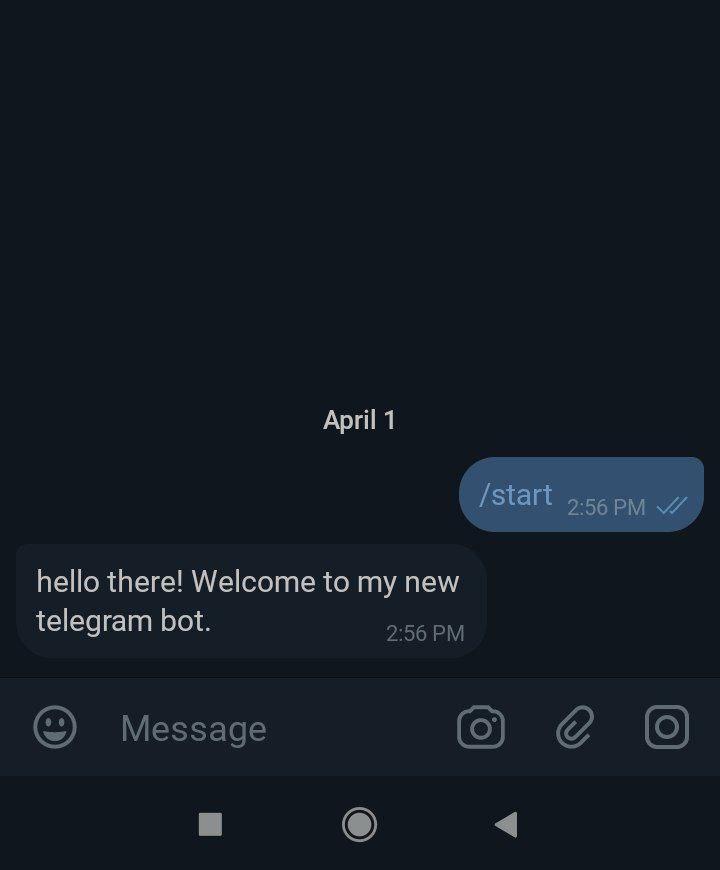
Let’s write a simple script that will welcome us every time we start the bot.
//method for invoking start command

bot.command('start', ctx => {
    console.log(ctx.from)
    bot.telegram.sendMessage(ctx.chat.id, 'hello there! Welcome to my new telegram bot.', {
    })
})
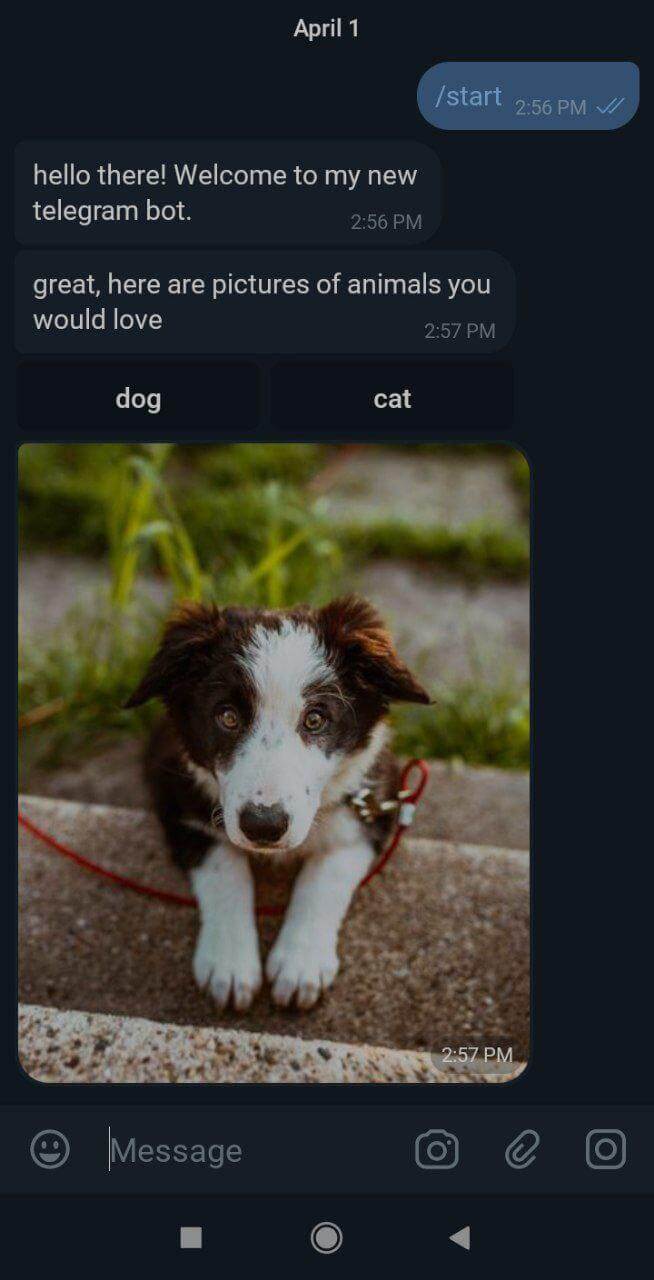
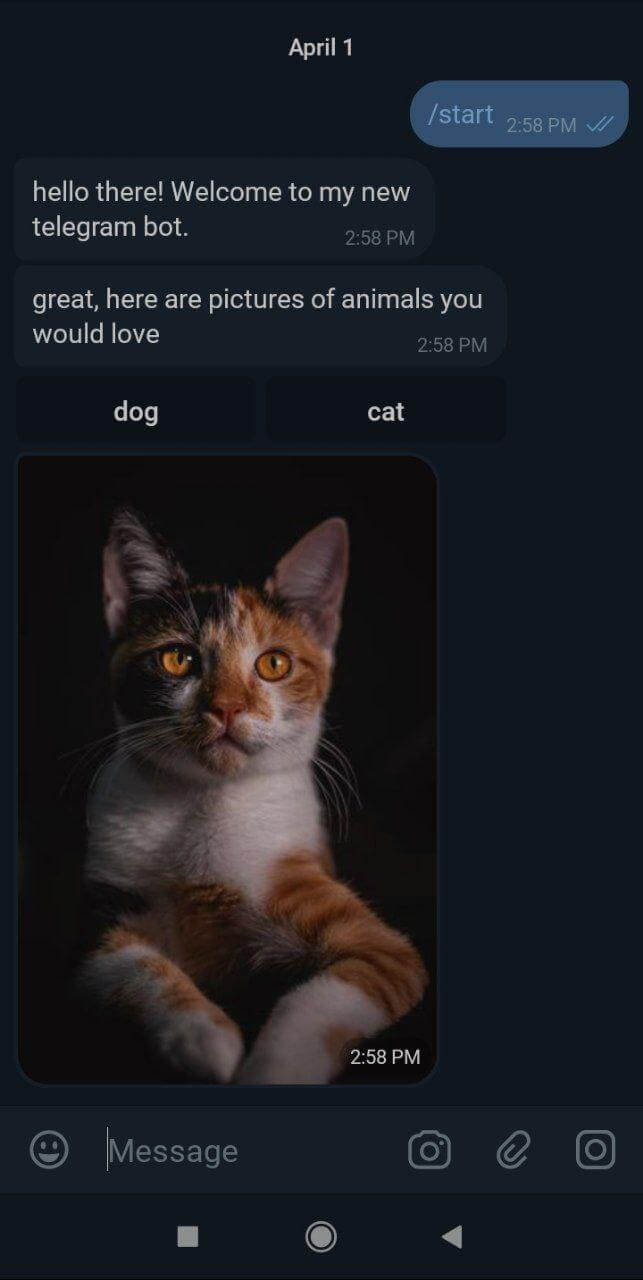
To add more functionality let’s write code that shows you images of animals when you click inline keyboard buttons. Create a res folder and add images into it.
//method that displays the inline keyboard buttons

bot.hears('animals', ctx => {
    console.log(ctx.from)
    let animalMessage = `great, here are pictures of animals you would love`;
    ctx.deleteMessage();
    bot.telegram.sendMessage(ctx.chat.id, animalMessage, {
        reply_markup: {
            inline_keyboard: [
                [{
                        text: "dog",
                        callback_data: 'dog'
                    },
                    {
                        text: "cat",
                        callback_data: 'cat'
                    }
                ],

            ]
        }
    })
})

//method that returns image of a dog

bot.action('dog', ctx => {
    bot.telegram.sendPhoto(ctx.chat.id, {
        source: "res/dog.jpeg"
    })

})

//method that returns image of a cat

bot.action('cat', ctx => {
    bot.telegram.sendPhoto(ctx.chat.id, {
        source: "res/cat.jpeg"
    })

})
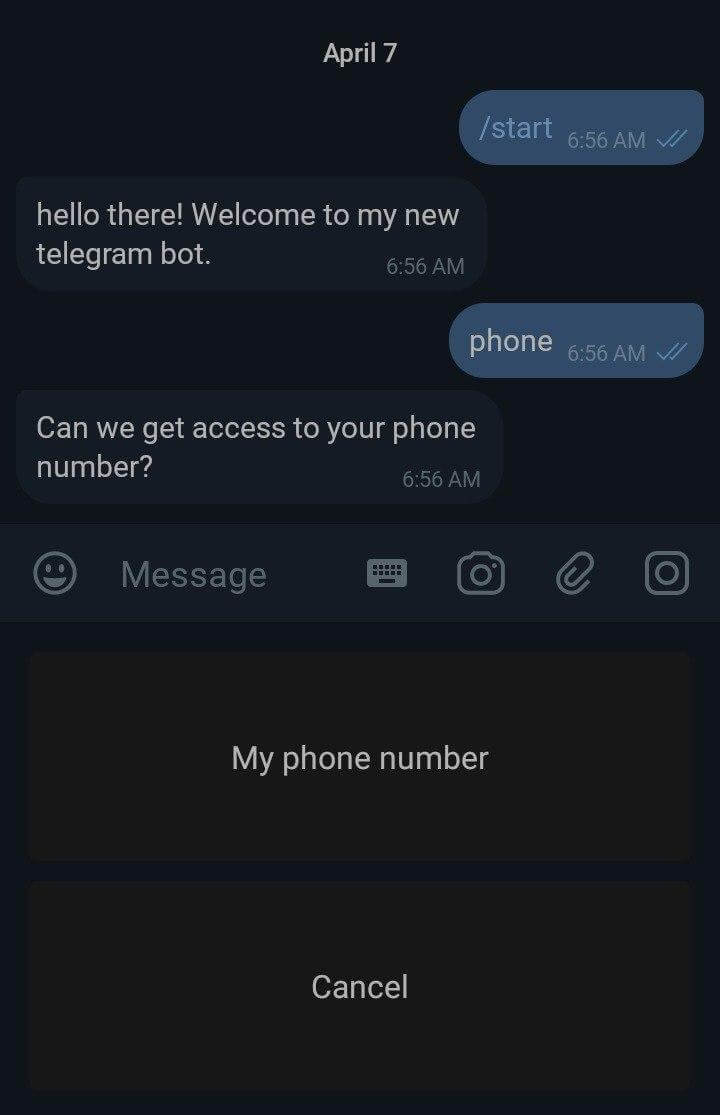
We have seen how to use inline keyboard, let’s now try to use the one time reply keyboard feature to share our location or phone number with the bot.
Note: Sharing location feature is only available for telegram mobile application.
//method for requesting user's phone number
bot.hears('phone', (ctx, next) => {
console.log(ctx.from)
bot.telegram.sendMessage(ctx.chat.id, 'Can we get access to your phone number?', requestPhoneKeyboard);
})
//method for requesting user's location
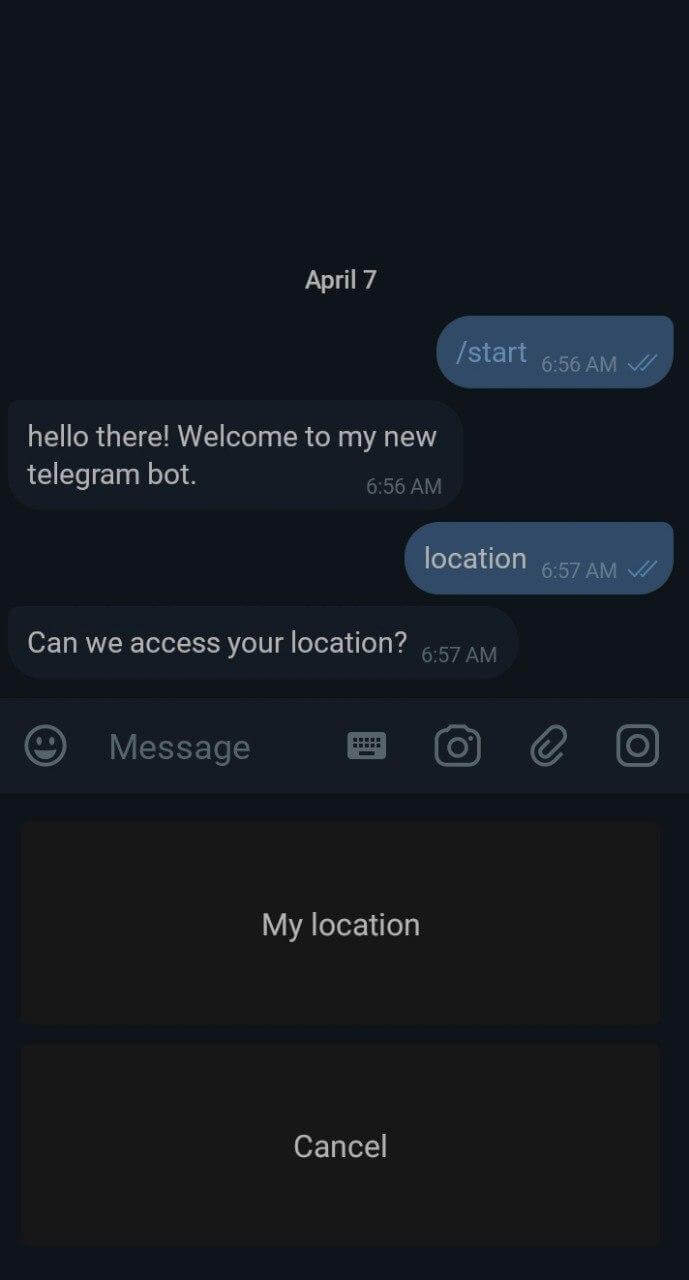
bot.hears("location", (ctx) => {
console.log(ctx.from)
bot.telegram.sendMessage(ctx.chat.id, 'Can we access your location?', requestLocationKeyboard);
})
//constructor for providing phone number to the bot
const requestPhoneKeyboard = {
"reply_markup": {
"one_time_keyboard": true,
"keyboard": [
[{
text: "My phone number",
request_contact: true,
one_time_keyboard: true
}],
["Cancel"]
]
}
};
//constructor for proving location to the bot
const requestLocationKeyboard = {
"reply_markup": {
"one_time_keyboard": true,
"keyboard": [
[{
text: "My location",
request_location: true,
one_time_keyboard: true
}],
["Cancel"]
]
}
}
Finally, write the following code at the end to launch the bot.
//method to start get the script to pulling updates for telegram

bot.launch();
4. Using the bot
We have successfully written three blocks of codes, one that welcomes you when you start the bot.
One that sends you images when you click inline keyboard buttons and finally one that allows the user share their phone number or location when they click reply keyboard button.
Run the bot in the terminal and then go to the telegram search bar and search the name of your bot.
node app.js
Here are the results from telegram.
4.1. Starting the bot
4.2. Requesting for a dog photo
4.3. Requesting for a cat photo
4.4. Requesting phone number
4.5. Requesting location
Kindly check the source code in my GitHub repository here.
5. Summary
In this article we have gone through how to get your telegram bot token, setting up your environment and writing a simple bot for displaying images of animals using the inline keyboard feature and also share your location and phone number using reply keyboard feature.
Follow this series of articles over the coming days as we will code bots that have more functionality.
Happy coding and stay safe!