
Table of Contents
- 1. A glance at GraphQL
- 2. A glance at Prisma
- 3. Goal
- 4. Prerequisites
- 5. Setting up TypeScript
- 6. Installing Nest.js CLI
- 7. Installing Prisma CLI
- 8. Create the first migration
- 9. Setting, Installing GraphQL packages and adding GraphQL
- 10. Adding the Prisma service
- 11. Adding post service
- 12. Adding post resolvers
- 13. Connecting Prisma service, post-service, and post resolvers with providers
- 14. Adding post Mutations
- 15. Running the Application
- 16. Testing the Application with GraphQL playground
- 17. Conclusion
Nest.js is built on Node.js and Express, which is arguably the most popular way to build servers with JavaScript. Nest.js is a TypeScript-based JavaScript framework for developing and scaling backend microservices.
Being statically typed with TypeScript, it allows you to do various JavaScript tasks as an escape hatch. This guarantees that your code is more solid.
Furthermore, it makes the code easier to navigate through. This is because everything is strongly typed and more scalable for large applications. This provides an out-of-the-box application architecture that enables developers and teams to construct highly testable, scalable, loosely connected, and easily maintainable applications.
Nest.js, like other back-end frameworks, is designed to deliver an Angular-like experience. As a result, when you create a new Nest.js application, you will be launched into an environment that resembles a normal front-end Angular application.
The major distinction is that what you end up creating will be your back-end services. You’ll set up a server, link it to databases, and do all the typical tasks associated with a back-end based application.
1. A glance at GraphQL
GraphQL is a query language for accessing and modifying data in APIs (interconnected data sources). It is compatible with a variety of server-side languages, including Next.js. GraphQL allows you to query your data and receive the results you need.
You can query numerous related resources in a single request using GraphQL. To put it another way, you can query across relationships. GraphQL also allows you to query related items and receive a response in the same shape as the query.
Thus, it is used to load data from the server to the client application. It allows you to get data from the API into your application more efficiently than traditional methods and services such as SOAP and REST.
For example, if you’re using REST to access two resources, you’ll need two different endpoints to request data from each resource. This also means that when a request is received, the API responds with the whole data payload of that entity. GraphQL allows you to access many resources with a single request.
GraphQL has a type system that allows you to define a schema for your data. For example, a graph made up of nodes and edges can be used to represent the data in your application. The nodes represent objects. The edges represent the relationship between these objects. These reflect the data and the relationships between the data in your application.
The benefit of GraphQL is that it allows clients to ask for exactly what they want. There is nothing more or less. Furthermore, because there is no redundant data, requests and responses are quick.
Here is an example:
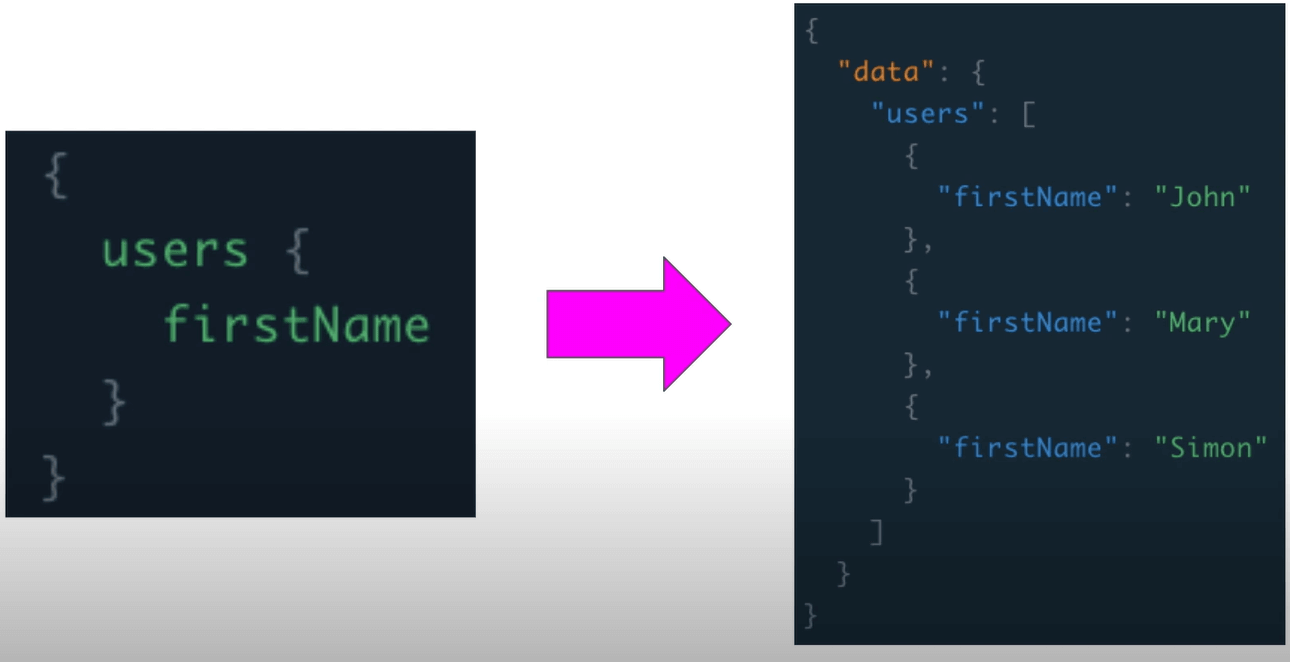
In this case, the client is requesting the first names of all users. Thus, as you can see in the answer, we only get the users’ first names and no redundant data.
2. A glance at Prisma
Prisma has a good modeling language for creating your database. It also has a robust GraphQL ORM (object-relational mapping) for working with databases in JavaScript. Furthermore, it makes developing GraphQL APIs with a database easy. Working with GraphQL allows developers to fetch data in their apps, while Prisma simplifies the process of connecting up data sources.
Prisma has the advantage of being database agnostic. It works with both relational (SQL) and non-relational (NoSQL) databases, including MySQL, PostgreSQL, and MongoDB. This implies that we can quickly select a database or swap between databases. Without changing any code (maybe about six lines you want to set up to connect to the particular database).
Prisma wraps your database and exposes it as a GraphQL API. As a result, it provides a GraphQL API that can be used to read and write from the actual database, irrespective of whether we’re using SQL or NoSQL.
3. Goal
The guide will focus on getting a simple server project up and running. We will use technologies such as Prisma, Nest.js, GraphQL, and SQLite as the project database. We will create a simple posts GraphQL API with all CRUD operations supported.
4. Prerequisites
To continue with this article, it is important to have the following:
- Node.js installed.
- Typescript set up in visual studio code or your favorite text editor.
- Prior knowledge working with TypeScript.
5. Setting up TypeScript
To start setting up TypeScript, first ensure Node.js is already installed. Then run npm install -g typescript inside your command line. Finally, you can check if Typescript is installed by running the tsc --version command.
6. Installing Nest.js CLI
Nest.js provides a command-line interface (CLI) that enables the creation of projects and files via the command line. One of the primary aims of the Nest.js framework CLI is to provide backend developers with a modular code structure.
This aids in the development and maintenance of large-scale business software architectural patterns. Also, it provides dependency injection straight out of the box to promote well-structured programs.
If you have it installed, nest CLI runs the following command to install it globally.
npm i -g @nestjs/cli
With the CLI set, we can run on time command to initialize a Nest.js project.
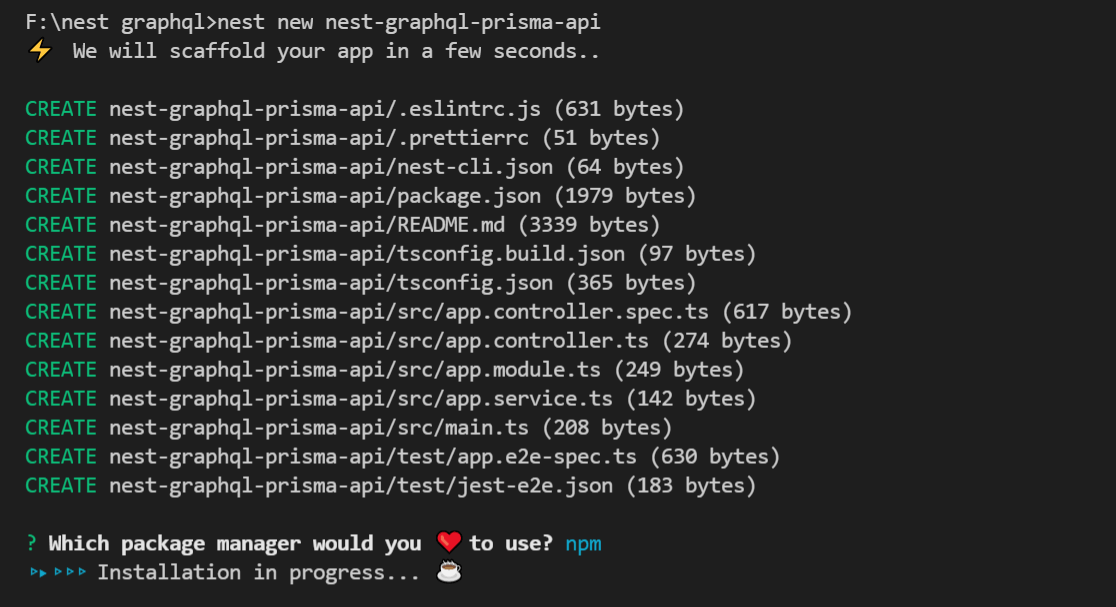
nest new nest-graphql-prisma-api
The above command will help us in scaffolding the project. The command will generate a TypeScript starter project and prompt you for the project’s details such as name, description, version number, which defaults to 0.0.0, and author (probably your name).
Upon completing this procedure, you will have a fully configured Nest.js application. Including all dependencies installed in the node modules directory.
While executing the above command, you may still select the package manager you want to use, that’s either yarn or npm.
Once the installation process is completed, a nest-graphql-prisma-api folder with all Nest.js dependencies will be created inside the path you executed the above command.
7. Installing Prisma CLI
The Prisma CLI allows us to dynamically construct the application models. By initializing new application resources, generating Prisma Client, and analyzing existing database schemas. This way, we can easily define our project schema and connect it to the project database.
Prisma CLI will be running inside the newly generated Nest.js application so ensure you change the directory to the nest-graphql-prisma-api folder.
cd nest-graphql-prisma-api
Then you can run the following command, and Prisma will be installed globally as a dependency on this project.
npm i -g prisma
This will download the Prisma CLI and Prisma engine for the operating system you are in.
Defining Our Prisma Data Model
Now we can initialize Prisma models for our project.
prisma init
The above command will create;
- A prisma folder containing the schema.prisma file. In this file, we will implement the
postsmodel. - A .env file. This file contains configurations to connect to the database. For our case, we will be using SQLite.
By default, .env file is configured for PostgreSQL database. So to use SQLite, edit it as follows;
DATABASE_URL="file:./dev.db"
Also, edit the prisma/schema.prisma file as follows;
datasource db {
    provider = "sqlite"
    url      = env("DATABASE_URL")
}

generator client {
    provider = "prisma-client-js"
}

model Post {
    id        Int      @id @default(autoincrement())
    title     String
    content   String
    published Boolean  @default(false)
    createdAt DateTime @default(now())
}
This will configure the SQLite database and construct the Post model. The generator client has always configured for you no need to edit that.
8. Create the first migration
The benefit of setting this SQL scheme programmatically is to skip a couple of keystrokes. By going over to a Relational Database Management Systems (RDMS), create a database, tables, and adding all the necessary fields.
This helps you move your project from the development to the production environment or between other developers. Your actual schema setup lives in code. This becomes easier to transfer that schema from one person to another or from your developer machine to the production machine. Without having to go to a database manager.
Furthermore, if you are setting the schema manually on different machines, you must ensure they match. You don’t have some automatic way to make sure that the schemas are set up correctly.
If you make a mistake and the database schemas are not entirely the same from your machine to the other machine, you may get some bugs when running the application. With the schema already set, you avoid schema mismatch. That’s why database migrations are so helpful.
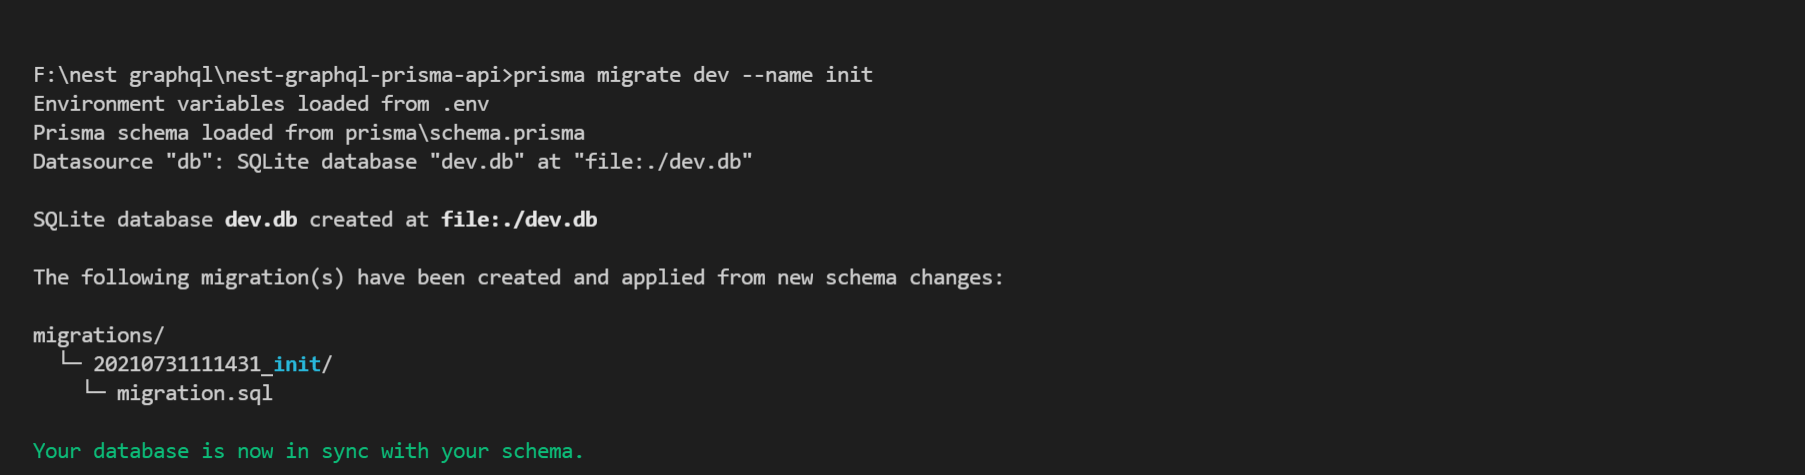
To start the Prisma database migration for our development purpose, we will execute the following command;
prisma migrate dev --name init
From the above command, we are running our first migration in development mode, giving it the name init. If you want to use a name with more than one word, make sure you separate the words with an underscore or hyphen. The command will also check if we have the Prisma client installed. If we don’t, it will install it automatically.
9. Setting, Installing GraphQL packages and adding GraphQL
@nestjs/graphql: For providing interaction between GraphQL and Nest.js.graphql-tools: For providing an interactive GraphQL playground.graphql: For support with native GraphQL setup.ts-morph,@apollo/gateway,apollo-server-express: Works in the background to start the GraphQl server successfully.
To install the above packages, run this command.
npm i @nestjs/graphql graphql-tools graphql ts-morph @apollo/gateway apollo-server-express@^2
Generate GraphQL Schema
Inside the src folder, create a folder posts. In the posts, create a file schema.graphql. In this file, we will define the GraphQL schema as follows:
type Post {
    id: ID!
    title: String!
    content: String!
    published: Boolean!
    createdAt: String!
  }

  input NewPost {
    title: String!
    content: String!
  }

  input UpdatePost {
    id:ID!
    published: Boolean
    title: String
    content: String
  }

  type Query {
    posts: [Post!]!
    post(id: ID!): Post
  }

  type Mutation {
    createPost(input: NewPost): Post!
    updatePost(input: UpdatePost): Post
    deletePost(id: ID!): Post
  }
From above, we are declaring the types and the input.
In the src folder, we will create a generate-typings.ts file that will export types from the .graphql file using @nestjs/graphql. Add the following content to the file.
import { GraphQLDefinitionsFactory } from '@nestjs/graphql';
import { join } from 'path';
const definitionsFactory = new GraphQLDefinitionsFactory();
definitionsFactory.generate({
  typePaths: ['./src/**/*.graphql'],
  path: join(process.cwd(), 'src/graphql.ts'),
  outputAs: 'class',
});
From the above code block, types will be generated from all .graphql files and exported to a graphql.ts file in the src folder. To execute this file, open the terminal of your text editor and execute it using tsc, i.e,
tsc src/generate-typings.ts
This command will create a transpiled Typescript generate-typings.js file. Execute the file using node from the terminal:
node src/generate-typings.js
This will create a graphql.ts file in the src folder. The file contains all exported files conversable with Nest.js.
10. Adding the Prisma service
In the src folder, create a prisma.service.ts file. The file will connect to the Prisma client as follows:
import { INestApplication, Injectable, OnModuleInit } from '@nestjs/common';
import { PrismaClient } from '@prisma/client';

@Injectable()
export class PrismaService extends PrismaClient implements OnModuleInit {
  async onModuleInit() {
    await this.$connect();
  }

  async enableShutdownHooks(app: INestApplication) {
    this.$on('beforeExit', async () => {
      await app.close();
    });
  }
}
The onModuleInit function connects to the Prisma client, which holds the connection to our database. We are also closing down the connection by using a beforeExit event listener.
11. Adding post service
In the src/posts folder, Create a posts.service.ts file to contain the logic as follows:
import { Injectable } from '@nestjs/common';
import { PrismaService } from 'src/prisma.service';
import { Post } from '@prisma/client';
import { NewPost, UpdatePost } from 'src/graphql';

@Injectable()
export class PostService {
  constructor(private prisma: PrismaService) {}

  // Get a single post
  async post(id: string): Promise<Post | null> {
    return this.prisma.post.findUnique({
      where: {
        id: parseInt(id),
      },
    });
  }

  // Get multiple posts
  async posts(): Promise<Post[]> {
    return this.prisma.post.findMany({});
  }

  // Create a post
  async createPost(input: NewPost): Promise<Post> {
    return this.prisma.post.create({
      data: input,
    });
  }

  // Update a post
  async updatePost(params: UpdatePost): Promise<Post> {
    const { id, published, title, content } = params;
    return this.prisma.post.update({
      where: {
        id: parseInt(id),
      },
      data: {
        ...(published && { published }),
        ...(title && { title }),
        ...(content && { content }),
      },
    });
  }

  // delete a post
  async deletePost(id: string): Promise<Post> {
    return this.prisma.post.delete({
      where: {
        id: parseInt(id),
      },
    });
  }
}
The above file has all the logic we need to support our operations.
12. Adding post resolvers
To expose our resolvers, we need to create a posts.resolvers.ts file in src/posts. The resolvers will be as follows:
import { Resolver, Query, Mutation, Args } from '@nestjs/graphql';
import { PostService } from './posts.service';
import { Post, NewPost, UpdatePost } from 'src/graphql';

@Resolver('Post')
export class PostResolvers {
  constructor(private readonly postService: PostService) {}

  @Query('posts')
  async posts() {
    return this.postService.posts();
  }

  @Query('post')
  async post(@Args('id') args: string) {
    return this.postService.post(args);
  }

  @Mutation('createPost')
  async create(@Args('input') args: NewPost) {
    return this.postService.createPost(args);
  }

  @Mutation('updatePost')
  async update(@Args('input') args: UpdatePost) {
    return this.postService.updatePost(args);
  }

  @Mutation('deletePost')
  async delete(@Args('id') args: string) {
    return this.postService.deletePost(args);
  }
}
The above file exposes all our queries and mutations.
13. Connecting Prisma service, post-service, and post resolvers with providers
For our resolvers and services to be accessed, we need to encapsulate them in a module as providers. We thus create a posts.module.ts file inside the src/posts folder and add the following:
import { Module } from '@nestjs/common';
import { PostResolvers } from './posts.resolvers';
import { PostService } from './posts.service';
import { PrismaService } from 'src/prisma.service';

@Module({
  providers: [PostResolvers, PostService, PrismaService],
})
export class PostModule {}
In the file above, we are simply adding the PostResolvers and PostService as providers.
14. Adding post Mutations
Edit the src/app.module.ts file as follows:
import { Module } from '@nestjs/common';
import { GraphQLModule } from '@nestjs/graphql';
import { PostModule } from './posts/posts.module';

@Module({
  imports: [
    PostModule,
    GraphQLModule.forRoot({
      typePaths: ['./**/*.graphql'],
    }),
  ],
})
export class AppModule {}
In the file above, we are exposing the GraphQLModule and PostModule in the module’s imports array. Also, we are specifying the typePaths for the GraphQLModule.
15. Running the Application
At this point, we are ready to run our application. From the terminal of your text editor, execute the following command to start the application.
npm run start:dev

The following command will start your project in development mode. In case you encounter errors, make sure you revisit the steps before proceeding further.
From your browser, open a tab and enter http://localhost:3000/graphql to open the GraphQL playground.
16. Testing the Application with GraphQL playground
Now, it’s time for us to consume the API. We will do it step by step as follows:
Creating a post
In the left pane of the playground, input the following:
mutation generatePost{
    createPost(input:{
      title:"A new second title"
      content:"A new second content"
    }){
      id
      title
      content
      published
      createdAt
    }
}
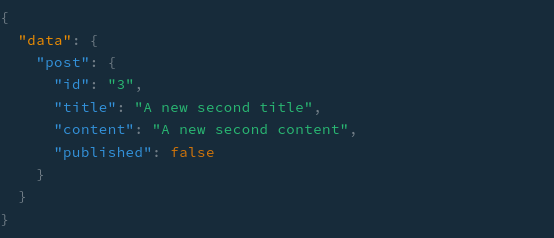
Hit the play button at the center and observe the results on the right side.

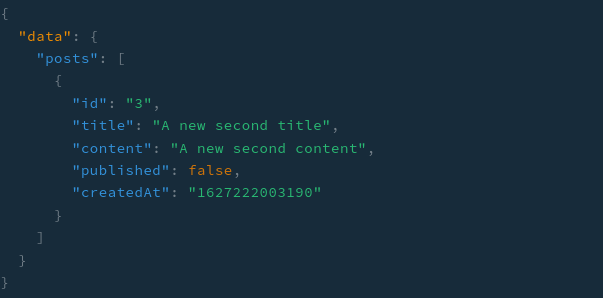
Fetching posts
Open a separate tab on the playground and enter the following on the left pane:
query GetPosts{
    posts{
      id
      title
      content
      published
      createdAt
    }
}
Hit the play button at the center and observe the results on the right side.
Fetching a single post
Open a separate tab on the playground and enter the following on the left pane:
query GetPost{
    post(id:1){
      id
      title
      content
      published
    }
}
Enter the id of the post you want to get in the id parameter and then hit the play button at the center. Observe the results on the right side.
Updating a post
Open a separate tab on the playground and enter the following on the left pane:
mutation updatePost{
    updatePost(input:{
      id:1,
      published:true
    }){
      id
      title
      content
      published
    }
}
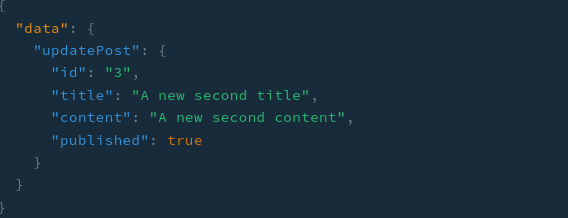
Enter the id of the post you want to update. For example, in the above mutation, we are just updating the published field. You can also edit the title and content field in the same way. Hit the play button at the center and observe the results on the right pane.
Deleting a post
Open a separate tab on the playground and enter the following on the left pane:
mutation deletePost{
    deletePost(id:1){
      id
      title
      content
      published
    }
}
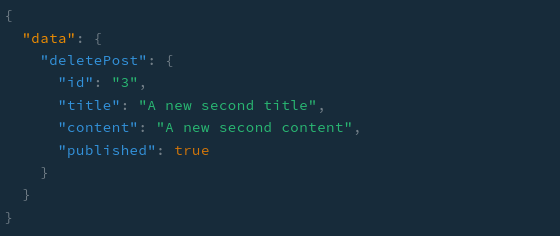
Enter the id of the post you want to delete on the id parameter. Then, hit the play button at the center and observe the results on the right side.
17. Conclusion
At this point, we have created a GraphQL API using Prisma and Nest.js consisting of all CRUD operations.
To gain more insight knowledge on Prisma, Nest.js, and GraphQL, check out the following resources:
You can also find the finalized code on GitHub.
Happy coding!