
Table of Contents
PayPal is an online payment platform that allows users to transfer funds worldwide. PayPal makes it easier for merchants to accept online payments through their websites. PayPal provides processing for both Visa and Mastercard payments.
We will learn how to integrate Paypal checkout into a Node.js application. We will also render a response to inform the user when their transaction was canceled.
1. Project setup
Create a directory named paywave. Change the working directory to the paywave directory created above by executing the command below.
$ mkdir paywave
$ cd paywave
To create a Node.js application in the paywave directory we created above, execute the command below.
$ npm init
npm initcommand adds thepackage.jsonfile to ourpaywavedirectory, making it a Node.js application.
Execute the commands below to install express, and paypal-rest-sdk into our project.
$ npm i express
$ npm i paypal-rest-sdk
- In the
paywavedirectory, create a new file namedindex.js. - Add the code snippets below to the
index.jsfile created above.
const express = require('express');
const paypal = require('paypal-rest-sdk');

paypal.configure({
  'mode': 'sandbox', //sandbox or live
  'client_id': '####yourclientid######',
  'client_secret': '####yourclientsecret#####'
});

const app = express();

app.get('/', (req, res) => res.sendFile(__dirname + "/index.html"));


app.listen(PORT, () => console.log(`Server Started on ${PORT}`));
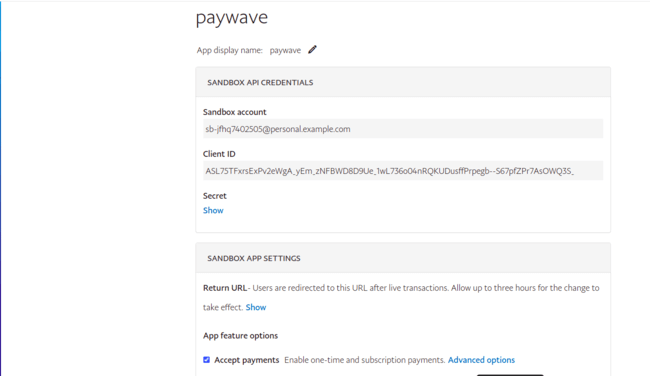
To obtain the client_id and client_secret, login into your PayPal developer accounthere and create a new app as shown in the image below.
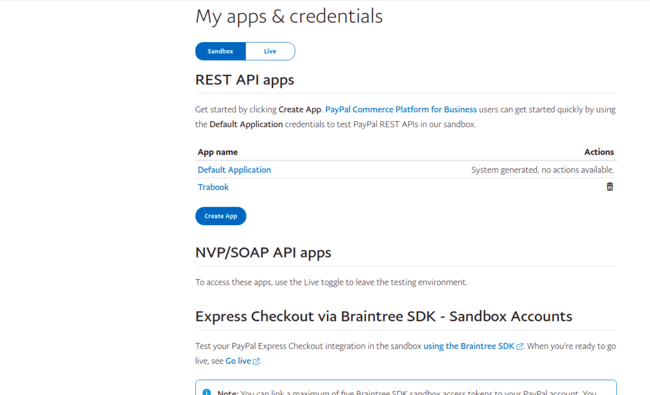
After creating the app, click on the app name to navigate to the app’s detail page, where you will obtain the client_id and client_secret.
On the app details page, copy the client_id and client_secret into the index.js file we created above.
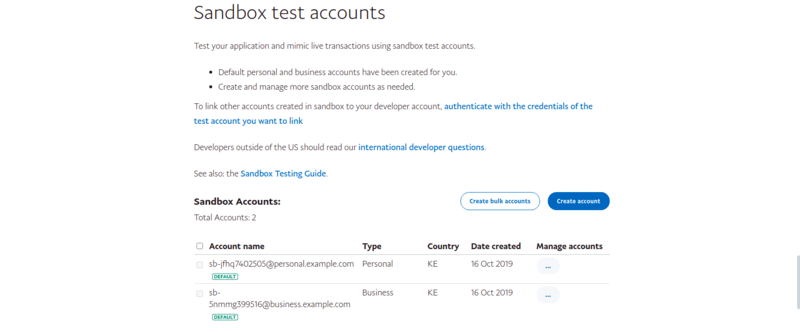
2. Creating a sandbox account
Select the account menu item on the sidebar as shown in the image below.

Create a new account that you will use when making the payments in the sandbox account.
3. Checkout view
- In the
paywavedirectory, create a file namedindex.html. - Add the code snippet below to the
index.html.
<!DOCTYPE html>
<html lang="en">
<head>
  <meta charset="UTF-8">
  <meta name="viewport" content="width=device-width, initial-scale=1.0">
  <meta http-equiv="X-UA-Compatible" content="ie=edge">
  <title>PayPal Node App</title>
</head>
<body>
  <h1>Nike shoes </h1>
  <h2>Buy For $25</h2>
  <form action="/pay" method="post">
    <input type="submit" value="Buy">
  </form>
</body>
</html>
The code snippet above the name of the item, buy button, and its price to the user. Whenever a user clicks on the buy button, a Paypal checkout will be initiated.
4. Payment handler
In the index.js file, add the code snippet below.
app.post('/pay', (req, res) => {
  const create_payment_json = {
    "intent": "sale",
    "payer": {
        "payment_method": "paypal"
    },
    "redirect_urls": {
        "return_url": "http://localhost:3000/success",
        "cancel_url": "http://localhost:3000/cancel"
    },
    "transactions": [{
        "item_list": {
            "items": [{
                "name": "Redhock Bar Soap",
                "sku": "001",
                "price": "25.00",
                "currency": "USD",
                "quantity": 1
            }]
        },
        "amount": {
            "currency": "USD",
            "total": "25.00"
        },
        "description": "Washing Bar soap"
    }]
};

paypal.payment.create(create_payment_json, function (error, payment) {
  if (error) {
      throw error;
  } else {
      for(let i = 0;i < payment.links.length;i++){
        if(payment.links[i].rel === 'approval_url'){
          res.redirect(payment.links[i].href);
        }
      }
  }
});

});
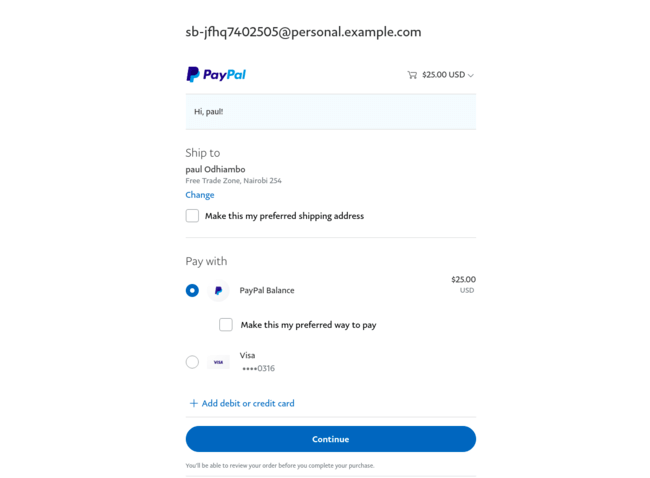
The code snippet above contains the payment details that Paypal uses to initiate a transaction. If the payment initiated successfully, then the user is presented with the page shown in the image below to complete the transaction.
5. Success transaction handler
Whenever the transaction is successful, we should get the transaction details from Paypal. The transaction details obtained from Paypal can be saved in the database for future references. In our case, we print a log of the transaction in the terminal.
In the index.js file add the code snippets below to get transaction details from Paypal whenever a transaction is successful.
app.get('/success', (req, res) => {
  const payerId = req.query.PayerID;
  const paymentId = req.query.paymentId;

  const execute_payment_json = {
    "payer_id": payerId,
    "transactions": [{
        "amount": {
            "currency": "USD",
            "total": "25.00"
        }
    }]
  };

// Obtains the transaction details from paypal
  paypal.payment.execute(paymentId, execute_payment_json, function (error, payment) {
      //When error occurs when due to non-existent transaction, throw an error else log the transaction details in the console then send a Success string reposponse to the user.
    if (error) {
        console.log(error.response);
        throw error;
    } else {
        console.log(JSON.stringify(payment));
        res.send('Success');
    }
});
});
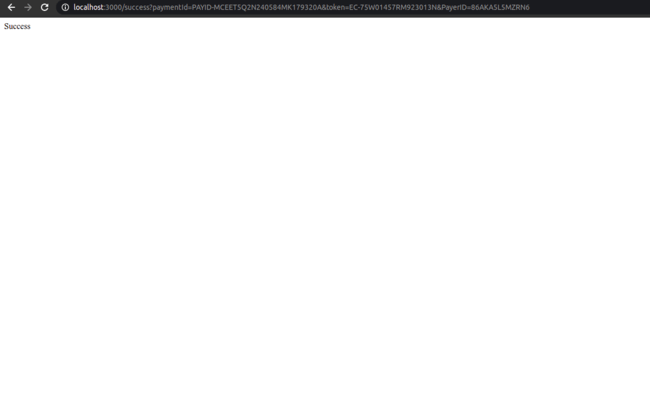
If the transaction was successful, then a success page will be displayed to the user as shown in the image below.
6. Transaction cancellation
When a user cancels the transaction, we need to render a response to inform the user that the transaction was successfully canceled. To handle the cancellation, add the code snippet below into the index.js file.
app.get('/cancel', (req, res) => res.send('Cancelled'));
- The above route returns a
Cancelledstring to the user whenever a transaction cancellation is successful.
7. Conclusion
Now that you have learned how to integrate Paypal checkout into a Node.js application, add a success and error page to the application we created.
The full source for the application can be downloaded here.
Happy coding!