
Table of Contents
In this article we are going to learn about EJS templating engine, it is one of the most used templating engines in the Node.js ecosystem. In the Node.js and Express ecosystem, there is a tone of templating engines that makes it possible to create a web interface for our Node.js and Express applications.
Whenever we develop full-stack web applications, there comes a need to create a web interface where users can interact with the site.
We are going to learn how to use EJS template tags and partials, create a website that reuses a footer and implements conditional statements within the EJS template.
1. Prerequisites
To follow this article along the reader will need:
- A basic knowledge of Node.js.
- Node.js installed on your computer.
2. Project setup
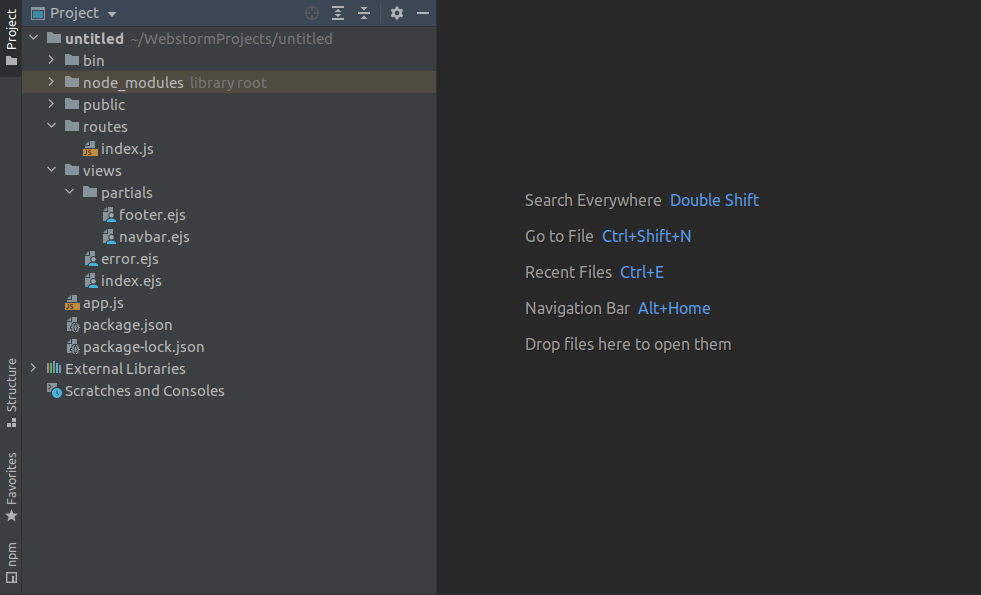
viewscontains theEJSfiles and thepartialscontains the partialEJSfiles.app.jsfile contains the express configurations and routes.package.jsoncontains the list of dependencies we will use in the application.publiccontains the front end assets (HTML and CSS)wwwcontains the server startup script.
Let’s create a directory for our project by executing the commands below.
$ mkdir demo
$ cd demo
Execute the command below to initialize the package.json and install express and ejs into our project.
$ npm init -y
$ npm install --save express ejs
3. EJS views and partials
EJS partials make it possible to create reusable views. In a real-world application, there can be over 100 HTML files with the same footer. To reduce the development time of such a website, the partials become handy.
With the partials, we can create a single footer partial file and reuse it across all the pages on the website. Partials improve productivity because in the case of maintenance, changing the code at a single point changes all the occurrences in the pages reusing the partial.
- In the root project directory, create a directory named
views. - In the
viewsdirectory created above, create a directory namedpartials. - Create a file named
footer.ejsin thepartialsdirectory and add the code snippet below. We will import the footer file into the footer section of our index file.
<footer class="footer">
    <p>© 2021 demo.</p>
</footer>
- Create a file named
navbar.ejsin thepartialsdirectory and add the code snippet below. We will import this file into the navbar section of our index file.
<div class="header clearfix">
    <nav>
        <ul class="nav nav-pills pull-right">
            <li role="presentation"><a href="/">Home</a></li>
        </ul>
        <h3 class="text-muted">Node.js Blog</h3>
    </nav>
</div>
- In the
viewsdirectory, create a file namedindex.ejsand add the code snippet below. This file will contain theEJScode for our index page.
<!DOCTYPE html>
<html>
<head>
    <meta charset="utf-8">
    <title>Node.js Blog</title>
    <link rel="stylesheet" href="https://maxcdn.bootstrapcdn.com/bootstrap/3.3.6/css/bootstrap.min.css">
    <style>
        body {
            padding-top: 20px;
            padding-bottom: 20px;
        }
        .jumbotron {

            margin-top: 10px;
        }
    </style>
</head>
<body>
<div class="container">
    <%- include('partials/navbar') %>
    <div class="jumbotron">
        <h1>All about Node</h1>
        <p class="lead">Check out our articles below!</p>
    </div>
    <div class="row">
        <div class="col-lg-12">
            <div class="list-group">
                <!-- loop over blog posts and render them -->
                <% posts.forEach((post) => { %>
                    <a href="#" class="list-group-item">
                        <h4 class="list-group-item-heading"><%= post.title %></h4>
                        <p class="list-group-item-text"><%= post.author %></p>
                    </a>
                    <br>
                    <br>
                <% }) %>
            </div>
        </div>
    </div>
    <%- include('partials/footer') %>
</div>
</body>
</html>
<%- include('partials/navbar') %>includes the navbar into our application from thenavbar.ejsfile we created in thepartilsdirectory above.<%- include('partials/footer') %>includes the footer into the index file from thefooter.ejsfile.
NOTE It is possible to inlcude JavaScript logic in our EJS files.
   <% posts.forEach((post) => { %>
                    <a href="#" class="list-group-item">
                        <h4 class="list-group-item-heading"><%= post.title %></h4>
                        <p class="list-group-item-text"><%= post.author %></p>
                    </a>
                    <br>
                    <br>
                <% }) %>
The code snippet above loops through the posts array that will be passed from the IndexRoute file. For each post, a title, and the author name displays within the posts div.
4. Routes
In the routes folder, we store the JavaScript files containing the logic that is executed whenever a certain route is visited.
In our case whenever you visit 121.0.0.1:5000/ when the development server is running, the logic in our IndexRoute.js file will be executed to respond to the request.
In the root project directory, create a file named IndexRouter.js and add the code snippets below into it.
const express = require('express');
const router = express.Router();
const posts = [

    {
        id: 1,
        author: 'John',
        title: 'Templating with pug',
        body: 'Blog post 1'
    },

    {
        id: 2,
        author: 'Peter',
        title: 'React: Starting from the Bottom',
        body: 'Blog post 2'
    },

    {
        id: 3,
        author: 'Violet',
        title: 'Node.js Streams',
        body: 'Blog post 3'
    },

    {
        id: 4,
        author: 'Condy',
        title: 'Node.js Events',
        body: 'Blog post 4'
    }

]

/* GET home page. */
// Returns a list of posts to the view.
router.get('/', function (req, res, next) {
    res.render('index', {title: 'Express', posts: posts});
});

module.exports = router;
In the code snippet above, we create an array of posts that we will display whenever a user visits the route /.
module.exports = router; exports the file so that we can import it in the app.js file.
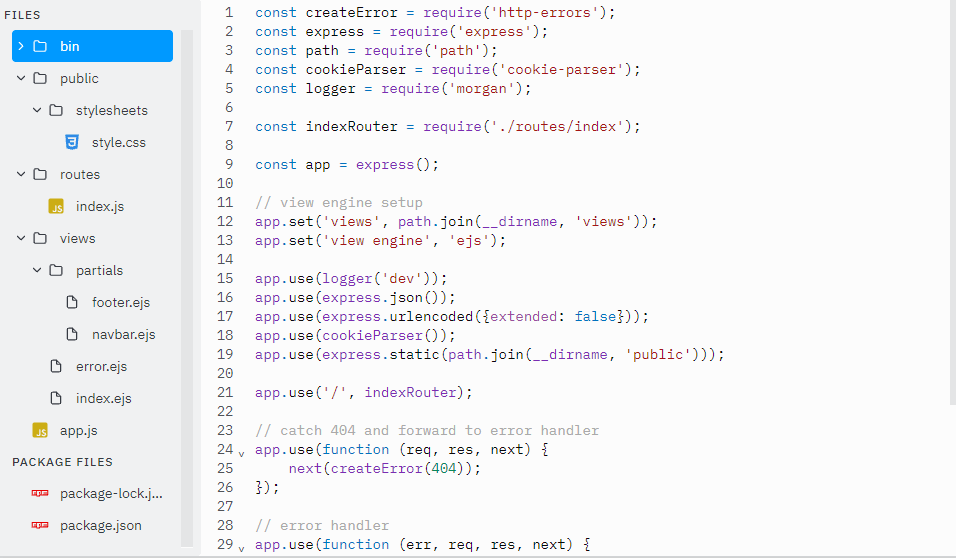
5. App.js
All configurations and the main application routes go into this file.
const express = require('express');
const indexRouter = require('./routes/index');
const app = express();

// view engine setup
app.set('views', path.join(__dirname, 'views'));
app.set('view engine', 'ejs');
app.use('/', indexRouter);

app.listen(3000)
console.log('listening on port 3000')
const app = express();creates an instance of the express, making our application an express application.app.set('views', path.join(__dirname, 'views'));sets the view directory toviews. This is where all ourEJSfiles will be stored.app.set('view engine', 'ejs');sets the view engine toEJS.app.listen(3000)starts the development server.
Start the server by executing the command below.
$ node app.js
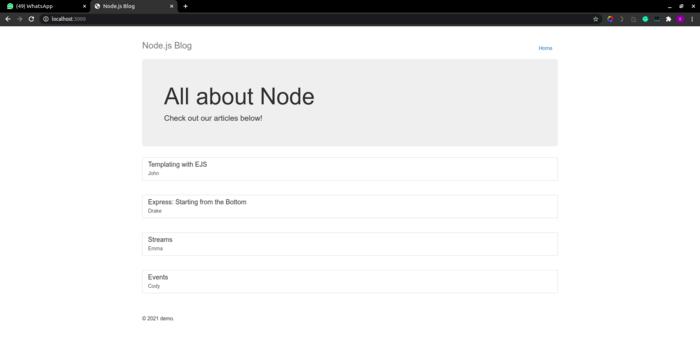
When we navigate to localhost:3000/ in our browser, a page with all the posts is displayed as shown below.
6. Conclusion
Now that you have learned how to use EJS template tags and partials, create a website that reuses a footer and implements conditional statements within the EJS template.
The full source code can be downloaded here:
Happy coding!