
Table of Contents
- 1. Prerequisites
- 2. Steps to follow
- 3. Step 1: Generate a CA certificate
- 4. Step 2: Generating a certificate
- 5. Step 3: Creating a Node.js Express server
- 6. Step 4: Test in a browser and API client
- 7. Step 5: Importing CA Certificate to the browser
- 8. Step 6: Configuring and testing the API Client
- 9. Conclusion
This article will take you through the process of provisioning SSL certificates for local servers. Building a web application for a production server requires local testing before deployment. It is also possible to run the web application in a local environment and have it accessible over the internet.
Introduction
It is equally important that we get an SSL certificate for the same, for the users to trust the site and to remove the ‘Not Secure’ message at the address bar.
1. Prerequisites
To follow this article along – it will be helpful to have the following:
- Node.js installed.
- Postman Installed.
- Operating System can either be Windows installed with Cygwin or Linux based operating system.
- Working knowledge of Linux bash commands, Node.js and Express.
- Working Firefox web browser installed.
- A text editor – VS Code.
2. Steps to follow
- Create a certificate.
- Sign an SSL certificate for localhost.
- Develop a server using Node.js that is being served up using a localhost SSL certificate.
- Configure the Firefox web browser and the Postman API client to allow certificates that we have signed as the CA.
- Access the localhost with HTTPS securely from the browser or API client.
3. Step 1: Generate a CA certificate
SSL certificates are usually signed by third-party companies known as Certificate Authority (CA). They are trusted issuers of the internet and do their due diligence on whether the site does what it is supposed to do before issuing any certificate.
However, there is no CA issues certificate for localhost, simply because no one owns localhost. In our case, we will sign the certificate just like the way CA does.
First step will be to generate a root CA certificate using below commands:
$ mkdir cert
$ cd cert
$ mkdir CA
$ cd CA
$ openssl genrsa -out CA.key -des3 2048
The above commands will generate a private key and request a simple passphrase for the key. The user will enter the passphrase and re-enter it again for confirmation.
Next, we will generate a root CA certificate using the key generated, that will be valid for ten years in our case. The passphrase for the key and certificate info will be requested. The user can input the desired certificate info or leave it as default.
Run the command below to achieve the what we discussed above:
$ openssl req -x509 -sha256 -new -nodes -days 3650 -key CA.key -out CA.pem
As of now, in our cert/CA folder, we have two files, CA.key and CA.pem.
4. Step 2: Generating a certificate
Now have created the CA key and CA certificate. It is possible to sign SSL certificates since we already created CA.
Next, in the cert/CA directory create a new directory, localhost. Inside localhost create a new file, localhost.ext.
$ mkdir localhost
$ cd localhost
$ touch localhost.ext
The information that needs to be written into the signed SSL certificate will be contained in this localhost.ext file.
The file will appear as below:
authorityKeyIdentifier = keyid,issuer
basicConstraints = CA:FALSE
keyUsage = digitalSignature, nonRepudiation, keyEncipherment, dataEncipherment
subjectAltName = @alt_names

[alt_names]
DNS.1 = localhost
IP.1 = 127.0.0.1
Note that the certificate will work for localhost and also 127.0.0.1. One can decide to add more domains or IP addresses to the file but ensure to edit the /etc/hosts file to have those domains point to the local machine (127.0.0.1).
Next will be to generate a key and use the key to generate a CSR (Certificate Signing Request) using the command below.
$ openssl genrsa -out localhost.key -des3 2048
The command will generate the localhost private key, and the passphrase will be requested for the key, and the user will be asked to confirm it again.
Next will be to generate CSR using the key, and then the passphrase create above will be requested. Any other details requested can be left as default or keyed in as appropriate.
Note the challenge password requested; one can enter anything.
Use the below command to generate the CSR:
$ openssl req -new -key localhost.key -out localhost.csr
Now with this CSR, we can request the CA to sign a certificate as below. Note that the paths for CA.key and CA.pem files are dependent on where the user is running commands from. In this case, the commands below are ran from /cert/CA/localhost.
$ openssl x509 -req -in localhost.csr -CA ../CA.pem -CAkey ../CA.key -CAcreateserial -days 3650 -sha256 -extfile localhost.ext -out localhost.crt
This command takes in the CSR (localhost.csr), the CA certificate (CA.pem and CA.key), and the certificate extensions file (localhost.ext). Those inputs generate a localhost.crt certificate file, valid for ten years.
The server will need the localhost.crt certificate file, and the decrypted key since our localhost.key is in encrypted form.
We will need to decrypt the localhost.key and store that file too as below:
$ openssl rsa -in localhost.key -out localhost.decrypted.key
5. Step 3: Creating a Node.js Express server
To test whether the snippets above are working as expected, we have to create a Node.js Express server that outputs a success message.
Going back to our cert directory, we will initialize a Node.js project and add the express and HTTPS packages using the commands below:
$ npm init -y
$ npm i express https
$ touch index.js
Then edit the index.js file as below:
const fs = require('fs');
const key = fs.readFileSync('./CA/localhost/localhost.decrypted.key');
const cert = fs.readFileSync('./CA/localhost/localhost.crt');

const express = require('express');
const app = express();

app.get('/', (req, res, next) => {
  res.status(200).send('Hello world!');
});

const https = require('https');
const server = https.createServer({ key, cert }, app);

const port = 3000;
server.listen(port, () => {
  console.log(`Server is listening on https://localhost:${port}`);
});
Run the server using the below command:
$ node index.js
A success message: Server is Listening on https://localhost:3000 will be displayed on the console.
6. Step 4: Test in a browser and API client
Now that our server is serving up our SSL, we can try our https://localhost:3000 link in our Firefox browser as shown below:
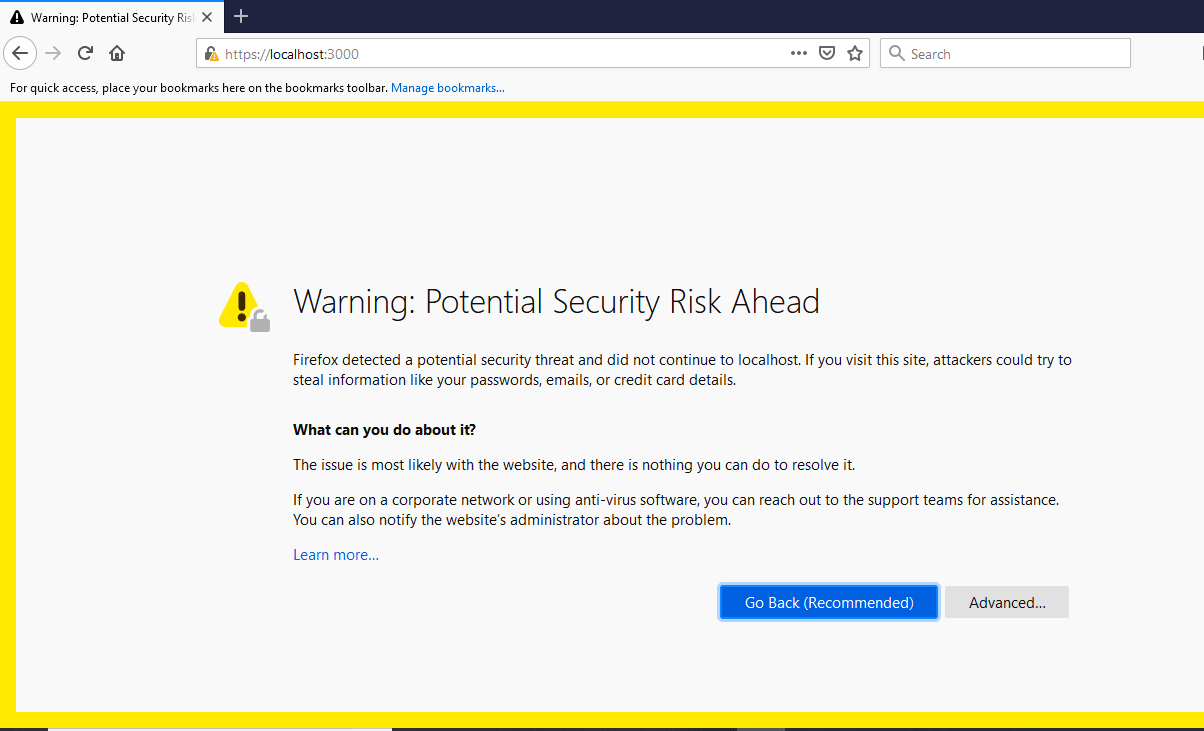
We are close but not finished yet. Even after serving up our localhost with SSL and inspecting the signed certificate, Firefox would not trust the CA that signed this certificate, which is correct; we cannot be trusted as a CA.
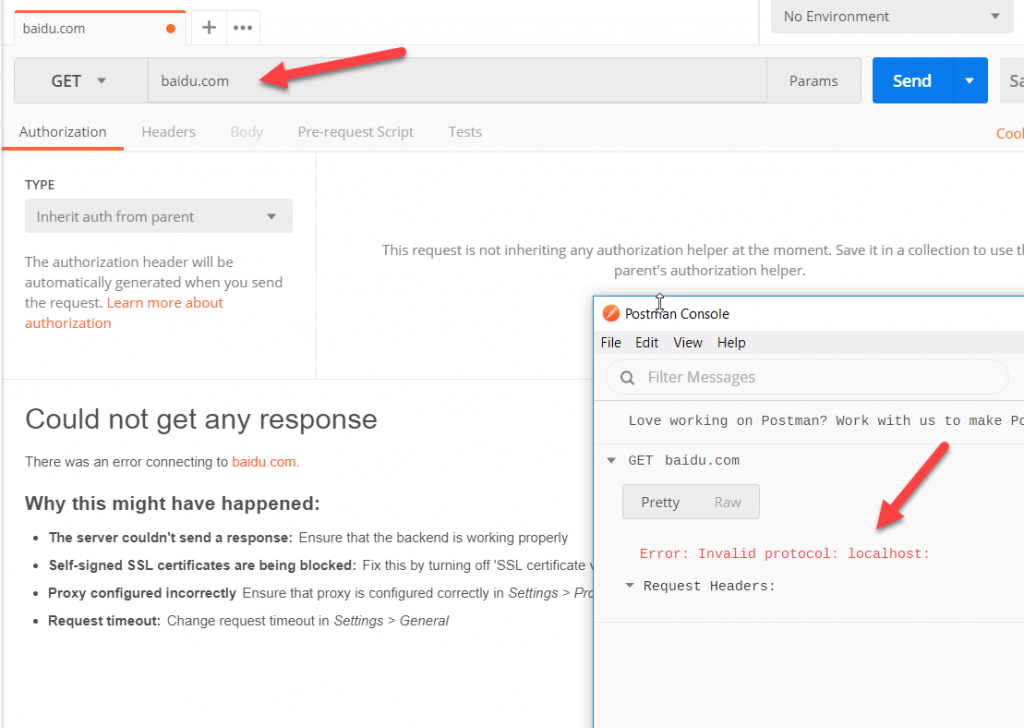
To deal with this, we first test our link with Postman as below:
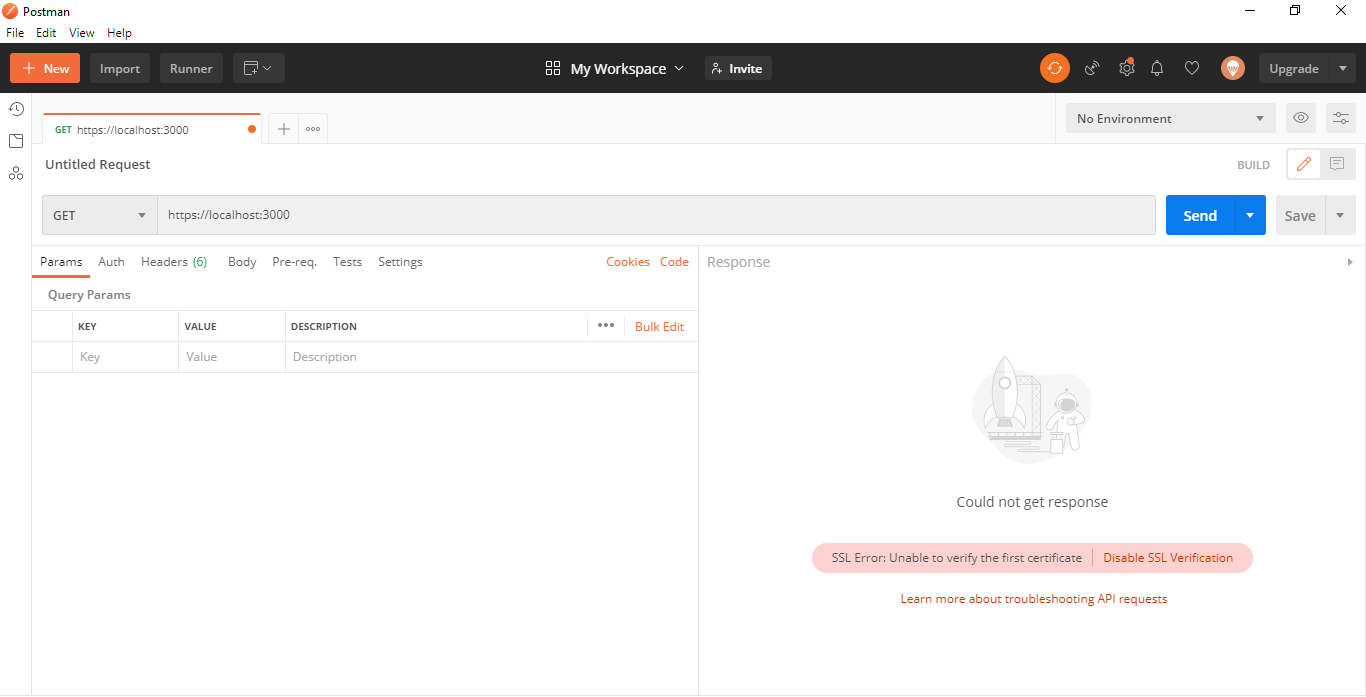
As can be seen above, the SSL certificate cannot be verified.
7. Step 5: Importing CA Certificate to the browser
For the browser to trust the CA certificate we created, there is a need to import the certificate. In Firefox, open Options, and navigate to Privacy and Security and click on View Certificates as shown below:

Then click on import and choose the CA.pem and check the checkbox to trust the CA that has been just imported, and then click Ok.
Next, we will test it in Firefox as demonstrated below:
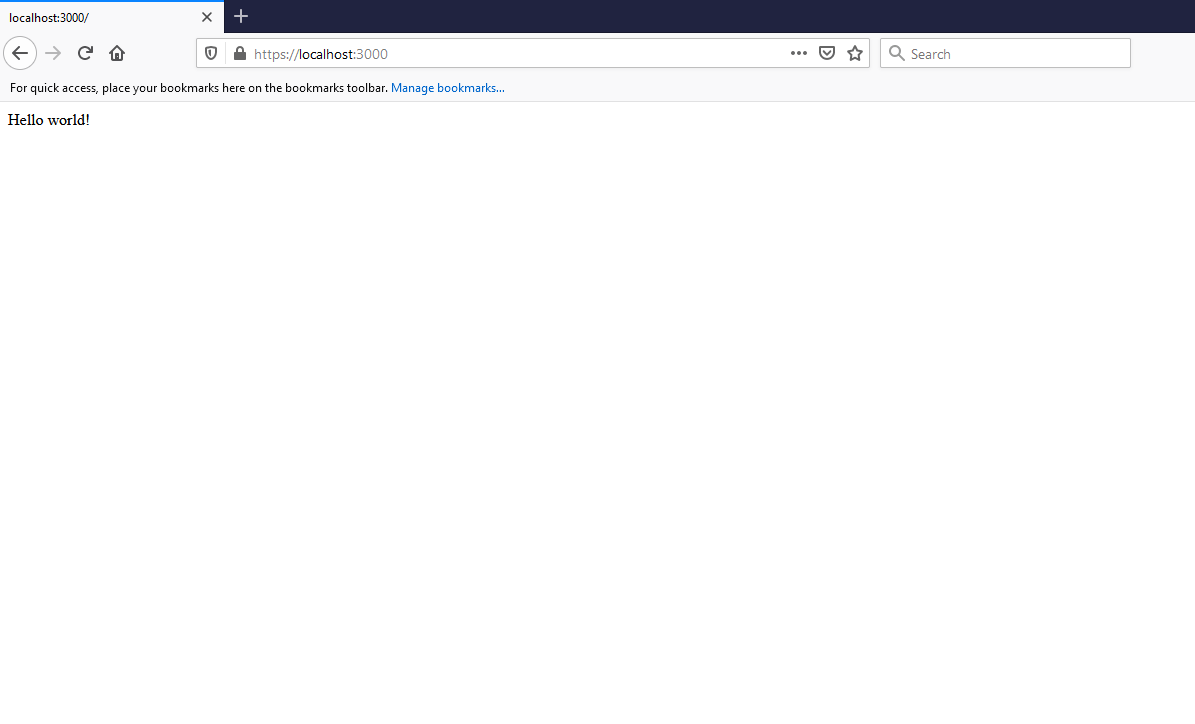
The browser is now ok, and they trust our CA and the certificate.
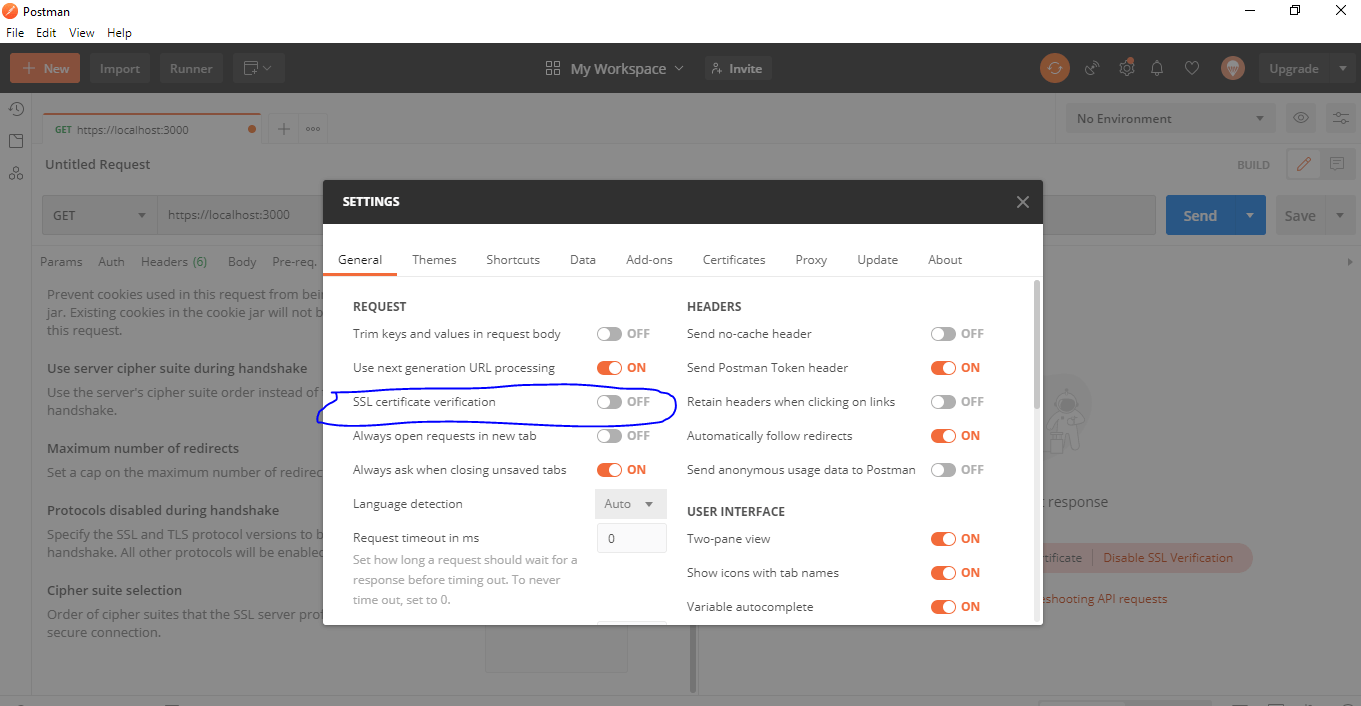
8. Step 6: Configuring and testing the API Client
The process of configuring the API Client is the same as the browser, and the difference is one has to disable certificate validation. In Postman settings, make sure that SSL certificate verification is turned off.
Then we resend the request in Postman, and the results will be:

We have been able to get a 200 OK message, which is good at this stage. However, the problem is we still have red security warning because our SSL certificate is off.
The warning in details will look like this below:
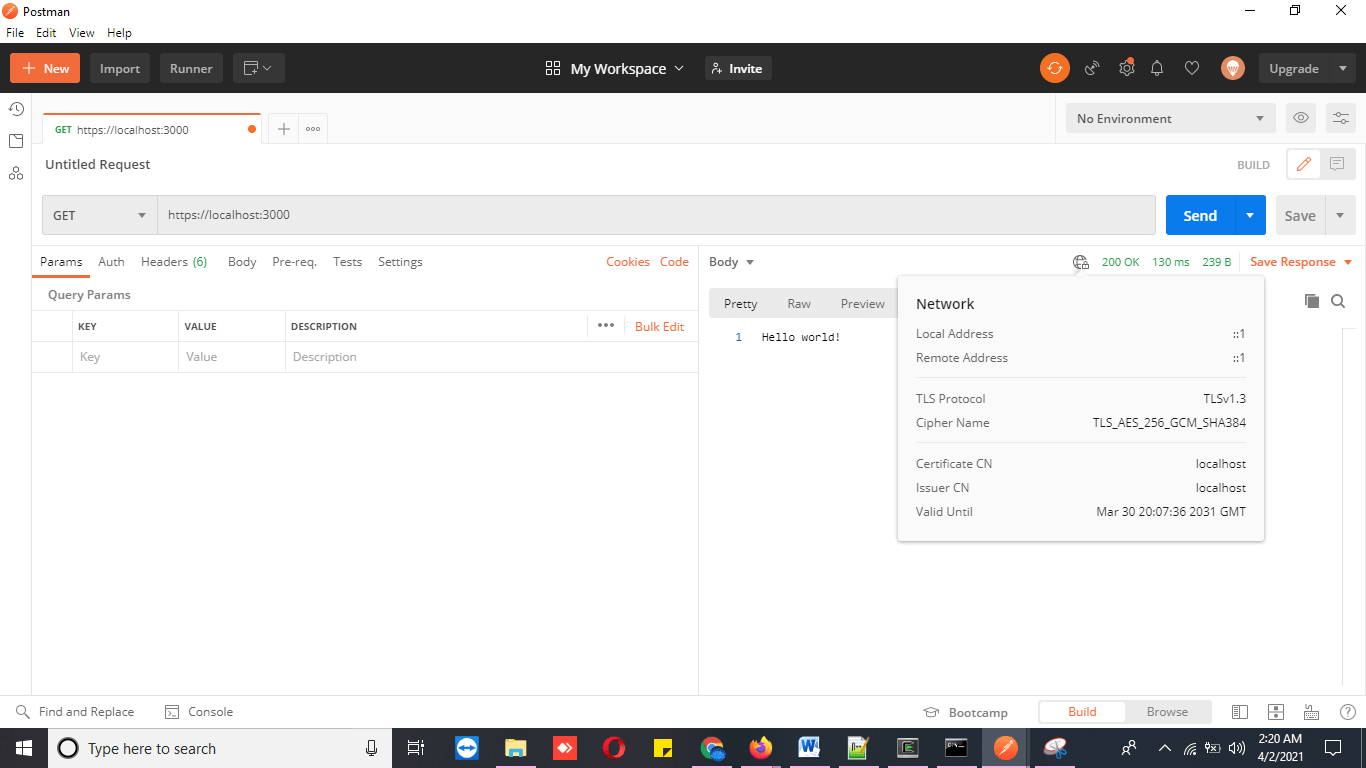
To solve this issue, we can add our CA to Postman. In the Postman settings, make sure that CA certificates are turned on and select the CA.pem file.
Then rerun the request as shown below; this time, we will have a secure 200 OK message.
9. Conclusion
In this guide, we have seen it is possible to have localhost served up with SSL. With the guide, we have been able to set the CA and used it to sign the SSL certificate. We changed the browser settings as well as the API client settings for them to accept the certificate.
Note it is never advisable to add certificates to the certificate list thoughtlessly. Malicious users everywhere will pose as a CA and trick the user into accepting their websites as authentic, leading to a serious security breach.
The process can help developers host their sites on local servers or forwarded ports to assure their visitors that the site is safe and secure.
The files and code snippets used in this article can be accessed at this GitHub Repo.
Happy coding!