
Table of Contents
In this tutorial, we’ll be discussing the concepts of the Node.js Express generator tool. The Express-generator package is a utility that provides a command-line tool you can use to scaffold your project – ie create boilerplate folder structure, files and code.
1. Introduction
It’s a package that you can use to simplify your development time while developing your Node.js web applications. As the name suggests, an Express generator is a tool that we’ll be using to generate our application, that otherwise, we would’ve created manually.
2. Objectives
By the end of this tutorial, you should be in a position to generate complete Node.js application folders.
3. Prerequisites
- Node.js installed in your local machine.
- Basic knowledge of Node.js templating engines, in this application we use
pugtemplating engine.
4. Generating Express application
In this section, we will look at the Express generator package, how it’s installed and used to generate folder structure.
Let’s start by creating an express application using Express generator.
npx express-generator --view=pug expressExample
In the above command, we instructed the express-generator to generate an application called expressExample. We then specify the view that we need our application to use, in our case we select pug.
There are many other view template engines that you could find here
Output:
create : expressExample/
   create : expressExample/public/
   create : expressExample/public/javascripts/
   create : expressExample/public/images/
   create : expressExample/public/stylesheets/
   create : expressExample/public/stylesheets/style.css
   create : expressExample/routes/
   create : expressExample/routes/index.js
   create : expressExample/routes/users.js
   create : expressExample/views/
   create : expressExample/views/error.pug
   create : expressExample/views/index.pug
   create : expressExample/views/layout.pug
   create : expressExample/app.js
   create : expressExample/package.json
   create : expressExample/bin/
   create : expressExample/bin/www

   change directory:
     $ cd express examples

   install dependencies:
     $ npm install

   run the app:
     $ DEBUG=expressexample:* npm start
The output above gives you an overview of your project folder structure while the immediate instruction is for us to install dependencies for this application and run the execution.
$ cd expressExample
$ npm install
This will install your node.js application dependencies for a few seconds, depending on your internet speed.
On completion, in your Mac or Linux system, run the following command to start your application:
$ DEBUG=expressexample:* npm start
Output:
> expressexample@0.0.0 start
> node ./bin/www

  expressexample:server Listening on port 3000 +0ms
In case you’re using a Windows based operating system, run the following command to start your application.
> set DEBUG=expressexample:* & npm start
You could also run it on the Windows PowerShell as follows:
PS> $env:DEBUG='expressexample:*'; npm start
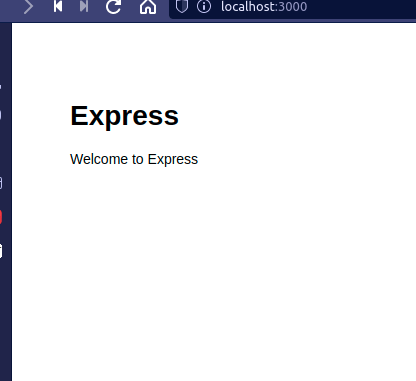
Now open the browser and navigate to the following URL:
http://localhost:3000
Output:
Our final project folder structure:
expressExample
├── app.js
├── bin
│   └── www
├── package.json
├── package-lock.json
├── public
│   ├── images
│   ├── javascripts
│   └── stylesheets
│       └── style.css
├── routes
│   ├── index.js
│   └── users.js
└── views
    ├── error.pug
    ├── index.pug
    └── layout.pug
├── node_modules
    ├── packages you installed on the npm install command
Now that we have a completely well-structured application, let’s take a look at an example of how we can use these generated files to create an application.
Open the index.pug file on “ directory and add the following:
extends layout

block content
  h1= title
  p This is my first express application generated by the Express Generator package
  p To print this view, you require knowledge using Pug
Now open your app.js in your project directory and modify as shown below:
...............................................
var createError = require('http-errors');
// we are importing the express package
const express = require('express');
// this line imports the path
const path = require('path');

// these packages will aid in application routing
const homePageRouter = require('./routes/home');
const studentEngineeringRouter = require('./routes/engineering-education');

//these packages are used to parse cookie values
const cookieParser = require('cookie-parser');
const logger = require('morgan');


const app = express();

// the following lines are used to setup view templates for our application
// you can also set views of your choice here.

app.set('views', path.join(__dirname, 'views'));
app.set('view engine', 'pug');

// we directing the application of which pages to use
app.use(logger('dev'));
app.use(express.json());
app.use(express.urlencoded({ extended: false }));
app.use(cookieParser());
app.use(express.static(path.join(__dirname, 'public')));

app.use('/home', homePageRouter);
app.use('/engineering-education', studentEngineeringRouter);

// this method catches error Not Found
app.use(function(req, res, next) {
  next(createError(404));
});

app.use(function(err, req, res, next) {

  res.locals.message = err.message;
  res.locals.error = req.app.get('env') === 'development' ? err : {};

  res.status(err.status || 500);
  res.render('error');
});

module.exports = app;
You’ll notice that you just modified the routes and any other feature on the Express generated application as a normal Node.js initialised app.
5. Conclusion
In this tutorial, we’ve discussed how to generate an Node.js-express application using the express generator. We generated a project structure and started our application on the server and displayed an ouput. We’ve also seen how we can modify this application to suit our needs.
As we saw the express-generator package is a utility that provides a command-line tool you can use to scaffold your project – like creating boilerplate folder structure, files, and code.
Happy coding!