
Table of Contents
In this guide, you will build a Node.js REST API with the Express Framework, expose it to the internet with Ngrok and make test requests to it on Postman.
1. Introduction
Web services based on REST Architecture are known as RESTful web services. These web services use HTTP methods to implement the concept of REST architecture. A RESTful web service usually defines a URI which provides resource representation such as JSON and set of HTTP Methods.
2. Prerequisites
Before you begin this guide you’ll need the following:
- A non-root user with sudo privileges on Ubuntu 18.04
- Node.js installed.
- Npm installed.
- Postman installed.
- Ngrok executable downloaded.
3. Step 1 — Build and Run an Express Server with Node.js
In this step, you will write up an Express server with Node.js and run it locally.
First, Setup Express. After the setup you should have one directory node_modules and two files package.json & package-lock.json.
Next, you will write a simple “Hello World” app. Create an index.js file and add the code below to it.
const express = require('express')
const app = express()
const port = 3000

app.get('/', (req, res) => {
  res.end('Hello World!');
});

app.listen(port, () => {
    console.log(`app listening at http://localhost:${port}`)
  });
Finally, you should run the server with a command that tells Node.js to run your Express sever:
node index.js
Opening http://localhost:3000/ should return a “Hello World” message as expected.
Stop the server by running CTRL + C.
In the next step, you will add an API endpoint to your server.
4. Step 2 — Create a GET Endpoint
In this step, you are going to create an endpoint that returns a list of all the movies stored in a JSON file.
Let’s consider that you have a JSON database of movies in a file named movies.json that lies in the same directory as your index.js file.
[
    {
      "id": 1,
      "title": "Star girl"
    },
    {
      "id": 2,
      "title": "Five feet apart"
    },
    {
      "id": 3,
      "title": "Fifty shades of Grey"
    },
    {
      "id": 4,
      "title": "Fifty shades of Grey"
    }
]
First, you would need to read the file contents and then return the data obtained to the client that made the GET request to your server.
We will make use of the fs module to read the file. How to do this is shown below.
const express = require('express')
const app = express()
const port = 3000
const fs = require('fs')

app.get('/', (req, res) => {
  res.end('Hello World!');
});

app.get("/list_movies", (req, res) => {
    fs.readFile(__dirname + '/' + 'movies.json', 'utf8', (err, data) => {
        res.end(data);
    });
});

app.listen(port, () => {
    console.log(`app listening at http://localhost:${port}`)
  });
Next, start up the server by running node index.js.
Finally, opening http://localhost:3000/list_movies should return the same data found in the movies.json file, as expected.
Stop the server by pressing CTRL + C.
Congratulations!!! You have managed to build and locally serve a Node.js REST API built with Express!
In the next step, you will expose the server to the internet with Ngrok.
5. Step 3 — Expose Server with Ngrok
In this step, you are going to use Ngrok to expose your localhost server to the internet.
First, get the Express server up and running.
Run node index.js
Next, you’ll need to expose the port the server is running on, which in our case is port 3000.
To do this, we need to run the ngrok executable.
In the directory where the ngrok executable is, run the command below:
./ngrok http 3000
If successful, you should see something similar to the snippet below.
ngrok by @inconshreveable                                                                                                    (Ctrl+C to quit)                                                                                                                                             Session Status                online
Session Expires               7 hours, 59 minutes
Version                       2.3.35
Region                        United States (us)
Web Interface                 http://127.0.0.1:4040
Forwarding                    http://367f23f4ca81.ngrok.io -> http://localhost:3000
Forwarding                    https://367f23f4ca81.ngrok.io -> http://localhost:3000

Connections                   ttl     opn     rt1     rt5     p50     p90
                              0       0       0.00    0.00    0.00    0.00
The snippet above might be a little overwhelming, but once we break it down you’ll feel significantly more comfortable with it.
The first thing you need to note is the URLs to the right of the word “Forwarding”.
Both are HTTP endpoints.
The only difference is one (HTTPS) uses the SSL protocol to ensure security.
The next thing to note is the URL to the right of “Web Interface” which is a web variant of what you see above.
Then, you see the counter to the right of “Session Expires”, which is how long the exposed URLs will be valid if you don’t stop the Ngrok service.
Finally, once you start making requests to the server, a listing of every request will appear under the heading “HTTP Requests”.
You are now ready to test out your server!!!
In the next step, you will use Postman to test out your server.
6. Step 4 — Test Requests with Postman
In this step, you are going to use Postman to make test requests to your running server.
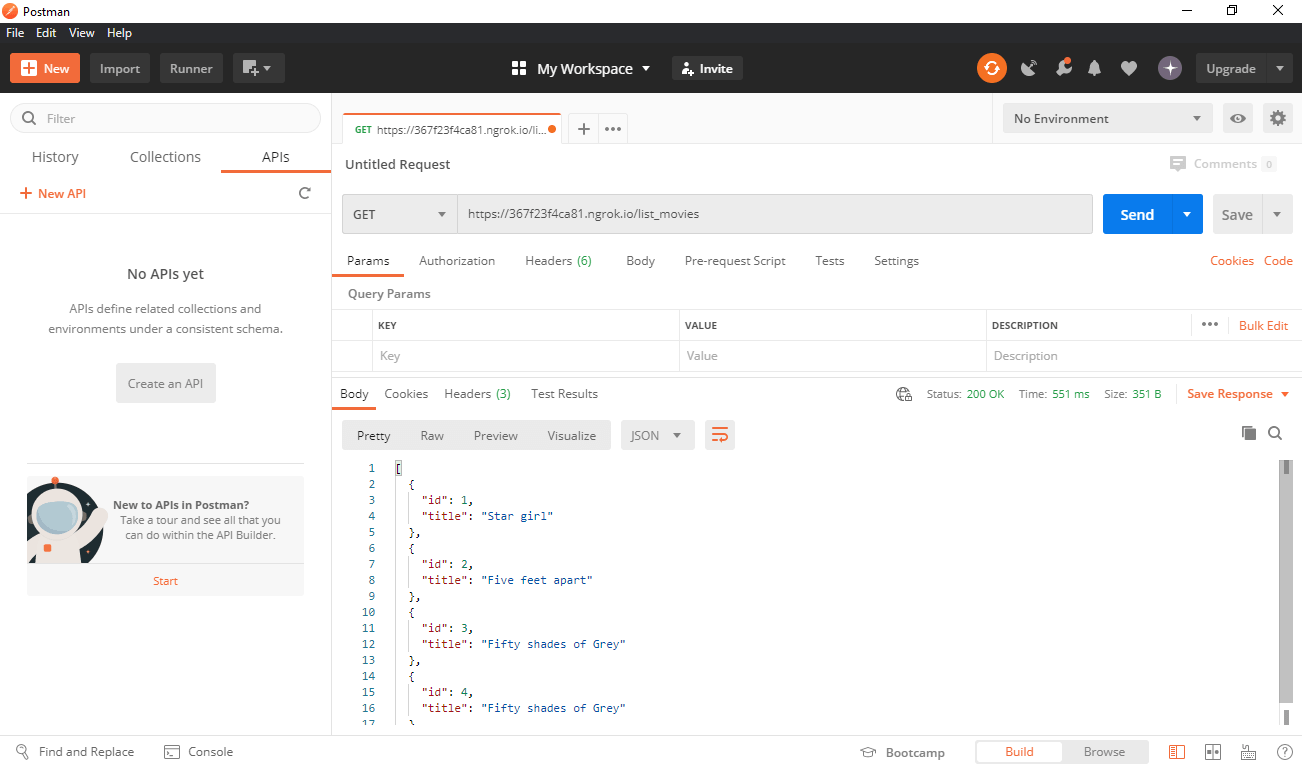
On Postman, create a new request tab and make a GET call to your endpoint. The endpoint is your Ngrok URL followed by /list_movies.
This should return the data from the movies.json as shown below.
Ngrok will record the request as well.
ngrok by @inconshreveable                                                                                                    (Ctrl+C to quit)                                                                                                                                             Session Status                online                                                                                                         Session Expires               6 hours, 48 minutes
Version                       2.3.35
Region                        United States (us)
Web Interface                 http://127.0.0.1:4040
Forwarding                    http://367f23f4ca81.ngrok.io -> http://localhost:3000
Forwarding                    https://367f23f4ca81.ngrok.io -> http://localhost:3000

Connections                   ttl     opn     rt1     rt5     p50     p90
                              3       0       0.00    0.00    5.05    6.32                                                                                                                                                                                                                HTTP Requests
-------------                                                                                                                                                                                                                                                                             GET /list_movies               200 OK
GET /                          200 OK
GET /favicon.ico               404 Not Found
GET /                          200 OK
And there you have it. You managed to build a Node.js API server with Express, exposed it to the internet with Ngrok and tested it on Postman!
To get some more information on Postman – and how to create a mock server with Postman.
Congratulations!!!
I encourage you to try to implement other request types and expand your API to add more functionality to it.