Table of Contents
Have you ever wanted to build an application that generates QR codes of text or URLs using Node.js? If so, then you are in the right place. In this tutorial, you are going to learn how to create a QR code generator for text or URLs using Node.js.
QR Code, which stands for Quick Response code, is a form of a graphical object which stores data that can be easily accessed through scanning. Invented in 1994 by the Danson Wave Company, it has become more popular as the years went on.
1. Prerequisites
Some of the basic requirements for this tutorial are:
- Having a basic understanding of HTML, CSS, and web development.
- A basic understanding of Node.js.
- Have Node.js installed on your machine. You can download it from their website.
- An IDE installed on your machine, in our case we’ll be using Visual Studio Code. You can download it from its website.
- A stable internet connection.
Once we have all these, we can go step by step through the tutorial.
2. Key takeaways
At the end of this tutorial, the reader will have understood:
- What QR codes are.
- Purpose of QR codes.
- How to create a QR code generator.
- How to run it on a simple webpage.
- What to do with the generated QR codes.
3. What are QR Codes
QR codes are made up of modules, which are black and white dots (or any other color such as blue or even red), that hold the data in by being arranged in a certain format. The smallest QR code size is 2 cm x 2 cm (0.787 inches x 0.787 inches) which is made up of 21 x 21 modules.
The largest on the other hand can be very big and can consist of up to 177 x 177 modules. This can store 7089 numeric characters or 4296 Alphanumeric characters. You can read more on how data is stored on the QR code here.
QR Codes are very efficient for sharing data. Multiple devices can access the same data anytime and anywhere without restrictions.
4. Uses and importance of QR Codes
Some of the major uses of QR Codes in the world as we see today include:
- In online payment to access account numbers or pay bills.
- Advertisements to land on webpages.
- By companies to advertise and download apps.
- Shopping and Ecommerce.
- Direct clients and potential customers on social media platforms and so much more…
You can refer to additional uses here or here.
5. Overall folder structure
The overall project structure will be as shown below:
QRcode-Generator (Root Directory)

|--node_modules (folder)

|-- views (folder)

|-- |-- index.ejs (file) scan.ejs (file)

|-- index.js (file)
Let’s begin by setting up our project directory. Create a folder and name it “QRcode-Generator”. Open the folder with Visual Studio Code. Once inside VS Code, open the terminal. You can quickly do this by using the Ctrl+ shortcut on a PC or Control + Shift + shortcut on a Mac.
Create a package.json file by running:
npm init -y
Once created, run the following command:
npm i qrcode express body-parser ejs
This installs the following packages to the project:
- body-parser
- ejs (Embedded JavaScript templates)
- express
- qrcode
6. Adding a starting point
We will need a starting point for our application. Create a file called “index.js”.
Inside the “index.js” file, let’s do the following in sequential order:
- Import the required modules.
// Importing the packages that we need

const express = require("express");
const app = express();
const bp = require("body-parser");
const qr = require("qrcode");
- Use express package to set our template engine (view engine) and the body-parser middleware for parsing bodies from URL and JSON objects.
// Using the ejs (Embedded JavaScript templates) as our template engine
// and call the body parser  - middleware for parsing bodies from URL
//                           - middleware for parsing json objects

app.set("view engine", "ejs");
app.use(bp.urlencoded({ extended: false }));
app.use(bp.json());
A Template Engine during runtime, replaces actual values to the variables used in the HTML file template. It then converts the HTML templates to an actual visible page that can be accessed. This allows the webpage to have dynamic content on it. Examples of these engines include pug.js, ejs.js, Dust.js, and handlebars.js among many others. You can learn more about Node.js Template Engines here or here.
- Create a listener to the root route (
/) and render the “index.ejs” file.
// Simple routing to the index.ejs file
app.get("/", (req, res) => {
    res.render("index");
});
- Add a POST request listener to convert Text/URL to QR Code.
app.post("/scan", (req, res) => {
    const url = req.body.url;

    // If the input is null return "Empty Data" error
    if (url.length === 0) res.send("Empty Data!");

    // Let us convert the input stored in the url and return it as a representation of the QR Code image contained in the Data URI(Uniform Resource Identifier)
    // It shall be returned as a png image format
    // In case of an error, it will save the error inside the "err" variable and display it

    qr.toDataURL(url, (err, src) => {
        if (err) res.send("Error occured");

        // Let us return the QR code image as our response and set it to be the source used in the webpage
        res.render("scan", { src });
    });
});
- Configuring the ports we are listening to. This line starts the server.
// Setting up the port for listening requests
const port = 5000;
app.listen(port, () => console.log("Server at 5000"));
6.1. Adding a views folder
Inside the main directory, create an additional folder namely “views”. In this directory, add 2 new files and name them “index.ejs” and “scan.ejs”.
The “index.ejs” file will be the default page that loads when we start the application while the “scan.ejs” will hold our QR Code image after generation.
Let us create a simple page structure in “index.ejs”. We shall then copy the structure to the “scan.ejs” file to promote webpage design consistency. We shall use some custom css and online bootstrap to quicken the styling process and shorten the code.
This is shown in the code below:
<!doctype html>
<html lang="en">
<head>
    <title>QR Code Generator</title>

    <!-- Bootstrap CSS -->
    <link rel="stylesheet" href="https://stackpath.bootstrapcdn.com/bootstrap/4.3.1/css/bootstrap.min.css" integrity="sha384-ggOyR0iXCbMQv3Xipma34MD+dH/1fQ784/j6cY/iJTQUOhcWr7x9JvoRxT2MZw1T" crossorigin="anonymous">

    <!-- Custom CSS -->
    <style>
        @import url('https://fonts.googleapis.com/css2?family=Montserrat:wght@500&display=swap');
        * {
            font-family: Montserrat;
        }
        body {
            margin: 10px;
            padding: 10px;
        }
    </style>
</head>

<body>
    <div class="container">
        <h1 class="text-center">QR CODE GENERATOR</h1>
        <hr>

    </div>
</body>
</html>
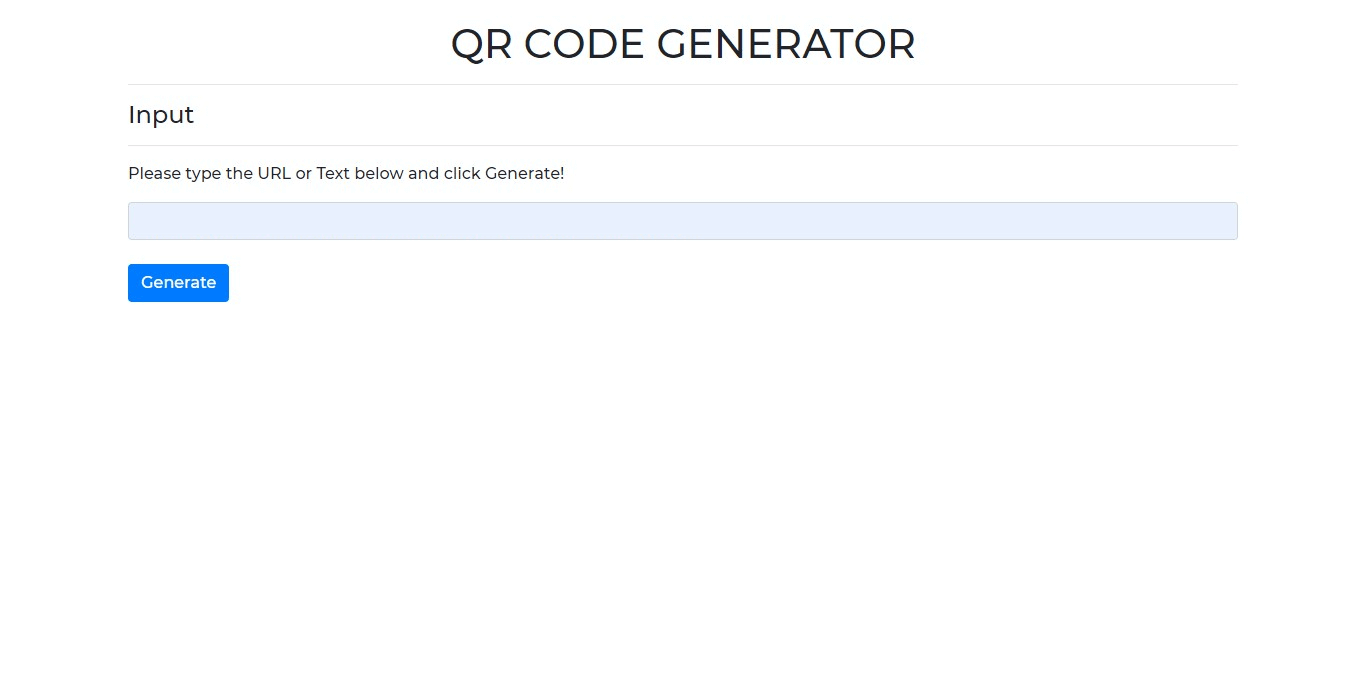
Now, inside the “index.ejs” file, let’s add an input element inside the body tags and a button which we shall name, “Generate”, to execute the QR Code generation process.
This is shown in the code below:
<h4>Input</h4>
<hr>
<p>Please type the URL or Text below and click Generate!</p>
<form class="form" action="/scan" method="POST">
    <input name="url" class="form-control" placeholder="URL or Text" type="text" required>
    <br>
    <button type="submit" class="btn btn-primary" value="Get QR">Generate</button>
</form>
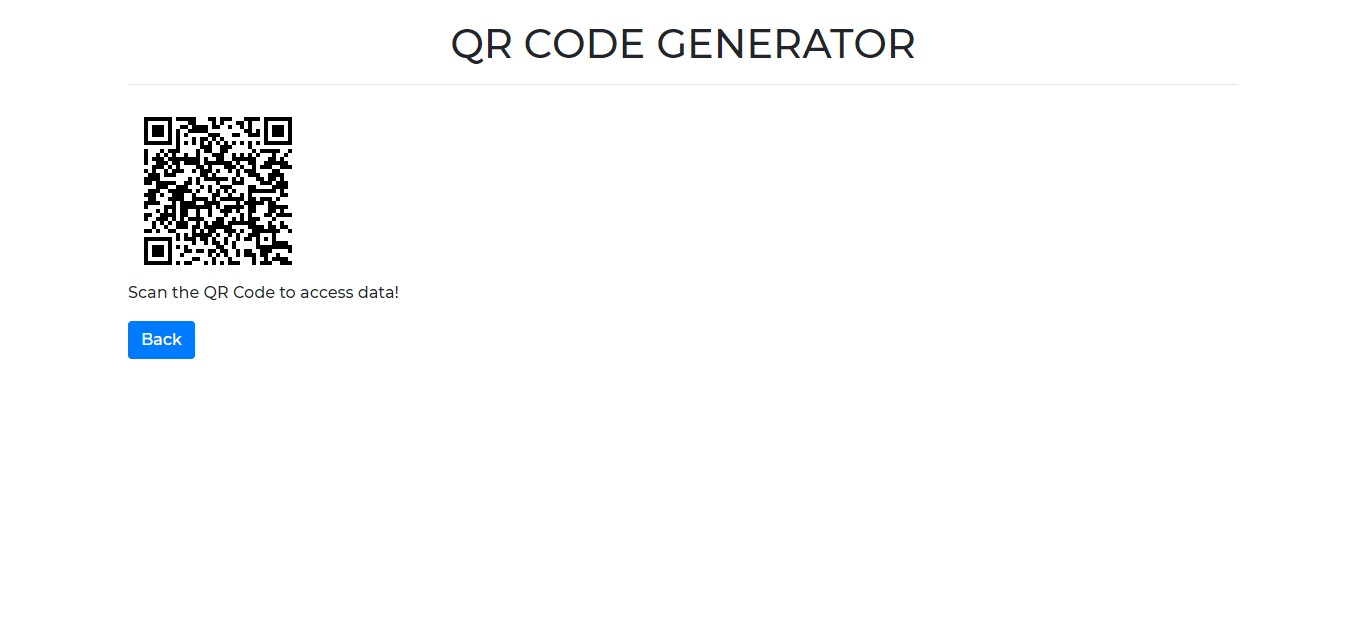
Inside the “scan.ejs” file, add a card that will contain the QR Code image generated. Add also a button that returns us to the previous page.
This is shown in the code below:
<img src=<%=src%> alt="QR Code Image">
<p>Scan the QR Code to access data!</p>
<a href="/"><button type="button" class="btn btn-primary">Back</button></a>
<br>
Notice how we use the ejs source attribute to easily add our image to our webpage!
6.2. Running the Node.js application
Let’s now run our application using Node.js by running the command below inside the terminal:
node index.js
Access the webpage at localhost:5000.
You can now enter some simple URL or Text and click generate to see the output.
An example is shown below:
Main Webpage

QR Webpage

You can find and clone the code above in this repository. Congratulations, you have successfully created a Node.js QR Code generator program!
7. Conclusion
In conclusion, we have learned:
- What QR Codes are and how they store data.
- Uses of QR codes.
- How QR Codes are efficient in data sharing on multiple devices.
- How to create a simple QR Code generator using Node.js.
You can also try other projects on your own using the knowledge above such as automatically printing or sharing the code generated in social media platforms or emails.
Happy coding!

