
Table of Contents
- 1. Goal
- 2. Prerequisites
- 3. The Google cloud console
- 4. Creating access credentials
- 5. Creating a Google sheets file
- 6. Getting started
- 7. Installing dependencies
- 8. Integrating the API
- 9. Writing into the spreadsheet
- 10. Reading from the Google sheets file
- 11. Running the application
- 12. Conclusion
- 13. Final thoughts
Google Sheets API enables programmers to create applications that can read, write, and update a Google spreadsheet. In advanced stages of programming, Google sheets can act as a database from where an application fetches data and renders it to a UI template.
However, this tutorial will focus on achieving the functions of Google Sheets using Node.js.
1. Goal
This tutorial aims to demonstrate the functions that can be used to read and write into a Google sheet using the Google sheets API by building an application that inserts into and reads data from an existing Google sheet.
2. Prerequisites
To effectively follow along with me, you’ll need to have the following tools and skills:
- You will need to have Node.js installed on your computer.
- A basic understanding of Node.js and JavaScript.
- A code editor. I will be using Visual Studio Code.
- Google cloud console.
3. The Google cloud console
The Google cloud console is a web-based platform that enables developers to build and deploy applications on the Google Infrastructure.
The platform allows one to create a project and specify the resources to be used in the project, or add specific resources to an existing project.
To use a resource on Google Cloud Console, one needs to have a Google account and access credentials for the specific resource we wants to use.
For our case, we will be using Google Sheets API, therefore, we need to have access credentials for the API.
4. Creating access credentials
We need a client ID and secret to access the drive storage.
Follow the steps below to obtain the client secret and ID:
- Visit the console.cloud.google.com.
- Create a new project if you do not have an existing project.
- Select the project and select
APIs and services. - Click on
ENABLE APIS AND SERVICES. - In the search box, search for
google sheets APIthen enable it for the project created. - Once you have enabled the API, select
CREATE CREDENTIALSto access the API. In the drop-down menu, selectService Account. - In the next screen, provide the details required then click
CREATE. - The next two steps are optional, just click
CONTINUEand thenDONE. - Copy the email address and save it on the clipboard. Click on the email address to go to the next screen. Under keys, select
Create new key. - Select
JSONas the keyType thenCreate. This process downloads a JSON file of the Key. - Move the downloaded JSON file into the same folder as the project and, since the name is too long, we can rename it as
keys.json.
The file should look like the one below:
{
  "type": "service_account",
  "project_id": "YOUR PROJECT ID",
  "private_key_id": "YOUR PRIVATE KEY ID",
  "private_key": "YOUR PRIVATE KEY ",
  "client_email": "YOUR CLIENT EMAIL",
  "client_id": "YOUR CLIENT ID",
  "auth_uri": "YOUR AUTH URI",
  "token_uri": "YOUR TOKEN URI",
  "auth_provider_x509_cert_url": "https://www.googleapis.com/oauth2/v1/certs",
  "client_x509_cert_url": "https://www.googleapis.com/..."
}
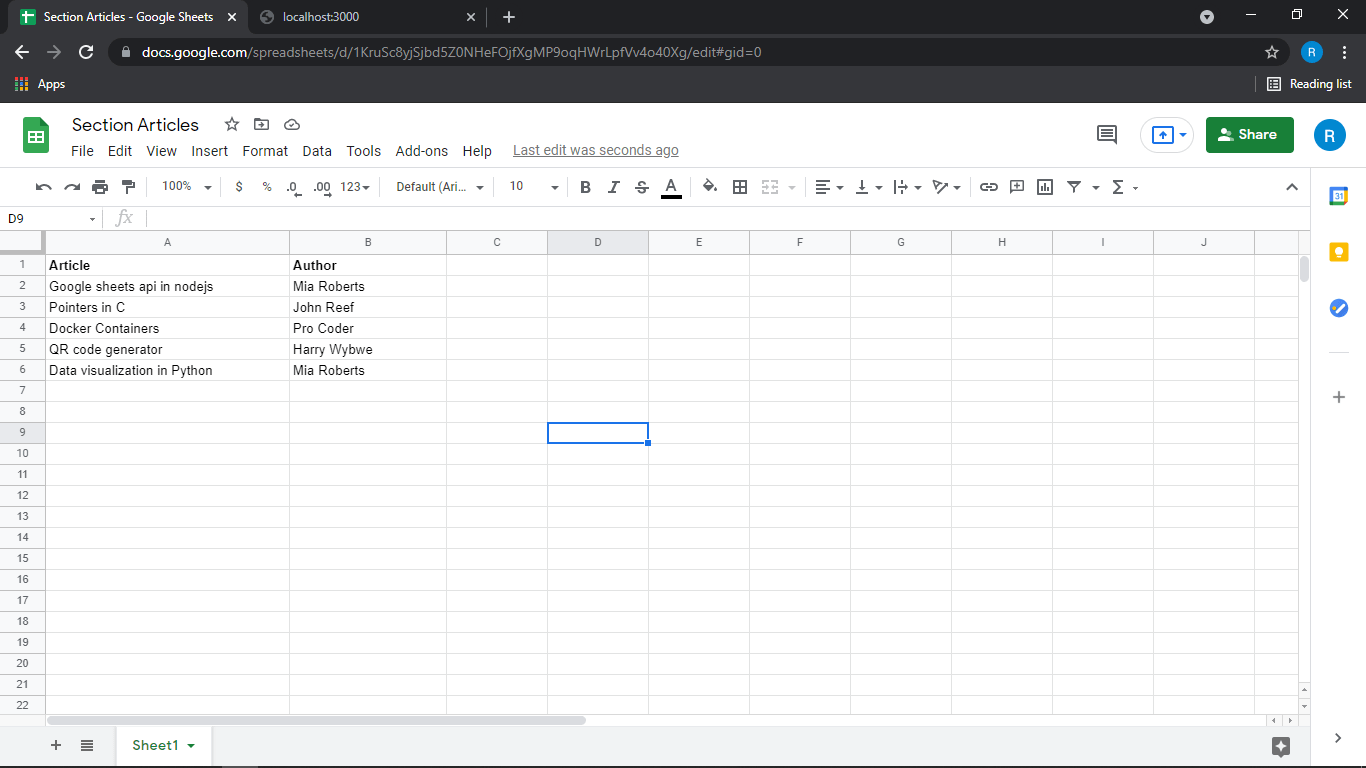
5. Creating a Google sheets file
Next, we create a Google sheet file and share it with the email we copied in step 9 above. From the email, our application will read, edit, and update the contents of the Google sheets file.
Be sure to set the role of the email to editor. Our Google sheets file will be used to collect article suggestions and their authors as shown below.
6. Getting started
Create a directory named google-sheet-api by executing the command below.
mkdir google-sheet-api
cd google-sheet-api
To create the Node.js application, we will run the command below to initialize an empty package.json file. The package.json defines the project’s useful information such as project version, development dependencies, and other relevant scripts.
npm init -y
7. Installing dependencies
Next, we will install the required dependencies.
We will use
expressto render dynamic pages,ejsfor the frontend,nodemonfor live update during development, andgoogleapisto access the Google sheets api.
To install the required project dependencies, we need to execute the following command in our vscode terminal:
npm install –save googleapis express nodemon
Next, we create the entry point of the application. Create a file named index.js in the main folder. We will write most of our code in this file.
8. Integrating the API
In the index.js, import the installed dependecies as follows:
// inlcude express
const express = require("express");

//googleapis
const { google } = require("googleapis");

//initilize express
const app = express();

//set app view engine
app.set("view engine", "ejs");
We will write the next set of snippest under the post route in the index.js file. Here is a look at the app.post route before we add the snippets.
app.post("/", async (req, res) => {
    const { request, name } = req.body;
})
Creating the auth object
    const auth = new google.auth.GoogleAuth({
        keyFile: "keys.json", //the key file
        //url to spreadsheets API
        scopes: "https://www.googleapis.com/auth/spreadsheets",
    });
Client instance of the auth object
    //Auth client Object
    const authClientObject = await auth.getClient();
Instance of Google sheets API
//Google sheets instance
    const googleSheetsInstance = google.sheets({ version: "v4", auth: authClientObject });
Extract the spreadsheets ID from the URL
The spreadsheet ID to be obtained from the URL of the Google sheets. It is the alphanumeric value that is between the
/d/and the/editin the URL of your spreadsheet.
// spreadsheet id
const spreadsheetId = "YOUR SPREADSHEET ID";
9. Writing into the spreadsheet
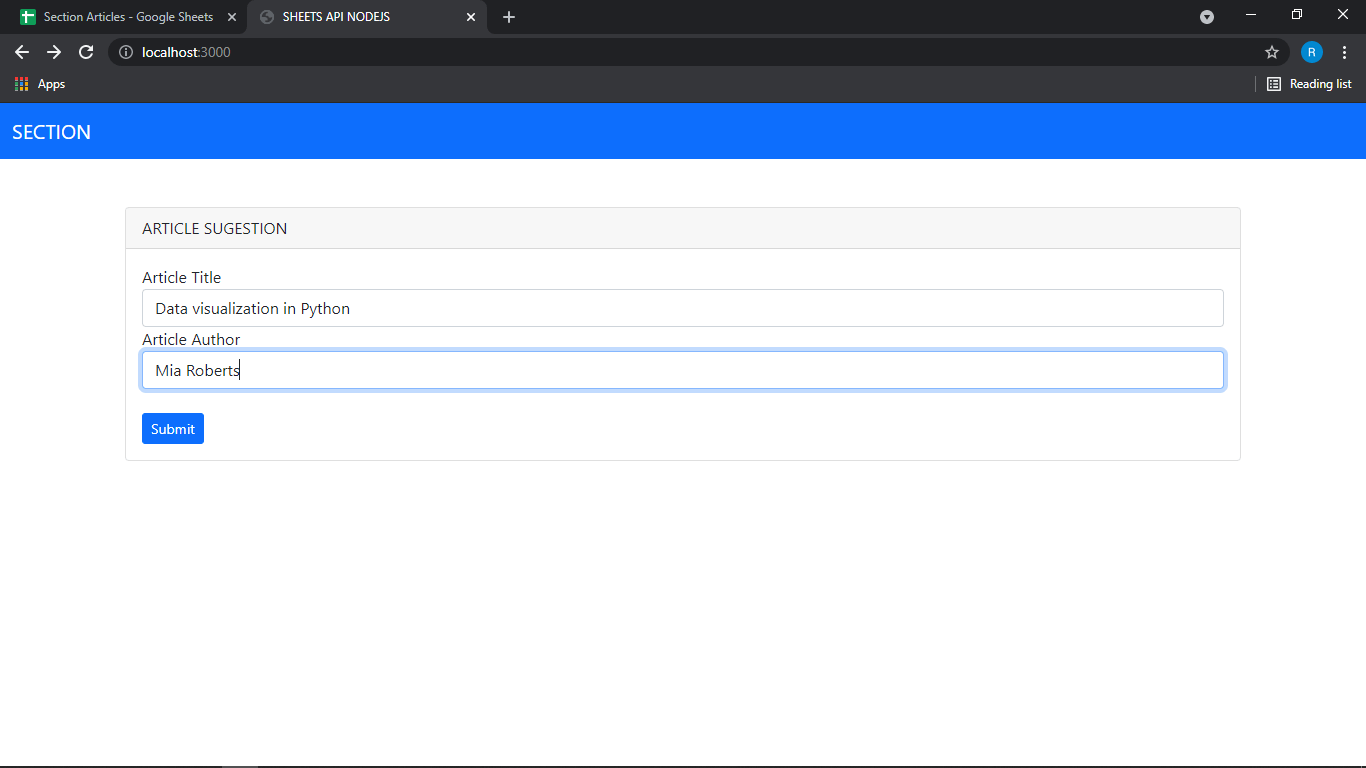
We will create a form to collect data and sent it to our spreadsheets. The form will have two fields for the article title and another for the author.
To create the form, create a folder named views then a file called index.ejs.
In the file created, add the snippets below:
<!DOCTYPE html>
<html lang="en">
<head>
    <meta charset="UTF-8">
    <meta http-equiv="X-UA-Compatible" content="IE=edge">
    <meta name="viewport" content="width=device-width, initial-scale=1.0">
    <title>SHEETS API NODE JS</title>
    <link href="https://cdn.jsdelivr.net/npm/bootstrap@5.0.1/dist/css/bootstrap.min.css" rel="stylesheet">
</head>
<body>
    <nav class="navbar navbar-expand-lg navbar navbar-dark bg-primary">
        <div class="container-fluid">
            <a class="navbar-brand" href="#">SECTION</a>
            <div class="collapse navbar-collapse" id="navbarSupportedContent">
                <ul class="navbar-nav me-auto mb-2 mb-lg-0">
                </ul>
            </div>
        </div>
        </nav><br><br>
    <div class="container">
        <div class="card">
            <div class="card-header">
            ARTICLE SUGESTION
            </div>
            <div class="card-body">
                <form action="" method="POST">
                    <div class="form-group">
                        <label for="formGroupExampleInput">Article Title</label>
                        <input type="text" class="form-control" id="article" name="article" placeholder="Article">
                    </div>
                    <div class="form-group">
                        <label for="formGroupExampleInput2">Article Author</label>
                        <input type="text" class="form-control" id="author" name="author" placeholder="Author">
                    </div>
                    <br>
                    <button type="submit" class="btn btn-primary btn-sm">Submit</button>
                </form>
            </div>
            </div>
    </div>
</body>
</html>
The function to write into the spreadsheets takes the auth object, spreadsheet ID, and the range of cells to write onto, the value entered by the user, and the resource object containing the information to insert into the rows.
The resource object has a child value, which is an array of the data to be entered into the sheets. The array length depends on the number of columns of the spreadsheet.
    //write data into the google sheets
    await googleSheetsInstance.spreadsheets.values.append({
        auth, //auth object
        spreadsheetId, //spreadsheet id
        range: "Sheet1!A:B", //sheet name and range of cells
        valueInputOption: "USER_ENTERED", // The information will be passed according to what the usere passes in as date, number or text
        resource: {
            values: [["Git followers tutorial", "Mia Roberts"]],
        },
    });
10. Reading from the Google sheets file
The function that reads from the Google sheets file takes auth object, spreadsheets ID and the range of cells to read from. The snippets below are used to read the file contents.
    //Read front the spreadsheet
    const readData = await googleSheetsInstance.spreadsheets.values.get({
        auth, //auth object
        spreadsheetId, // spreadsheet id
        range: "Sheet1!A:A", //range of cells to read from.
    })

    //send the data reae with the response
    response.send(readData.data)
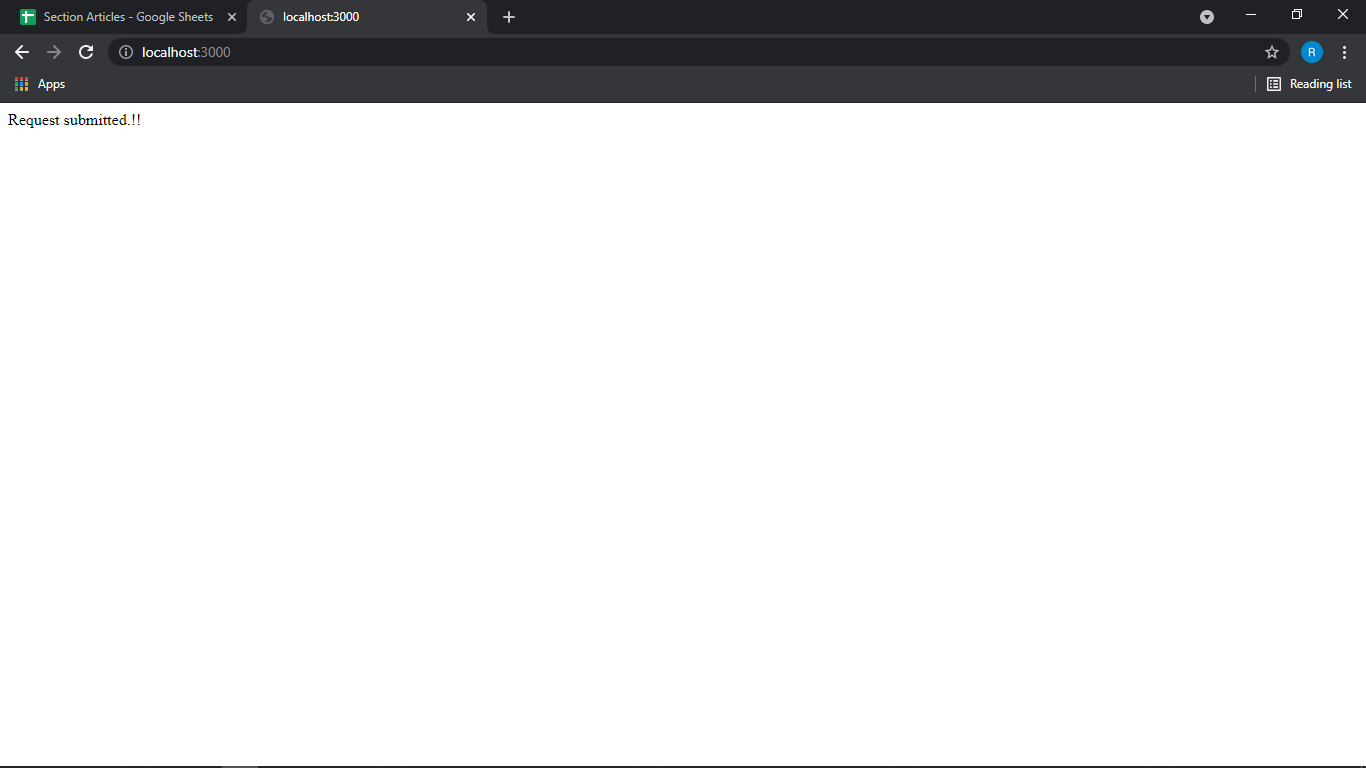
11. Running the application
To test out the application, we need to start the server then try it out by filling the form and sending the data. Add the block of code below in the index.js file. Then run the command nodemon start in your terminal.
const port = 3000;
app.listen(port, ()=>{
    console.log(`server started on ${port}`)
});
Head to your browser on localhost port 3000, fill in the form, and click the submit button. You should have a success message as shown below and the data entered into the Google sheets file.
12. Conclusion
In this tutorial, we demonstrated how to integrated Google sheets API into a Node.js application. We created a sheets file and wrote functions to read and write from the file.
Now go ahead and implement the same in your project.
You can find the source code for the entire project here.
13. Final thoughts
Google sheets has a wide range of applications. Programmers can explore to maximize its functionalities and also to make better applications. For instance, this tutorial explains how to use Google sheets to records attendance using QR-codes.
Besides, we can use Google sheets to extract data from financial websites as this tutorial explains. Through proper research, we could understand how to make large-scale applications from the ideas presented in these videos.
Good luck coding!