
Table of Contents
Email verification is a mechanism to ensure that a system does not stack its database with fake email addresses. An account remains unverified until the user verifies it through a unique link sent to his/her email address.
In the meantime, the system restricts the account from the core functionalities of the application.
1. Goal
By the end of this article, you will understand the logic of email verification. We will go through a step by step implementation of the same using Node.js, Firebase,and Express by building a sample login and registration system.
2. Prerequisites
To follow this artice along with me effectively:
- You will need to have Node.js installed on your computer.
- A basic understanding of Node.js.
- A suitable code editor. I will go with Visual Studio Code.
3. Project setup
We will set up the project just like any other Node.js project. Execute the command below to get started.
npm init -y
Next, we will install the required dependencies. We need
expressfor our backend,body-parserto handle HTTP requests,ejsto render our HTML files, andnodemonto constantly update the changes as we develop the application.
Execute the command below to install the dependencies:
npm install --save express, body-parser, ejs, nodemon
Next, we will create all the files and directories for the project.
The project structure should be as below.
    ┣ node-modules
    ┣ static
    ┣ views
    ┃   ┣ login.html
    ┃   ┣ profile.html
    ┃   ┗ signup.html
    ┣ index.js
    ┣ package-lock.json
    ┣ package.json
4. Building the server
The index.js file is the entry point of the application. It will also act as the server file for the project.
4.1. Import the dependencies
To bring in the dependencies, add the snippets below to your index.js file.
//Express
const express = require('express');

//body-parser
const bodyParser = require('body-parser');

//ejs
const ejs = require('ejs');

//using express
const app = express();

//using bodyparser
app.use(bodyParser.json())

app.engine("html", require("ejs").renderFile);
app.use(express.static("static"));
4.2. Creating the application routes
We need three routes for this project:
- The default route is the
signupwhere the user registers and automatically logs into their account.
//sign up route
app.get("/signup", function (req, res) {
    res.render("signup.html");
});
- The next route is the
loginroute which takes the user to the login page. On the login page the user logs into their account using an email and password supplied during registration.
//login route
app.get("/login", function (req, res) {
    res.render("login.html");
});
- The last route is the
profileroute, which takes the user to his profile page where the user can see his account status and request a verification link.
//user profile route
app.get("/profile", function (req, res) {
    res.render("profile.html");
});
4.3. The user interface
In the views folder, create three HTML files named login.html, signup.html, and profile.html.
You can find the files for the user interface in this link.
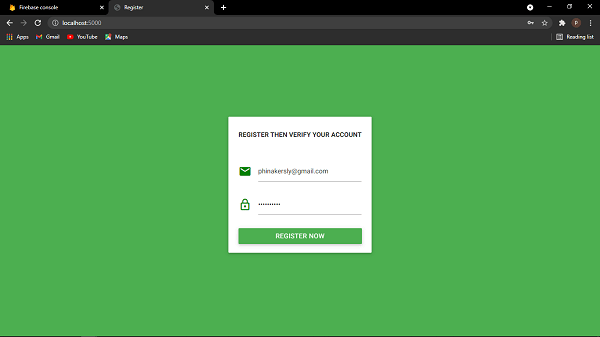
4.3.1. Sign up page user interface
Here is where the user creates an account using an email and password.
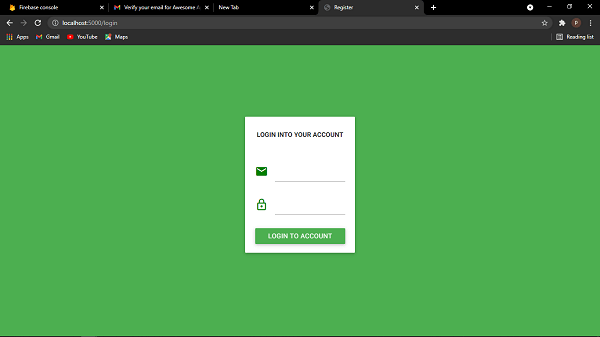
4.3.2. Login page user interface
On this page, the user enters his email and password set during signing up.
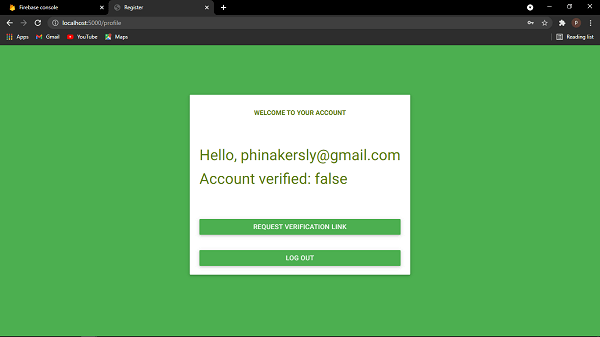
4.3.3. Profile page user interface
On the user profile page, the user can request account verification and check the verification status of their accounts.
5. Adding Firebase to the application
In the next phase, we will get to the core functions of the application. To use Firebase, we need to obtain authorization for Firebase to know who is accessing the Firebase functions. We need to generate a config object to use with the application.
To generate the config object, check out this guide.
Your final Firebase config object should look like this:
var config = {
    apiKey: "YOUR API KEY",
    authDomain: "YOUR AUTH DOMAIN",
    databaseURL: "YOUR DATABASE URL",
    projectId: "YOUR PROJECT ID",
    storageBucket: "STORAGE BUCKET",
    messagingSenderId: "MESSAGE SENDER ID",
    appId: "YOUR APPLICATION ID"
};
6. Create account function
This function calls Firebase auth to create a new account with the supplied email and password. After a successful account creation, the function automatically logs the user into their account and redirects them to the profile page.
// initialize firebase
firebase.initializeApp(config);
function createAccount(){
    // obtain user email and user password from HTML
    var userEmail = document.getElementById("email_field").value;
    var userPass = document.getElementById("password_field").value;
    firebase.auth().createUserWithEmailAndPassword(userEmail, userPass).catch((error) =>{
        //error code
        var errorCode = error.code

        //error message
        var errorMessage = error.message
    }).then(() => {
        //redirect the user to profile page
        window.location.assign("/profile");
    });
}
7. Login function
The login function takes the user’s email and password then calls Firebase to authenticate the user. It returns an error if the user does not exist or the password is wrong. Add the snippets below in the script tag of the login page.
// initialize firebase
firebase.initializeApp(config);

function login() {
    // obtain user email and user password from HTML
    var userEmail = document.getElementById("email_field").value;
    var userPass = document.getElementById("password_field").value;
    firebase.auth().signInWithEmailAndPassword(userEmail, userPass).catch(function(error) {
        //error code
        var errorCode = error.code
        //errod message
        var errorMessage = error.message
        //show error message
        window.alert("Error : " + errorMessage);
    }).then(() => {
        //redirect the user to profile page
        window.location.assign("/profile");
    });
}
8. Send email verification link
This function is responsible for extracting the user email from the database and sending a unique link to the email used during account creating. Before the verification, the account verified status reads false meaning that the account is not verified.
//initialize firebase
firebase.initializeApp(config);
const user = firebase.auth().currentUser;

// send verification email
function sendVerificationEmail() {
    // extracting the user from the firebase
    var user = firebase.auth().currentUser;

    user.sendEmailVerification().then(function() {
        window.alert("Verification link sent to your email. Kinldy check to verify your account")
    }).catch(function(error) {
        // An error happened.
    });
}
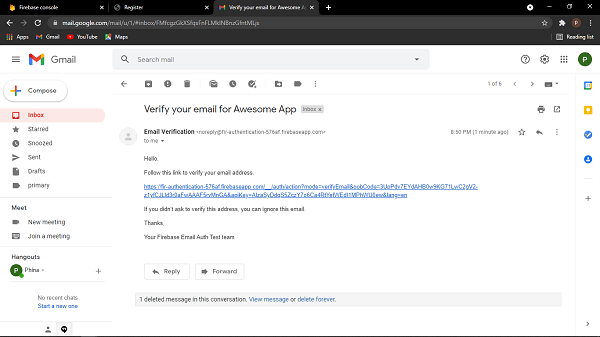
After the function is successfully executed, a link is sent to the email supplied during registration as shown below.
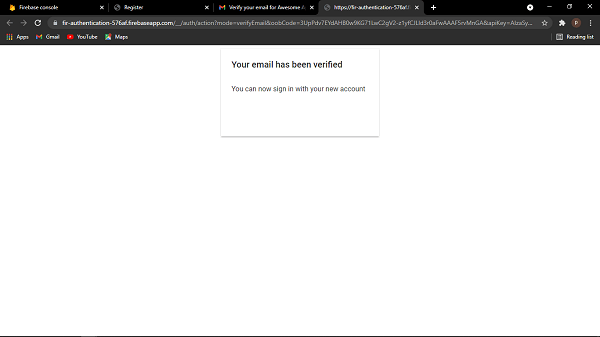
Upon clicking the link, the user is redirected to a new page.
The page shows the verification process status as below:
9. Check verification status
Once a user has successfully verified an account by clicking the link sent to their email, we need to update the verification status in the profile page.
Add the snippets below in the user profile page to check the verification status and render onto the profile page.
firebase.initializeApp(config);
firebase.auth().onAuthStateChanged(
    function(user) {
        if(user){
            var emailVerified = user.emailVerified;
            var email = user.email;
            var data =  '<h4> Hello, ' + email + '</h4>' +
                        '<h4>Account verified: ' + emailVerified + '</h1>';
            document.getElementById("wrapper").innerHTML = data
            if(emailVerified == true){
                document.getElementById("verify").style.display = "none"
            }
        } else {
            console.log("No user found")
        }
    }
);
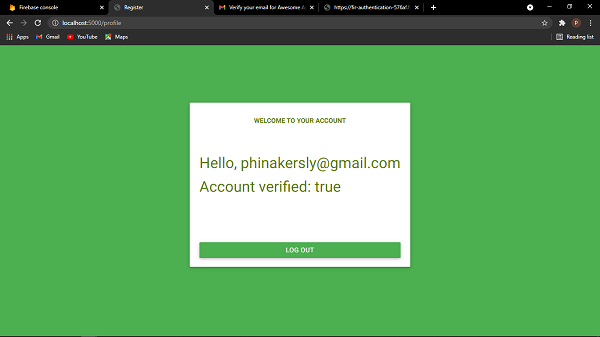
When the user gets back to their account, the account verified status changes to true and the verify button also dissappears.
10. Starting the server
In this phase, we will test our application by running the command nodemon start in the terminal.
We need to add the below code in the index.js file:
const PORT = process.env.PORT || 5000;
app.listen(PORT, () => {
    console.log(`Listening on http://localhost:${PORT}`);
});
11. Conclusion
In this tutorial, we learned how email authentication and verification are done using Firebase. Through the tutorial, we can appreciated how useful this functionality can be in ensuring that users are legitimate before accessing the resources of agiven system.
You can find the entire source code of the application here. Just be sure to replace the Firebase config object with your own.
Happy coding!
Further readings
To find more about the topic, you can check the resources in the following links: