
Table of Contents
Discord bots are very cool. They’re also very fun to make. But how do you make one? Typically, Discord bots are written in Node.js. Node.js is a JavaScript interpreter that runs on the desktop. Of course, it’s possible to write a bot in other languages.
For some people this may be preferable. If you have lots of users, you will need an efficient language (unlike JavaScript). We will use the JavaScript library because it is the most popular. But, many of the other libraries are somewhat similar. Once you are done reading this article, try looking at some Rust tutorials.
1. Get Started By Making a Bot
1.1. What You’ll Need
- Node.js v12.0 or above, with npm.
- A Discord account
- A computer to run it on (to keep it on 24/7, try using a Raspberry Pi)
- Some basic JavaScript knowledge
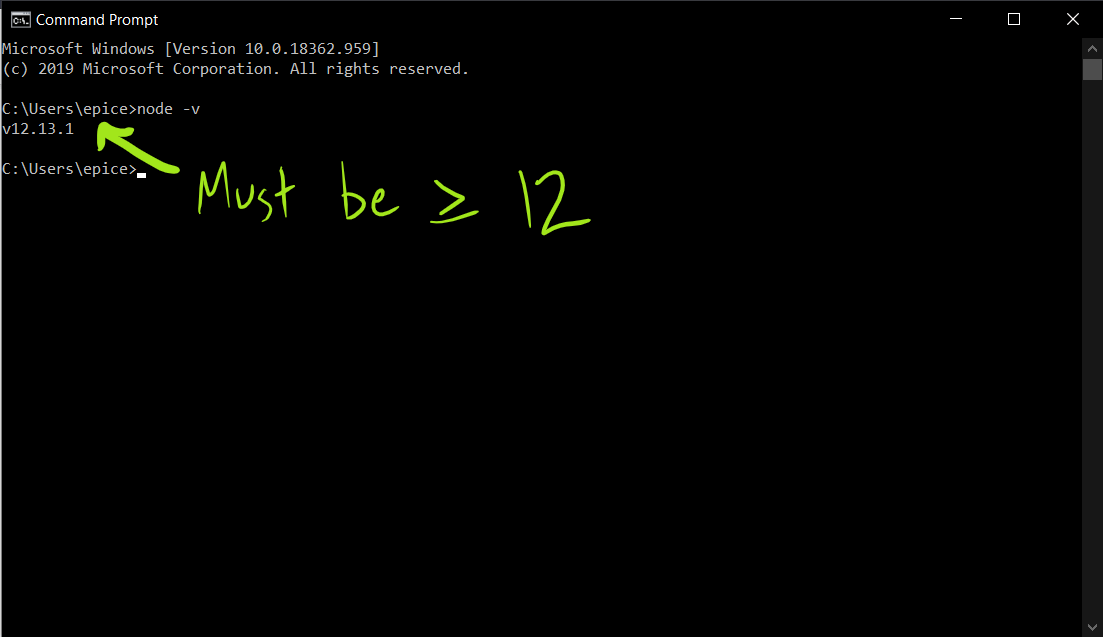
You’ll need Node.js v12 or above. To check which version you have, go into a command prompt or terminal, and type node -v. The version number you get should be greater than 12.0. If this isn’t the case, then just go to the download page and install the new version.
1.2. Creating The Bot
First, you need to visit the Discord Developer Portal. Click the “New Application” button. Give your bot a name, and click “Create”. This will create a new application that uses the Discord API.


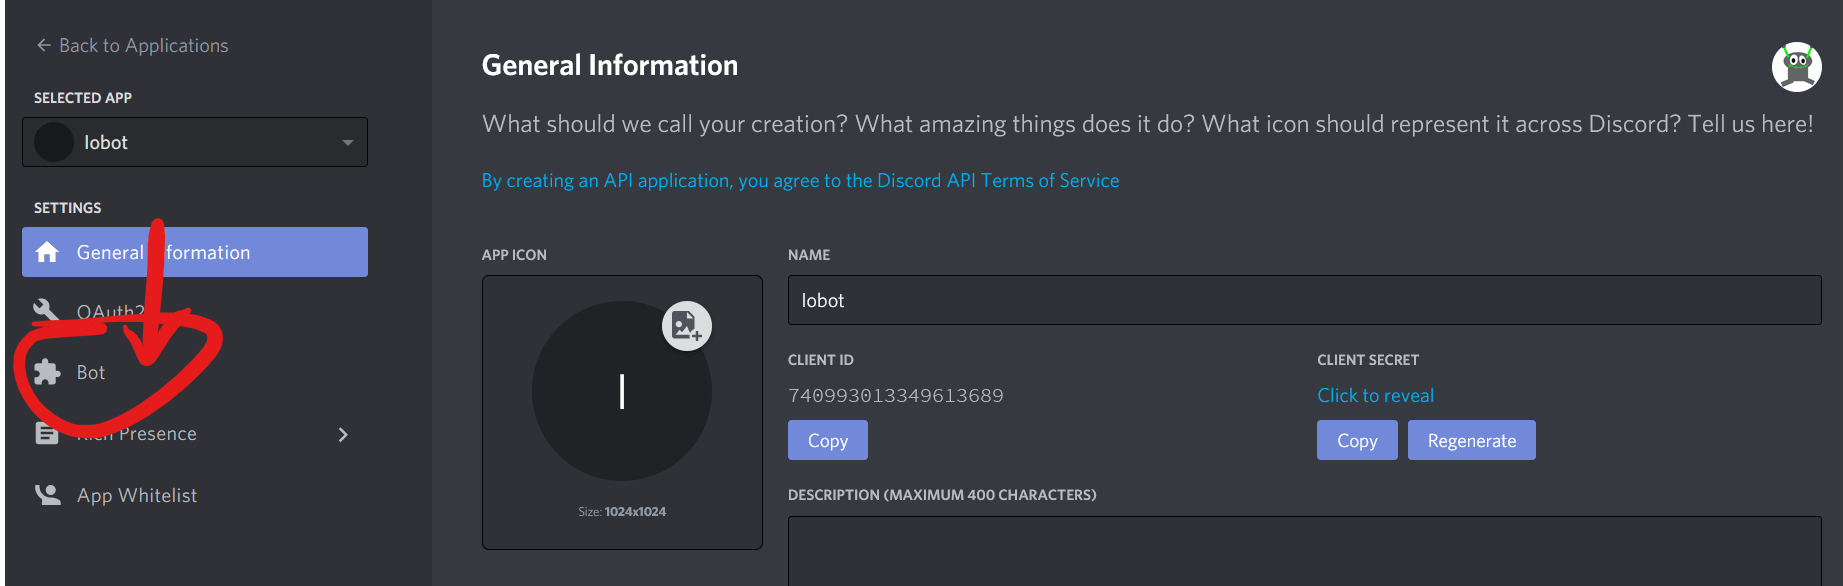
You’ll get to your application’s page, where if you want, you can give it a description and an avatar.
Applications aren’t necessarily bots, but bots are one of the most popular uses. Many games use the Discord API to make their game work with Rich Presence. We’ll just need to turn our application into a bot.
On the left, you should see a “Bot” tab. Click on that.
Now, click the “Add Bot” button.
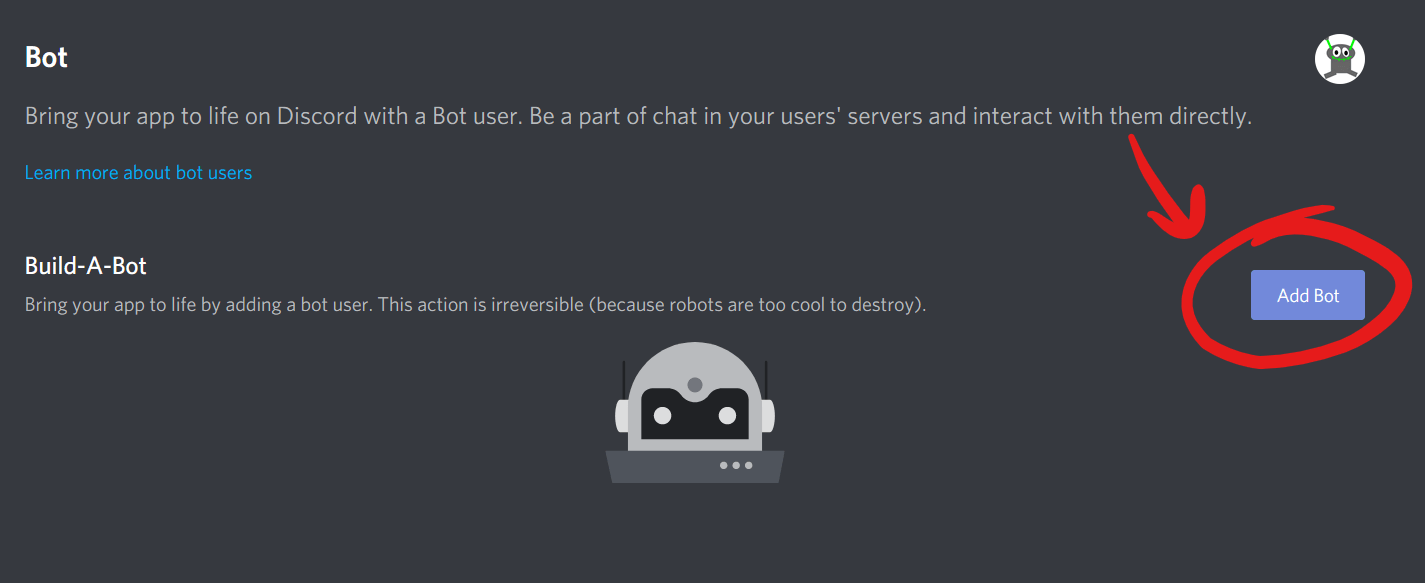
Give your new bot a name and an icon to make it stand out.
1.3. Adding The Bot To Your Server
The next thing we need to do is add the bot to a Discord server. It needs to be on a server where you have administrative privileges. You’ll need to use a URL that looks something like this:
https://discord.com/oauth2/authorize?client_id=CLIENT_ID&scope=bot
You’ll need to replace CLIENT_ID with the client ID of your bot, which you can find on the application page. The client ID is a unique public ID that Discord uses to identify a bot. In this instance, we’re telling Discord which bot we’d like to add to the server.

Once you’ve traveled to this page, you’ll need to specify which server to add it to. Then click “Authorize”. This button puts the bot in your server, and you’ll be ready!
2. Set up Your Project
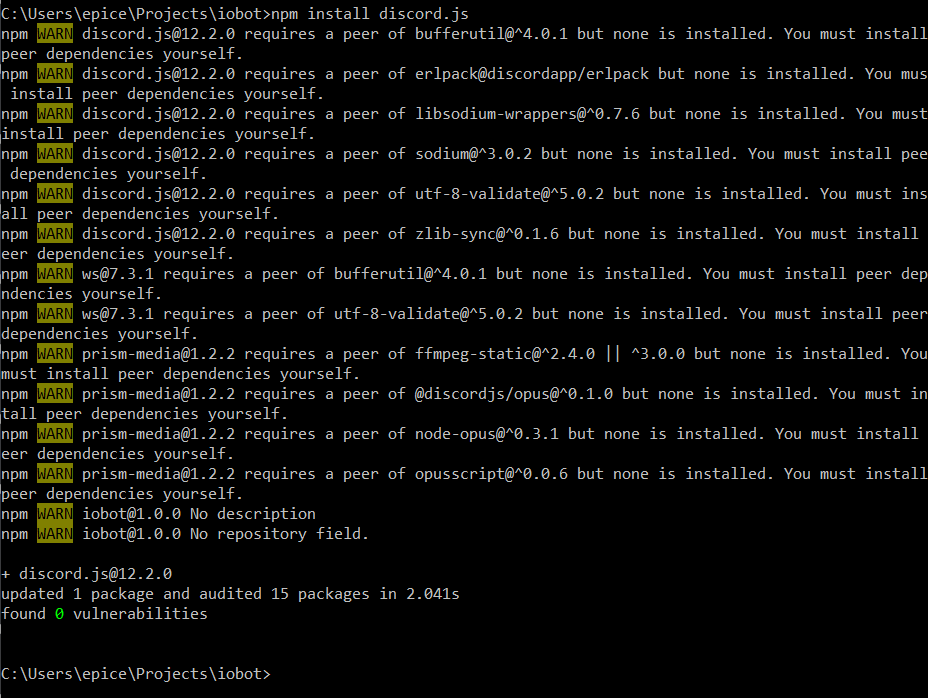
Make a folder for your project. You can call it anything. Open up a command prompt or terminal, and cd to the folder you just created. You’ll need to install the discord.js library. This makes it easy to interact with the Discord API. Type npm install discord.js to do this. NPM is the Node Package Manager, which we’ll use to install discord.js. It will take a bit of time. You might see a few warnings, but that’s perfectly normal. Make sure you have administrative privileges if you’re on Windows, and use sudo on Linux. The screenshot here is in command prompt.
2.1. Getting Your Token
The token for your bot is like a username and a password. It tells Discord which bot you want to control, and proves that you are the owner of the bot. DO NOT GIVE AWAY YOUR DISCORD TOKEN! I sometimes accidentally put my token on GitHub. Then I have to go through the trouble of resetting it. I’ll show you how to hide it from GitHub in just a sec.
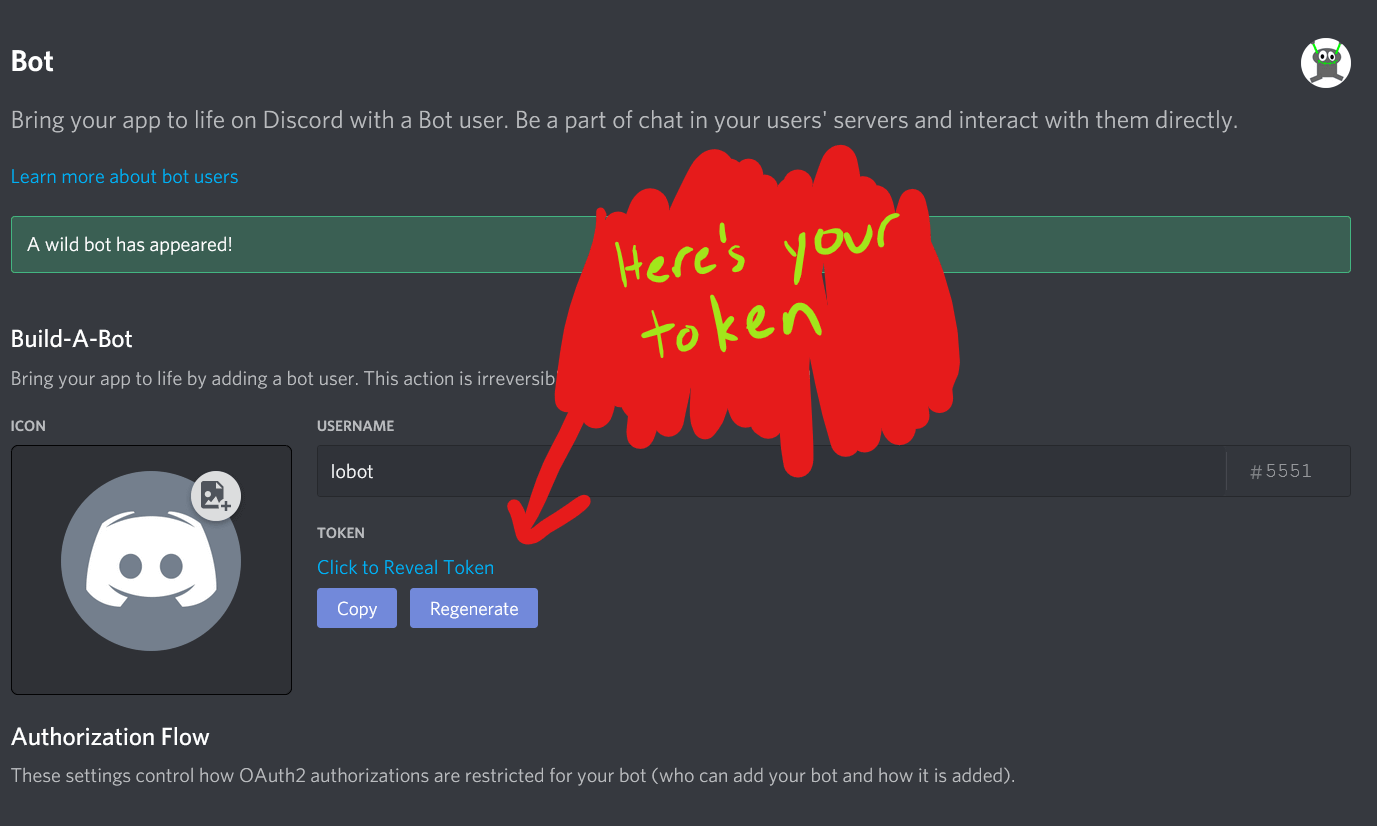
If this project is on GitHub, you’ll want to hide your token. In the root directory of your project, create a file called token.txt. You’ll also need a file called .gitignore. If you already have this file, just add a line that says token.txt. Otherwise, create it and put that line in there. You might want to put some random text in token.txt first, and then push to make sure it’s actually hidden. Once you’re sure you’ve done it correctly, put the bot token in your token.txt file. Now, we can start coding.
If you’re not planning on putting your project on GitHub, then just create a file called token.txt in the root directory of your project. Put your bot token in it.
Make a file called index.js and open it up in your text editor of choice. There’s some basic boilerplate code that you’ll need to get started.
const Discord = require("discord.js"); // imports the discord library
const fs = require("fs"); // imports the file io library

const client = new Discord.Client(); // creates a discord client
const token = fs.readFileSync("token.txt").toString(); // gets your token from the file

client.once("ready", () => { // prints "Ready!" to the console once the bot is online
	console.log("Ready!");
});

client.login(token); // starts the bot up
You can run this by using node index.js. Once you’ve done that, you should get this output:

2.2. Creating Commands
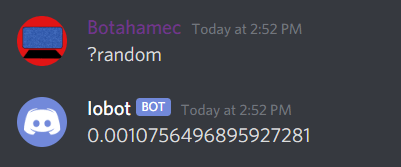
That’s cool, but we want the bot to actually do something. The most common example is ping-pong, but we should do something a little more interesting. Let’s generate random numbers. Whenever a user types in “?random”, let’s make the bot reply with a random number.
We just need to add some more code directly above the client.login() call.
// ...

client.on("message", message => { // runs whenever a message is sent
    if (message.content === "?random") { // checks if the message says "?random"
        const number = Math.random(); // generates a random number
        message.channel.send(number.toString()); // sends a message to the channel with the number
    }
});

// ...
This creates an event which runs whenever the bot sees a new message. It checks to see if the message says ?random. If it does, it generates a random number, and sends it to the channel. We did it!
We can add more commands by just adding more if statements. This can get messy though. Let’s come up with a better command structure. We can use a Map to store strings as keys and functions as values. A Map links “keys” to “values”. In this case, we’ll be using the command name as a key. Each key has a value, which we can access using the Map.get() method. In our case, the values will be functions that we can run.
The following code needs to replace the earlier client.on() call we made earlier.
// ...

function random(message) {
    const number = Math.random(); // generates a random number
    message.channel.send(number.toString()); // sends a message to the channel with the number
}

let commands = new Map();
commands.set("random", random);

client.on("message", message => {
    if (message.content[0] === '?') {
        const command = message.content.split(" ")[0].substr(1); // gets the command name
        if (commands.has(command)) { // checks if the map contains the command
            commands.get(command)(message) // runs the command
        }
    }
});

// ...
To get the bot to say the random number, just go into any Discord channel that the bot has access to, and type “?random”.
There. Now to add more commands, you just add them to commands.
2.3. Recap
That’s essentially what you need to do to get started. To recap, the process was:
Make a Discord application
- Turn it into a bot
- Add it to a server
- Download discord.js
- Write your bot
- Run it
2.4. Bot Ideas
Now that you know how to make a Discord bot, you’ll probably want to make your own. If you need a list of Discord Bot ideas, I’ve come up with a few already for my blog. Here are a few more though:
- A bot that can compile its own programming language
- Calculator Bot. If you’re learning a new programming language, you could start by making this bot in that language. Try different ways of inputting the values.
- Betting Bot, where users bet on which option will receive the least bets
- Betting bot, where users bet on elections. Just mentioning it makes me really want to do this
- A bot that tracks a GitHub repository. Yes, you can already do this with webhooks, but regular bots are more fun
- A bot that tracks a YouTube channel
- A game bot. Any game will work. Sudoku, Tic-Tac-Toe, Trivia, Chess, Pokémon, Tetris (ok maybe not that last one). For an extra challenge, make an AI to play it.
- Assign points to all the members of your server. I wanted to do this for the Effective Altruism server, but I honestly couldn’t figure out how to reward them. Maybe integrate it with the betting bot…?
Some of these are going to be more complicated, so the info that’s here isn’t going to be enough. You can get more information by using the guide or by reading the documentation.