
Table of Contents
A website is based on the HTTP protocol. HTTP is a stateless protocol which means at the end of every request and response cycle, the client and the server forget about each other.
This is where the session comes in. A session will contain some unique data about that client to allow the server to keep track of the user’s state. In session-based authentication, the user’s state is stored in the server’s memory or a database.
1. How sessions works
When the client makes a login request to the server, the server will create a session and store it on the server-side. When the server responds to the client, it sends a cookie. This cookie will contain the session’s unique id stored on the server, which will now be stored on the client. This cookie will be sent on every request to the server.
We use this session ID and look up the session saved in the database or the session store to maintain a one-to-one match between a session and a cookie. This will make HTTP protocol connections stateful.
As you might have noticed, we’ve introduced a new concept called a cookie. We need to answer the question of what is the difference between a session and a cookie.
A cookie is a key-value pair that is stored in the browser. The browser attaches cookies to every HTTP request that is sent to the server.
In a cookie, you can’t store a lot of data. A cookie cannot store any sort of user credentials or secret information. If we did that, a hacker could easily get hold of that information and steal personal data for malicious activities.
On the other hand, the session data is stored on the server-side, i.e., a database or a session store. Hence, it can accommodate larger amounts of data. To access data from the server-side, a session is authenticated with a secret key or a session id that we get from the cookie on every request.
To learn more about their differences, check this Session vs Cookie tutorial.
3. Prerequisites
- Have Node.js runtime installed on your computer.
- Basic knowledge on how to use Node.js.
- Basic understanding of how to create an HTTP server using the Expres.js library.
4. Setting up the required environments and libraries
This is a Node.js project. It uses NPM to manage its dependencies. You need to create a new project directory and initialize the node app using:
npm init –y
This will generate a package.json file that will manage the dependencies for this project’s tutorial.
The following libraries will help us setup a Node.js session.
- Express – a web framework for Node.js used to create HTTP web servers. Express provides an easy-to-use API to interact with the webserver.
- Express-session – an HTTP server-side framework used to create and manage a session middleware. This tutorial is all about sessions. Thus Express-session library will be the main focus.
- Cookie-parser – used to parse cookie header to store data on the browser whenever a session is established on the server-side.
Install the above libraries using the command:
npm install express express-session cookie-parser
5. Express-session options and how to use them
To set up the session, you need to set a couple of Express-session options, as shown below.
const oneDay = 1000 * 60 * 60 * 24;
app.use(sessions({
    secret: "thisismysecrctekeyfhrgfgrfrty84fwir767",
    saveUninitialized:true,
    cookie: { maxAge: oneDay },
    resave: false
}));
secret– a random unique string key used to authenticate a session. It is stored in an environment variable and can’t be exposed to the public. The key is usually long and randomly generated in a production environment.resave– takes a Boolean value. It enables the session to be stored back to the session store, even if the session was never modified during the request. This can result in a race situation in case a client makes two parallel requests to the server. Thus modification made on the session of the first request may be overwritten when the second request ends. The default value istrue. However, this may change at some point.falseis a better alternative.saveUninitialized– this allows anyuninitializedsession to be sent to the store. When a session is created but not modified, it is referred to asuninitialized.cookie: { maxAge: oneDay }– this sets the cookie expiry time. The browser will delete the cookie after the set duration elapses. The cookie will not be attached to any of the requests in the future. In this case, we’ve set themaxAgeto a single day as computed by the following arithmetic.
// creating 24 hours from milliseconds
const oneDay = 1000 * 60 * 60 * 24;
Check the documentation for all possible options and learn more about these options.
6. Setting up the session middleware
To initialize the session, we will set the session middleware inside the routes of the individual HTTP requests.
When a client sends a request, the server will set a session ID and set the cookie equal to that session ID. The cookie is then stored in the set cookie HTTP header in the browser. Every time the browser (client) refreshes, the stored cookie will be a part of that request.
We’ll create a simple login form to demonstrate that. Create a views folder and add the following:
- Here is the login form (
index.html).
<html>
<head>
    <link rel="stylesheet" href="views/app.css">
</head>
<body>
    <form action="/user" method="post">
        <h2>Login</h2>
        <div class="input-field">
            <input type="text" name="username" id="username" placeholder="Enter Username">
        </div>
        <div class="input-field">
            <input type="password" name="password" id="password" placeholder="Enter Password">
        </div>
        <input type="submit" value="LogIn">
    </form>
</body>
</html>
- And some CSS to style the form inside the views folder (
app.css).
body {
    display: flex;
    justify-content: center;
}

form {
    display: flex;
    flex-direction: column;
}

.input-field {
    position: relative;
    margin-top: 2rem;
}

.input-field input {
    padding: 0.8rem;
}

form .input-field:first-child {
    margin-bottom: 1.5rem;
}

form input[type="submit"] {
    background: linear-gradient(to left, #4776E6, #8e54e9);
    color: white;
    border-radius: 4px;
    margin-top: 2rem;
    padding: 0.4rem;
}
Let’s setup the server. Create an app.js file and set up the session server, as shown below.
6.1. Import all the Node.js libraries that we explained earlier
const express = require('express');
const cookieParser = require("cookie-parser");
const sessions = require('express-session');
Initialize the express app
const app = express();
const PORT = 4000;
Add the Express-session options
// creating 24 hours from milliseconds
const oneDay = 1000 * 60 * 60 * 24;

//session middleware
app.use(sessions({
    secret: "thisismysecrctekeyfhrgfgrfrty84fwir767",
    saveUninitialized:true,
    cookie: { maxAge: oneDay },
    resave: false
}));
6.2. Parse the HTML form
This will help us parser an HTTP POST method request from an HTML document. We also need to serve the CSS styling to format the outlook of the HTML form. Add the following express methods to perform these operations.
// parsing the incoming data
app.use(express.json());
app.use(express.urlencoded({ extended: true }));

//serving public file
app.use(express.static(__dirname));
6.3. Set the Cookie-parser
Define Cookie-parser usage so that the server can access the necessary option to save, read and access a cookie.
// cookie parser middleware
app.use(cookieParser());
6.4. Set the authentication credentials
In this example, we are using a simple login application. To authenticate the user, I’ve specified the username and password as user1 and mypassword, respectively in this file as variables.
In a production environment, these credentials are usually saved in a database. For the sake of simplicity in this tutorial, we are storing them in these variables.
//username and password
const myusername = 'user1'
const mypassword = 'mypassword'

// a variable to save a session
var session;
6.5. Add the endpoints
We have to make three routes here:
http://localhost:4000/
This will render and serve the HTML form to the client to fill in the login credentials. If the user is logged in, we’ll display a logout link.
app.get('/',(req,res) => {
    session=req.session;
    if(session.userid){
        res.send("Welcome User <a href=\'/logout'>click to logout</a>");
    }else
    res.sendFile('views/index.html',{root:__dirname})
});
http://localhost:4000/user
To create a session, the user will submit the credentials. The server will verify these credentials received in the request’s body with the username and the password for the existing user.
If the credentials are valid:
- The user will be granted the necessary access.
- The server will create a temporary user session with a random string known as a session ID to identify that session.
- The server will send a cookie to the client’s browser. The session ID is going to be placed inside this cookie.
Once the client browser saves this cookie, it will send that cookie along with each subsequent request to the server. The server will validate the cookie against the session ID. If the validation is successful, the user is granted access to the requested resources on the server.
If the credentials are invalid, the server will not grant this user access to the resources. No session will be initialized, and no cookie will be saved.
app.post('/user',(req,res) => {
    if(req.body.username == myusername && req.body.password == mypassword){
        session=req.session;
        session.userid=req.body.username;
        console.log(req.session)
        res.send(`Hey there, welcome <a href=\'/logout'>click to logout</a>`);
    }
    else{
        res.send('Invalid username or password');
    }
})
http://localhost:4000/logout
This will define the logout endpoint. When the user decides to log out, the server will destroy (req.session.destroy();) the session and clear out the cookie on the client-side. Cookies are cleared in the browser when the maxAge expires.
app.get('/logout',(req,res) => {
    req.session.destroy();
    res.redirect('/');
});
Listen to the port of the server
app.listen(PORT, () => console.log(`Server Running at port ${PORT}`));
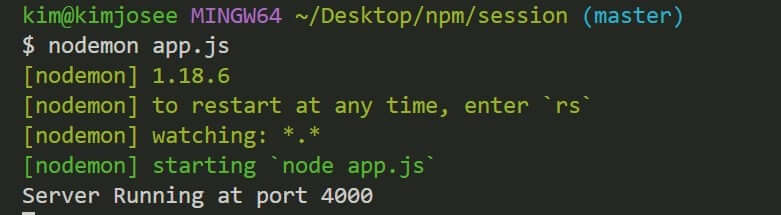
Your session application is now set. Run the application using:
node app.js
This should start the server on the set port 4000.
Open the server on the browser on route http://localhost:4000/, and you will be served with this login form.

To be authenticated by the server, provide the credentials specified in the server: username as user1 and password as mypassword.
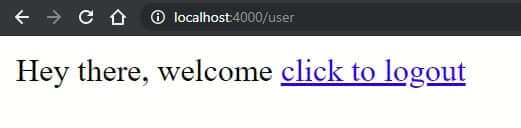
Once you log in successfully, a session will be generated, and a cookie will be saved in the browser.
In this case, since we don’t have a database to save the session, we will console.log(req.session) and glance at how it looks. If you go back to the command line, the session object will be printed to the console.

These are the same values you would have saved in a production environment on the server-side into a database such as MongoDB, PostgreSQL, etc.
Let’s see the cookie value saved in the browser.
Open the browser inspector tool > application > Cookies http://localhost:4000/.

Every time you refresh this page, the request will be sent along with the value of this cookie within this localhost domain. If it matches with the session stored value, the server will authenticate this user.
It’s not a security concern if a third party can read the cookies.
The client won’t be able to modify the contents of the cookie, and even if they try to, it’s going to break the signature of that cookie. This way, the server will be able to detect the modification.
A cookie doesn’t carry any meaningful data inside of them. It just contains the session ID token. The cookie is encrypted. It still has to maintain a one-to-one relationship with the user session. The cookie will be valid until set maxAge expires or the user decides to log out.
When the user logs out, the session will be destroyed. There is no session to compare with the saved cookie. The user will have to log in again to create a session ID for the new login session.
7. Conclusion
That’s all for this tutorial. This was a basic example, and I hope it helped you understand the concept of session management in Node.js using Express.js and Express-session.
Happy coding!!