
Table of Contents
- 1. Goal
- 2. Prerequisites
- 3. Initialize the application
- 4. Installing the required dependencies
- 5. Import the dependencies
- 6. Application setup
- 7. The user Interface
- 8. Working on the Application Routes
- 9. Translating the fetched text
- 10. Send back the translated text to the webpage
- 11. Displaying the translated text on the user interface
- 12. Running the server
- 13. Conclusion and Further Reading
Google Translate is a multilingual language translation service developed by Google to translate text, words, phrases and, documents from one language to another. Google translates supports over 109 languages across the globe.
Google has further developed a language translation API that comes with pre-trained Machine Learning models to use in both mobile and web applications. The API is fast enough to translate given text from one language to another in real-time.
1. Goal
In this article, we will go over a step-by-step development of a text translation application using Google Translate API in Node.js. In the end, the reader should be able to fully integrate Google Translate API into a Node.js application.
2. Prerequisites
The reader needs to have:
- Node.js installed on your computer.
- A basic understanding of Node.js, javascript, and express.
- A code editor. I will use Visual studio code.
- A browser to test the application routes.
3. Initialize the application
We will initialize the application by running the following command:
npm init -y
The npm init -y command creates a package.json file for our application. The package.json will hold the project’s metadata that includes development dependencies, executable scripts, application name, and versions.
4. Installing the required dependencies
Next, we will install the required dependencies.
Apart from the express backend framework we need to install the google-translate-api API dependency for translating text supplied. We also need body-parser to parser HTML and ejs as a templating engine. Last, we need nodemon to constantly watch our application as we develop.
Run the following command in your terminal to install the dependencies required by the application:
npm install –save express body-parser ejs @vitalets/google-translate-api nodemon,
5. Import the dependencies
In the root folder of the application, create a new file named index.js and add the following:
// bring in express
const express = require('express');

// brinrg in body parser
const bodyParser = require('body-parser');

// ejs template engine
const ejs = require('ejs');

// translate api
const translate = require('@vitalets/google-translate-api');

//init our application
const app = express()
6. Application setup
Here we are going to set up the template engine (I used ejs), public folder for css and javascript files and the body-parser middleware. We use body-parser to parse HTTP request body.
//setup template engine
app.set('view-engine', 'html');
app.engine('html', ejs.renderFile);

//public folder setup
app.use(express.static(__dirname + '/public'));

//body parser middleware
app.use(express.urlencoded({extended:true}));
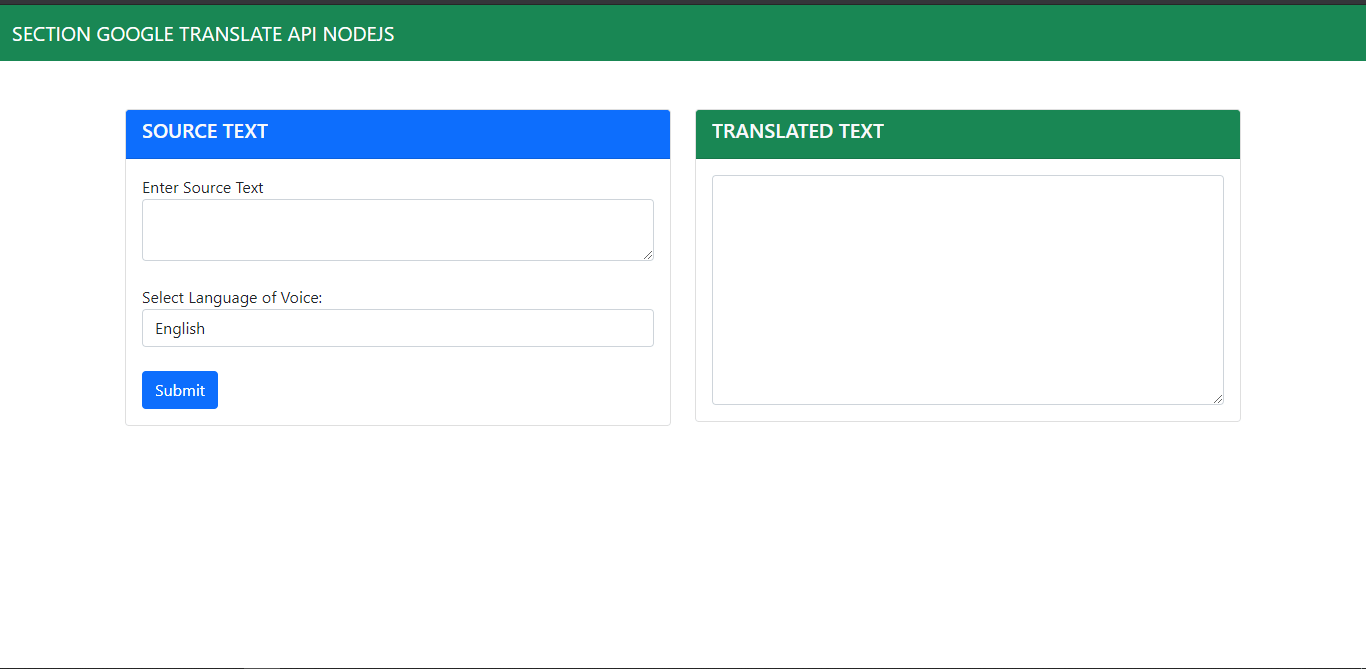
7. The user Interface
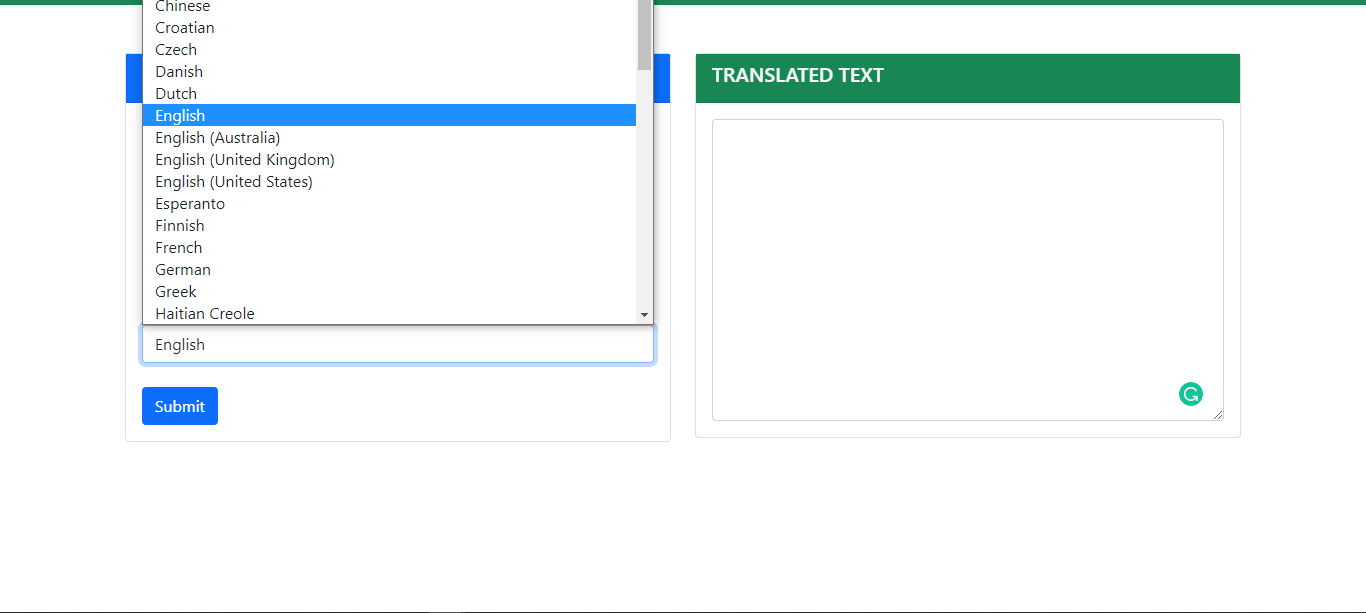
We need to have a form with two fields. The first field is where the user enters the text to translate, and another field is a select drop-down to choose which language they want the text entered to be translated into. We also need a submit button that will submit the request to the route specified by the form.
<!-- enter text to translate area -->
<div class="col-sm-6">
    <div class="card">
        <div class="card-header bg-primary">
            <h5 class="card-title text-light">SOURCE TEXT</h5>
        </div>
        <div class="card-body">
            <form action="/translate" method="POST">
                <div class="form-group">
                    <label for="exampleFormControlTextarea1">Enter Source Text</label>
                    <textarea class="form-control" id="text" name="text" rows="2"></textarea>
                </div>
                <br>
                <div class="form-group">
                    <label for="format">Select Language of Voice:</label>
                    <select class="form-control" name="language" id="">
                    <option value="af">Afrikaans</option>
                    <option value="sq">Albanian</option>
                    <option value="ar">Arabic</option>
                    <option value="hy">Armenian</option>
                    <option value="ca">Catalan</option>
                    <option value="zh">Chinese</option>
                    <option value="hr">Croatian</option>
                    <option value="cs">Czech</option>
                    <option value="da">Danish</option>
                    <option value="nl">Dutch</option>
                    <option value="en" selected>English</option>
                    <option value="en-au">English (Australia)</option>
                    <option value="en-uk">English (United Kingdom)</option>
                    <option value="en-us">English (United States)</option>
                    <option value="eo">Esperanto</option>
                    <option value="fi">Finnish</option>
                    <option value="fr">French</option>
                    <option value="de">German</option>
                    <option value="el">Greek</option>
                    <option value="ht">Haitian Creole</option>
                    <option value="hi">Hindi</option>
                    <option value="hu">Hungarian</option>
                    <option value="is">Icelandic</option>
                    <option value="id">Indonesian</option>
                    <option value="it">Italian</option>
                    <option value="ja">Japanese</option>
                    <option value="ko">Korean</option>
                    <option value="la">Latin</option>
                    <option value="lv">Latvian</option>
                    <option value="mk">Macedonian</option>
                    <option value="no">Norwegian</option>
                    <option value="pl">Polish</option>
                    <option value="pt">Portuguese</option>
                    <option value="pt-br">Portuguese (Brazil)</option>
                    <option value="ro">Romanian</option>
                    <option value="ru">Russian</option>
                    <option value="sr">Serbian</option>
                    <option value="sk">Slovak</option>
                    <option value="es">Spanish</option>
                    <option value="es-es">Spanish (Spain)</option>
                    <option value="es-us">Spanish (United States)</option>
                    <option value="sw">Swahili</option>
                    <option value="sv">Swedish</option>
                    <option value="ta">Tamil</option>
                    <option value="th">Thai</option>
                    <option value="tr">Turkish</option>
                    <option value="vi">Vietnamese</option>
                    <option value="cy">Welsh</option>
                    </select>
                </div>
                <br>
                <button type="submit" class="btn btn-primary">Submit</button>
            </form>
        </div>
    </div>
</div>
Second, on the user interface, we need a blank space where the translated text will appear after the request from the form is processed successfully. Add the code snippets below under the form to build the space for the translated text:
<!-- Translated text area -->
<div class="col-sm-6">
    <div class="card">
        <div class="card-header bg-success">
            <h5 class="card-title text-light">TRANSLATED TEXT</h5>
        </div>
        <div class="card-body">

            <textarea class="form-control text-success" name="translated" id="translated" cols="30" rows="9">
                <!-- Here is where we will display the translated text -->
            </textarea>
        </div>
    </div>
</div>
8. Working on the Application Routes
We will need two routes. The first route will render the index page that holds the form used to enter the text to translate, while the second route will handle the form data to be processed by the translation API. The first route is a get request, while the second route is a post request.
8.1. Get webpage Route
This route gets the index.ejs where the form is. From the page, a user can enter text to translate and view translation results.
Add the snippets below in the index.js file to handle get route:
//index route
app.get('/', (req, res) =>{
    res.render('index.ejs');
});
8.2. Post form data Route
This route captures form data from the frontend and brings it to the backend for processing. With the help of the body-parser middleware, this route extracts the values posted to it by the form.
Add the snippets below to handle posted data from the form:
// post the form data to post route
app.post('/translate', (req, res) => {
    // get form data from the request body
    // text entered by the user
    const text = req.body.text

    // destination language
    const language = req.body.language
})
9. Translating the fetched text
After the form data is posted, the body parser fetches the data in the post route.
Next, we need to call the translate method to translate the given text into the given language.
Add the snippets below in the post route to enable the translation:
// call translate method with the text and language as parameters
translate(text, {to: language})
10. Send back the translated text to the webpage
After translating the provided text, we need to send the translated text back to the webpage so that the user can see it.
The line of code below renders the webpage and sends the translation response with it:
// render the page with translation response as data
res.render('index.ejs', {translatedText:response.text})
11. Displaying the translated text on the user interface
We need to capture the result of translation sent by the render method from the server. This is easier when we use ejs templating engine. Since we capture the result in a text area, we will add the following code in the inner HTML of the textarea where it will display the response:
<div class="col-sm-6">
    <div class="card">
        <div class="card-header bg-success">
            <h5 class="card-title text-light">TRANSLATED TEXT</h5>
        </div>
        <div class="card-body">
            <!-- Notice how we bring in the response data sent as we render the same page by the request -->
            <textarea class="form-control text-success" name="translated" id="translated" cols="30" rows="9"><%=translatedText%></textarea>
        </div>
    </div>
</div>
12. Running the server
Let’s test run our application, add the following to the index.js file:
// Port variable
const PORT = process.env.PORT || 3000;

// listen for connections
app.listen(PORT, () =>{
    console.log(`App running on port ${PORT}`)
})
The code above specify the PORT NUMBER onto which the application runs and listens for incoming requests. Run the command nodemon start in your terminal to start the server.
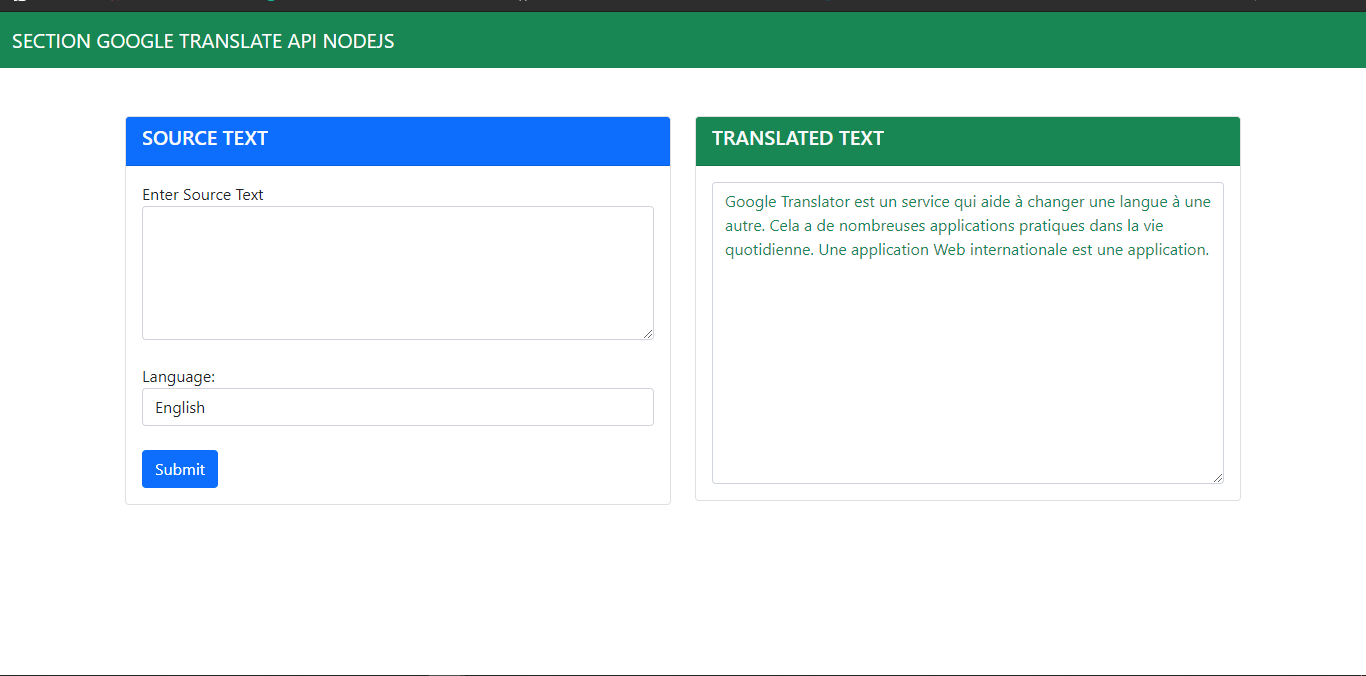
The application should be live on your browser via localhost on port 3000 and should be able to translate any given accurate text like:
13. Conclusion and Further Reading
In this article, we learned how to use Google Translate API to build a text translation application in Node.js. You can find the complete code here.
To find more about the topic, you can check the following resources: