
Table of Contents
Whenever we submit a form on the client-side of any website, all the form data goes to the server-side. Usually, form-data gets encoded before we submit it to the server. We can do this by specifying the enctype attribute in the <form> tag in HTML.
If we don’t specify it, form-data gets encoded with the default type.
1. Introduction
This is usually the case when we are dealing with text-only data like name, email, password, etc. But if we are uploading some kind of files, we need to specify the enctype attribute with the value “multipart/form-data”. We need this value when we are using forms that have a file upload control.
In this article, we will learn how we can upload files using node.js, express, and formidable. Formidable is a Node.js module for parsing form data, especially file uploads.
2. Prerequisites
- Good understanding of Node.js and NPM.
- MongoDB must be installed in your device and you need to have a basic understanding of the database.
- Good understanding of the command line or integrated terminal in code editors.
3. Goals of this tutorial
- How to design an API endpoint for posting multipart form data.
- How to use Formidable to handle the file uploads.
- How to manage and store those files on the server side.
- How to view those files on the Frontend.
However, since half of these topics are already covered in my previous article, therefore I will refer to that article wherever it will be needed.
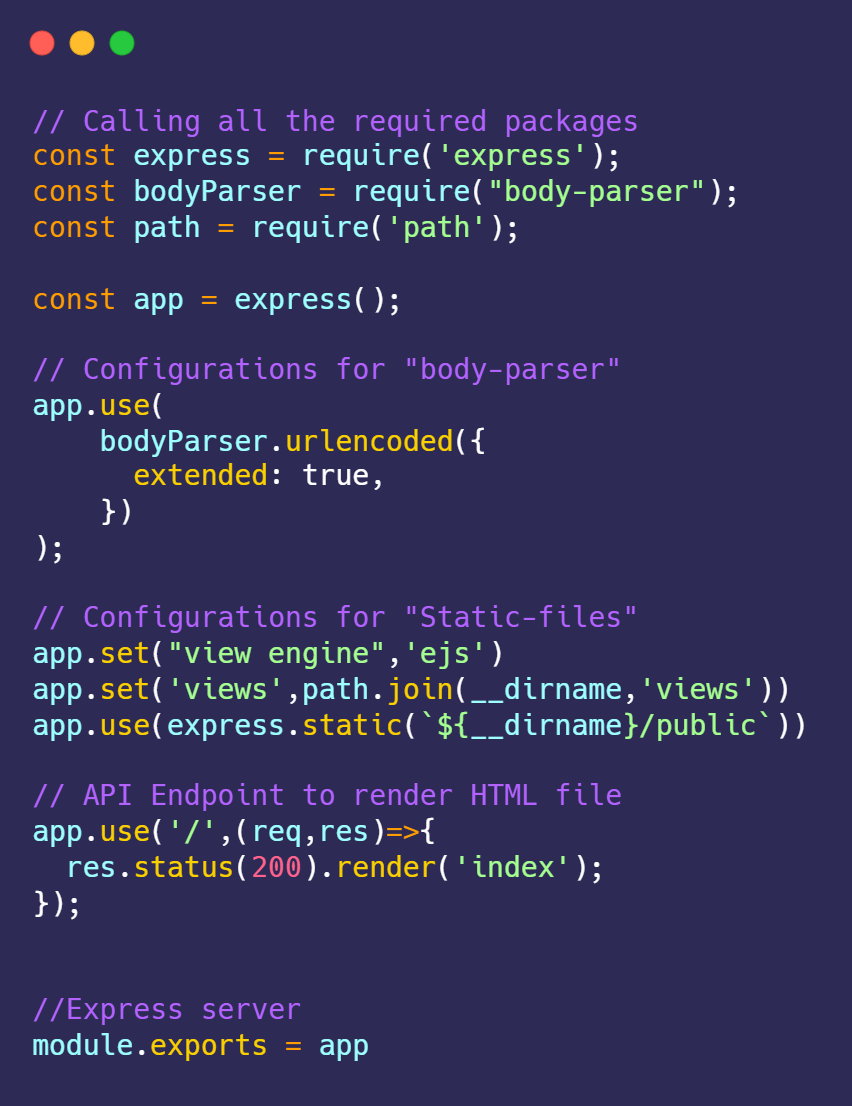
4. Project setup
For project setup, you can refer to my previous article. You have to follow every step until I give the introduction to Multer.
The steps basically involved the following:
- Folder Structure
- Setting up MongoDB with Mongoose and
- Rendering the HTML file.
Also, for reference. Your app.js file and folder structure should look like this.
Folder Structure:
├───model (folder)
│ └───fileSchema.js (file)
├───node_modules (folder)
├───public (folder)
│ └───css (folder), files(folder)
|──────└───style.css (file)
|───views (folder)
│────└───index.ejs (file)
├───app.js (file)
├───package-lock.json (file)
├───package.json (file)
├───server.js (file)
5. Formidable
As mentioned previously, formidable is a Node.js module for parsing form data, especially file uploads.
Let’s start by installing formidable.
Write this command in your terminal:
npm install formidable
After installing the package, we will import it at the top of the app.js file:
const formidable = require("formidable");
Then we will create an API endpoint to upload the file.
Note: Make sure that the endpoint used to render the page is at the end of all the API endpoints.
// API Endpoint for uploading file
app.post("/api/uploadFile", (req, res) => {
  // Stuff to be added soon
});
6. Let’s start using formidable
The package works by creating an instance of the form data that is coming from the client-side. It will be an object instance with some default key-value pairs that we can change following our requirements.
Let’s have a look at it.
Add this piece of code in the above API callback function:
const form = formidable.IncomingForm();
console.log(form);
We can see the form data by sending the request with files on this API. But, before that, we need to make small changes in our HTML code i.e. in the index.ejs file.
Change the value of the action attribute in the form to /api/uploadFile.
<form action="/api/uploadFile" enctype="multipart/form-data" method="POST">
  <input type="file" class="admin__input" id="myFile" name="myFile" />
  <input class="admin__submit" type="submit" />
</form>
If you upload something from your rendered web page after restarting your server, you should see something like this on your terminal.
IncomingForm {
  _events: [Object: null prototype] {},
  _eventsCount: 0,
  _maxListeners: undefined,
  error: null,
  ended: false,
  maxFields: 1000,
  maxFieldsSize: 20971520,
  maxFileSize: 209715200,
  keepExtensions: false,
  uploadDir: 'C:\\Users\\SARTHA~1\\AppData\\Local\\Temp',
  encoding: 'utf-8',
  headers: null,
  type: null,
  hash: false,
  multiples: false,
  bytesReceived: null,
  bytesExpected: null,
  _parser: null,
  _flushing: 0,
  _fieldsSize: 0,
  _fileSize: 0,
  openedFiles: [],
  [Symbol(kCapture)]: false
}
As you can see, we have many properties in this object including encoding, maxFileSize and so on. With these properties, we can configure formidable in our specification.
We have to create a variable pointing to the directory/folder in which we want to store the files. To do this, add the following code after creating the form instance.
const uploadFolder = path.join(__dirname, "public", "files");
Now, our uploadFolder variable points to the folder under the public directory which is present at the root level of our project.
Now let’s change the configuration by altering few properties in the form instance:
// Basic Configuration
form.multiples = true;
form.maxFileSize = 50 * 1024 * 1024; // 5MB
form.uploadDir = uploadFolder;
console.log(form);
multiplesproperty is set to false by default as seen in the form object we logged in the console. We can set it to true so that the user can add more than one file at once. Also, we have to add the multiple attributes in the input tag in the HTML to make sure that the user is able to upload multiple files.- We can restrict the size of the file that the user to uploads. Default is 200MB but we are limiting it to 5MB.
- And last but not least, we have to change the uploads directory to the one we created.
You can also alter many other properties, but this is enough for most of the use cases.
If we log form instance in our console one more time, we can see the difference in the above-mentioned properties.
IncomingForm {
  _events: [Object: null prototype] {},
  _eventsCount: 0,
  _maxListeners: undefined,
  error: null,
  ended: false,
  maxFields: 1000,
  maxFieldsSize: 20971520,
  maxFileSize: 52428800,
  keepExtensions: false,
  uploadDir: 'D:\\Sarthak\\upload-multipart-form-data-using-formidable\\public\\files',
  encoding: 'utf-8',
  headers: null,
  type: null,
  hash: false,
  multiples: true,
  bytesReceived: null,
  bytesExpected: null,
  _parser: null,
  _flushing: 0,
  _fieldsSize: 0,
  _fileSize: 0,
  openedFiles: [],
  [Symbol(kCapture)]: false
}
Since we are done with our basic configuration, we can begin parsing our files. To do this, we use a built-in parsing function which we can call on our form instance.
Add this piece of code below configuration.
// Parsing
form.parse(req, async (err, fields, files) => {
  console.log(fields);
  console.log(files);
  if (err) {
    console.log("Error parsing the files");
    return res.status(400).json({
      status: "Fail",
      message: "There was an error parsing the files",
      error: err,
    });
  }
});
.parse(request, callback)
The “parse” function parses an incoming Node.js request containing form data. If a callback is provided, all fields and files are collected and passed to the callback.
We aim to parse and store these files according to our own needs, thus we need to take a look at them before we work on them. Hence, we have two log statements to take a look at the data we get in the callback function.
Also, we will take care of any errors that may arise at the very first step. This is because we do not want to parse any files with some potential errors. We do this by checking if there are any errors. If we do encounter any, we can send the response with a status code of 400, depicting a bad request.
If you see this code by submitting a file, you will see the log of parsed form data in the console. Note that a new file will already have been created in your files folder under public. But, that file will not be readable since there is no extension for the file yet.
Your logged data should look something like this.
{}
{
  myFile: File {
    _events: [Object: null prototype] {},
    _eventsCount: 0,
    _maxListeners: undefined,
    size: 735154,
    path: 'D:\\Sarthak\\upload-multipart-form-data-using-multer\\public\\files\\upload_d235df36a536ff3bc3cbfa8ac0f86e2f',
    name: 'College ID.pdf',
    type: 'application/pdf',
    hash: null,
    lastModifiedDate: 2021-05-30T12:40:05.872Z,
    _writeStream: WriteStream {
      _writableState: [WritableState],
      _events: [Object: null prototype] {},
      _eventsCount: 0,
      _maxListeners: undefined,
      path: 'D:\\Sarthak\\upload-multipart-form-data-using-multer\\public\\files\\upload_d235df36a536ff3bc3cbfa8ac0f86e2f',
      fd: 4,
      flags: 'w',
      mode: 438,
      start: undefined,
      autoClose: true,
      pos: undefined,
      bytesWritten: 735154,
      closed: false,
      [Symbol(kFs)]: [Object],
      [Symbol(kCapture)]: false,
      [Symbol(kIsPerformingIO)]: false
    },
    [Symbol(kCapture)]: false
  }
}
The fields object is empty and we do not want it. In the files object, we can see the name of the input tag (myFile) as we referred to in our HTML. We even have access to the name of the file with the original extension. All this information will help us save and manage our files more precisely.
Before moving ahead, we have to look at a special case. Since the user can upload multiple files at once, the incoming parsed data will be an array of objects. So, we have to check each time if we are getting multiple files or single file before working on it further.
Data with multiple files looks something similar to this.
{
  myFile: [
    File {....},
    File {....}
  ]
}
Next steps:
- We will handle single files and multiple files separately.
- In both scenarios, we will check if the file is valid by creating a separate function.
- If the file isn’t valid, then we will throw an error. If it is, we will rename it and store the file name in our database.
Now, add this piece of code and then we will walk through each step.
// Check if multiple files or a single file
if (!files.myFile.length) {
  //Single file

  const file = files.myFile;

  // checks if the file is valid
  const isValid = isFileValid(file);

  // creates a valid name by removing spaces
  const fileName = encodeURIComponent(file.name.replace(/\s/g, "-"));

  if (!isValid) {
    // throes error if file isn't valid
    return res.status(400).json({
      status: "Fail",
      message: "The file type is not a valid type",
    });
  }
  try {
    // renames the file in the directory
    fs.renameSync(file.path, join(uploadFolder, fileName));
  } catch (error) {
    console.log(error);
  }

  try {
    // stores the fileName in the database
    const newFile = await File.create({
      name: `files/${fileName}`,
    });
    return res.status(200).json({
      status: "success",
      message: "File created successfully!!",
    });
  } catch (error) {
    res.json({
      error,
    });
  }
} else {
  // Multiple files
}
- In the very first step, we are checking if the user has uploaded multiple files or not. We are doing this by checking the length of the myFile property in the files parsed data. If the length is zero, then it means only a single file has been uploaded.
- The next step is to take a look at whether the uploaded file is valid or not. We are doing this by creating a special function that goes like this.
const isFileValid = (file) => {
  const type = file.type.split("/").pop();
  const validTypes = ["jpg", "jpeg", "png", "pdf"];
  if (validTypes.indexOf(type) === -1) {
    return false;
  }
  return true;
};
In this function, we are extracting the original extension of the file uploaded. If it exists in our described valid extensions array, then we can return true, otherwise we return false.
- We are creating a valid file name by removing all the “spaces” with “dashes”. This is done through the help of Regular expressions and
encodeURIComponent()function. - If the file is not valid, we are throwing an error. If it is, we are renaming the file in our files directory with the help of the
fsmodule which is a core module in Node.js
Don’t forget to import the fs module at the top of your file.
After that, we can store the name of the file in our MongoDB cloud database that we hosted earlier in this tutorial.
Try completing the else block for multiple files on your own! Here is the whole upload function for reference purposes.

With this, if you will try to upload a file or image with a valid extension. It will be saved in your files directory with the name definition that we defined. Also, the file name gets stored in your cloud database so that you can access it on our front end.
View these files on frontend
To learn how we can view these files, you can again refer to my previous article.
7. Formidable vs Multer
My preceding article was about Multer and this article is about Formidable. Both are npm packages yet one serves as a module and one as middleware.
I found formidable simpler to work with due to the fact configuring multer is lot more complicated. But, there are some use instances where you will have to work with Multer.
For instance, if you choose to resize images before saving them on your server, then multer provides something known as a Buffer storage that can help you.
So, it largely depends on your use case and what you find easier to use.
To learn about this comparison in extra depth, you can refer to this article.
Happy coding!